Adjusting dials, Setting the ivlachine, Starting to sew – SINGER 719 User Manual
Page 16: Setting stitch length
Attention! The text in this document has been recognized automatically. To view the original document, you can use the "Original mode".
to
í
I
If
n
[
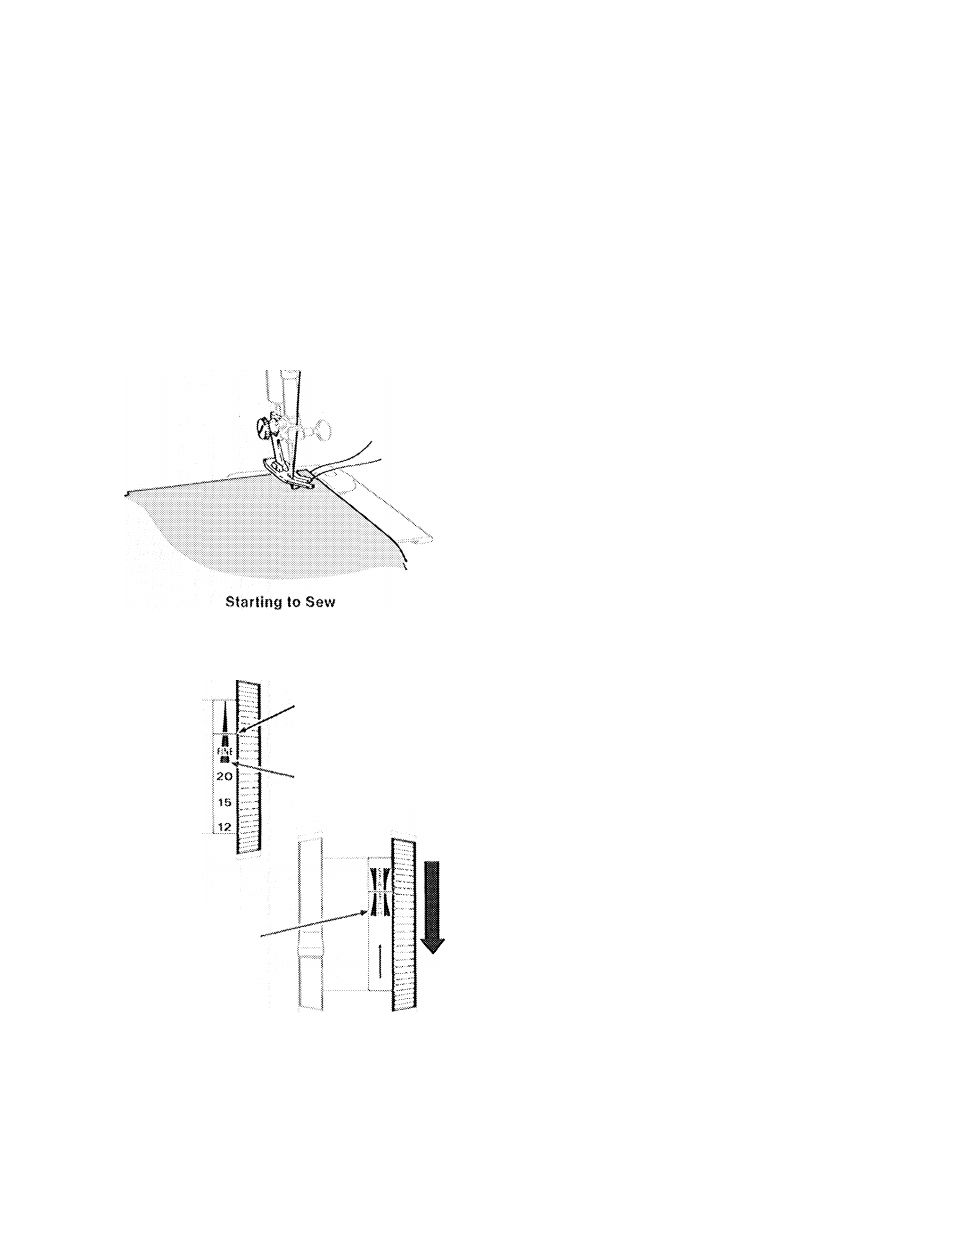
Regular
Straight
Stitch Settings
Stretch
Stitch
Setting
Stitch Cotiifol Dial
Red Line
Fine
Stitch
Lengths
{above 20)
Stretch Symbol
To
Set
for
Stretch
Stitching
Turn
Dial
Downward
until
Stretch Symbol Appears.
adjusting dials
Setting the iVlachine
Set stitch control for desired stitch length.
•
For
regular
straight
stitching,
turn
dial
to
a
number.
•
For
straight
stretch
stitching,
turn
dial
to
STRETCH setting.
Starting to Sew
•
Place
needle
and
bobbin
threads
under
presser foot and draw to back of machine.
•
Position
the
needle
in
the
fabric
where
de
sired for stitching start.
•
Lower
the
presser
foot
and
start
the
ma
chine.
To
sew
perfectly
on
a
wide
variety
of
fabrics,
adjust
stitch
length,
presser
foot
pressure
and
thread
tension
as
instructed
below
and
on
the
following pages.
For
information
on
stretch
stitching,
turn
to
page 21.
Setting Stitch Length
The
stitch
control
dial
regulates
the
length
of
stitches.
The
numbers
6
to
20
represent
the
number
of
stitches
per
inch:
the
higher
the
number,
the
shorter
the
stitch.
Generally,
shorter
stitches
are
best
for
lightweight
fabric;
longer
ones
for
heavy
fabric.
Curved
seams,
bias-cut
seams,
and
scallops
require
short
straight
stitches
(15
to
20)
for
elasticity
and
smooth contours.
The
triangular
symbol
on
the
dial
represents
stitch lengths shorter than 20 per inch.
The
STRETCH
setting
is
used
for
straight
stretch
stitching
only.
For
information
on
stretch stitching, see page 21,
•
To
set
stitch
control
for
regular
straight
stitching,
turn
dial
until
desired
number
is
under the red line.
•
To
set
stitch
control
for
stretch
stitch
ing,
turn
dial
downward
until
the
STRETCH
symbol appears under the red line.
14