Blindstitch zipper insertion – SINGER 413 User Manual
Page 46
Attention! The text in this document has been recognized automatically. To view the original document, you can use the "Original mode".
ZIPPERS (Continued)
BLINDSTITCH ZIPPER
INSERTION
• Flexi-Stitch Pattern Dial:
O
(off)
• Pattern Selector: A...A (Blindstitch)
• Needle Position: L
• Stitch Width : 2
• Stitch Length ; 12
• Zipper Foot
• General Purpose Throat Plate
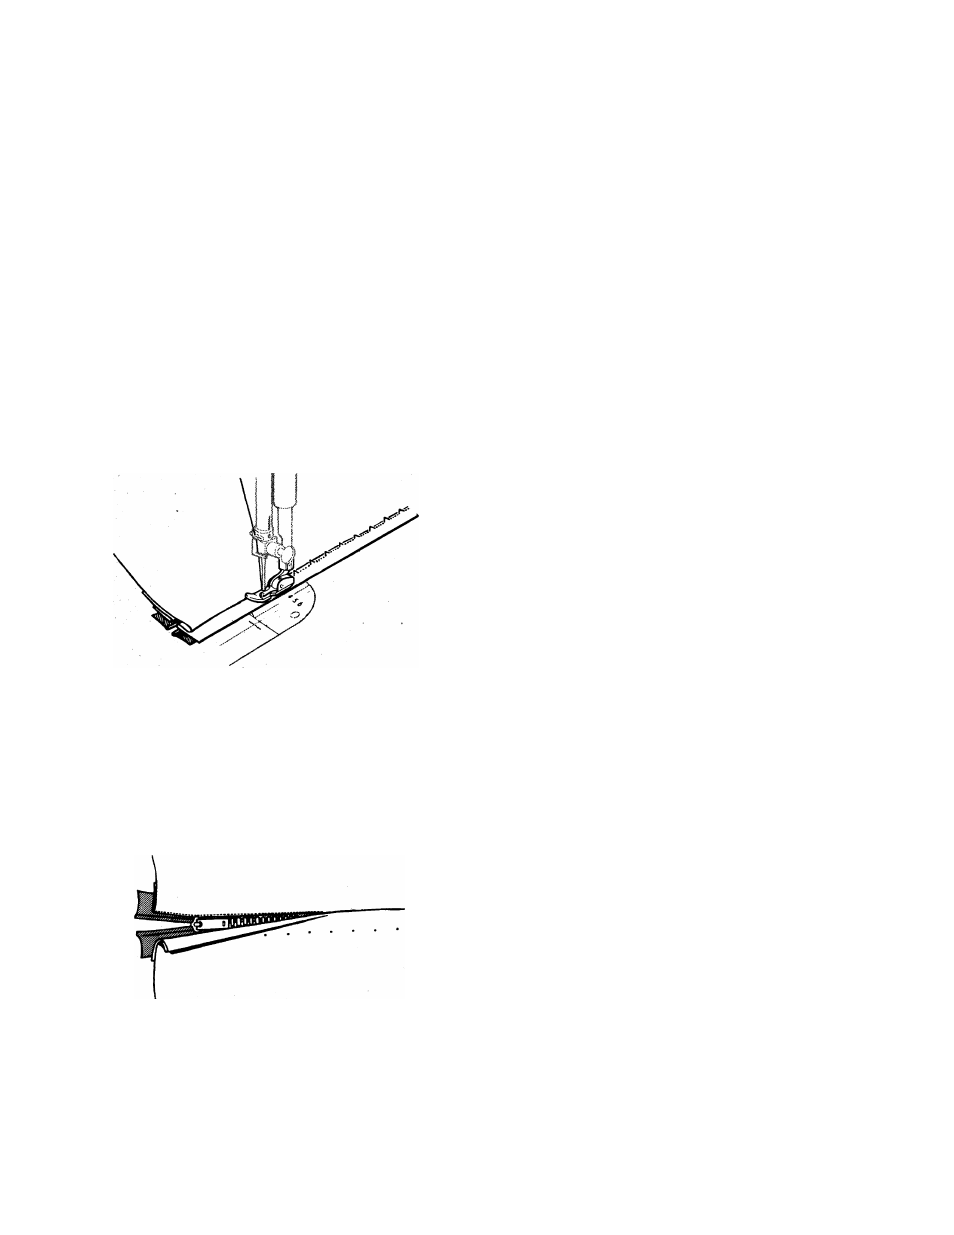
Final Step of Blindstitch
Zippei* Insertion
Completed Blindstitch
Zipper Insertion
Blindstitching, used instead of straight
stitching for the final step in zipper
insertion, gives a fine finish that is almost
invisible. Indispensable for knits, napped
fabrics, and sheers.
1. Allow for a l-inch seam allowance in
the zipper area when you cut garment.
2. Insert zipper in the usual way up to the
final step ; then, turn garment right side
out and spread flat with zipper face up.
3.
Work from the right side and pin
zipper tape into position.
4.
Baste a guideline for blindstitching
alongside zipper, about f inch from
garment seam. Make sure basting
stitches go through ail fabric layers
and zipper tape. Remove pins.
5. Adjust zipper foot to right side of
needle.
6. Turn garment wrong side out. Place
lower end of zipper tape over feed and
turn front section of garment back to
line of basting, creating a soft fold to
the left of the needle.
7. Set stitch width selector and position
work so that the straight stitches will
go through the seam allowance and
zipper tape, and the sideward stitches
catch a few threads of the fold.
8. Lower zipper foot and stitch slowly.
After stitching, remove basting and
press lightly.
44