Adjusting stitch balance, Adjusting pressure and choosing accessories, Nnnrmi ! 1 1 1 1 – SINGER 413 User Manual
Page 31
Attention! The text in this document has been recognized automatically. To view the original document, you can use the "Original mode".
When you use a Flexi-Stitch pattern,
stitch length is controlled with a sing/e
setting of the stitch control dial.
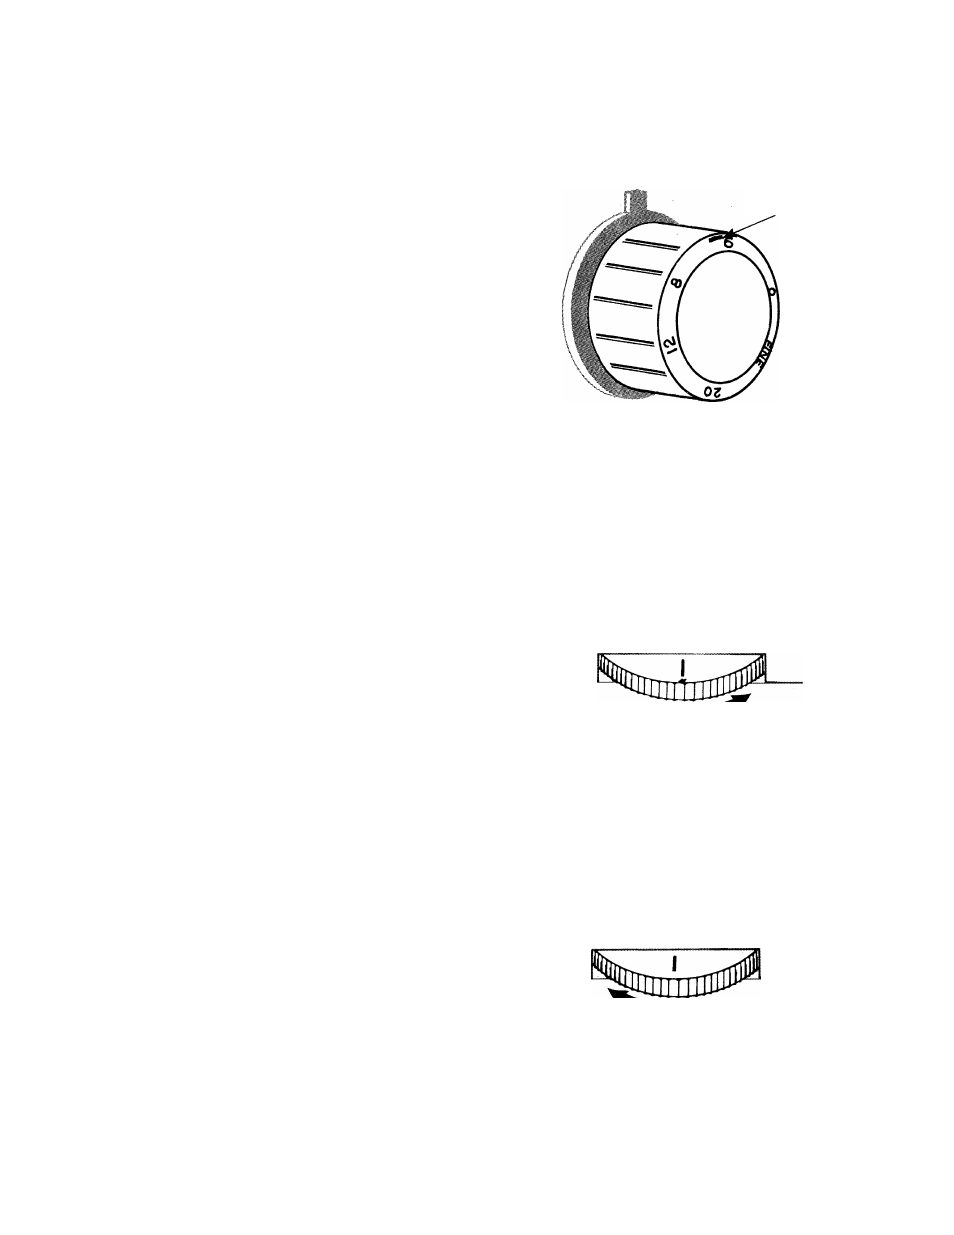
To set, turn dial until red bar — is
centered under the pointer A on the
control panel.
NOTE: Stitching cannot be reversed
when the Flexi-Stitch pattern dial is on
red Flexi-Stitch pattern setting.
SETTING STITCH CONTROL DIAL
STITCH CONTROL
Red Bar
ADJUSTING STITCH BALANCE
You may need to adjust the Flexi-Stitch
pattern dial when using a Flexi-Stitch
pattern in order to achieve the correct
pattern appearance. Before you move the
Flexi-Stitch dial from its neutral position
(red bar | centered under ▼), make a
test sample. If adjustment is required,
stitch slowly and move the dial as you sew.
• turn thè dial to the right to bring
stitches of the pattern together.
•
• Turn the dial to the left to separate
stitches of the pattern.
Stitch Control Dial
Incorrect
Correct
nnnrmi ! 1 1 1 1
Turn Dial to Right to Bring
Stitches Together
Incorrect
Correct
rirrrmrnii 11 / 1 1 1
ADJUSTING PRESSURE AND
CHOOSING ACCESSORIES
Turn to page 18 under “Straight Stitching"
for instructions on adjusting pressure.
For information on choosing accessories
refer to detailed instructions for sewing
with Flexi-Stitch patterns included in the
section called "Sewing the Professional
Way", which starts on page 36.
Turn Dial to Left to
Separate Stitches
Adjusting Stitch Balance
29