SINGER White 5500 User Manual
Page 34
Attention! The text in this document has been recognized automatically. To view the original document, you can use the "Original mode".
Step-3
Step-4
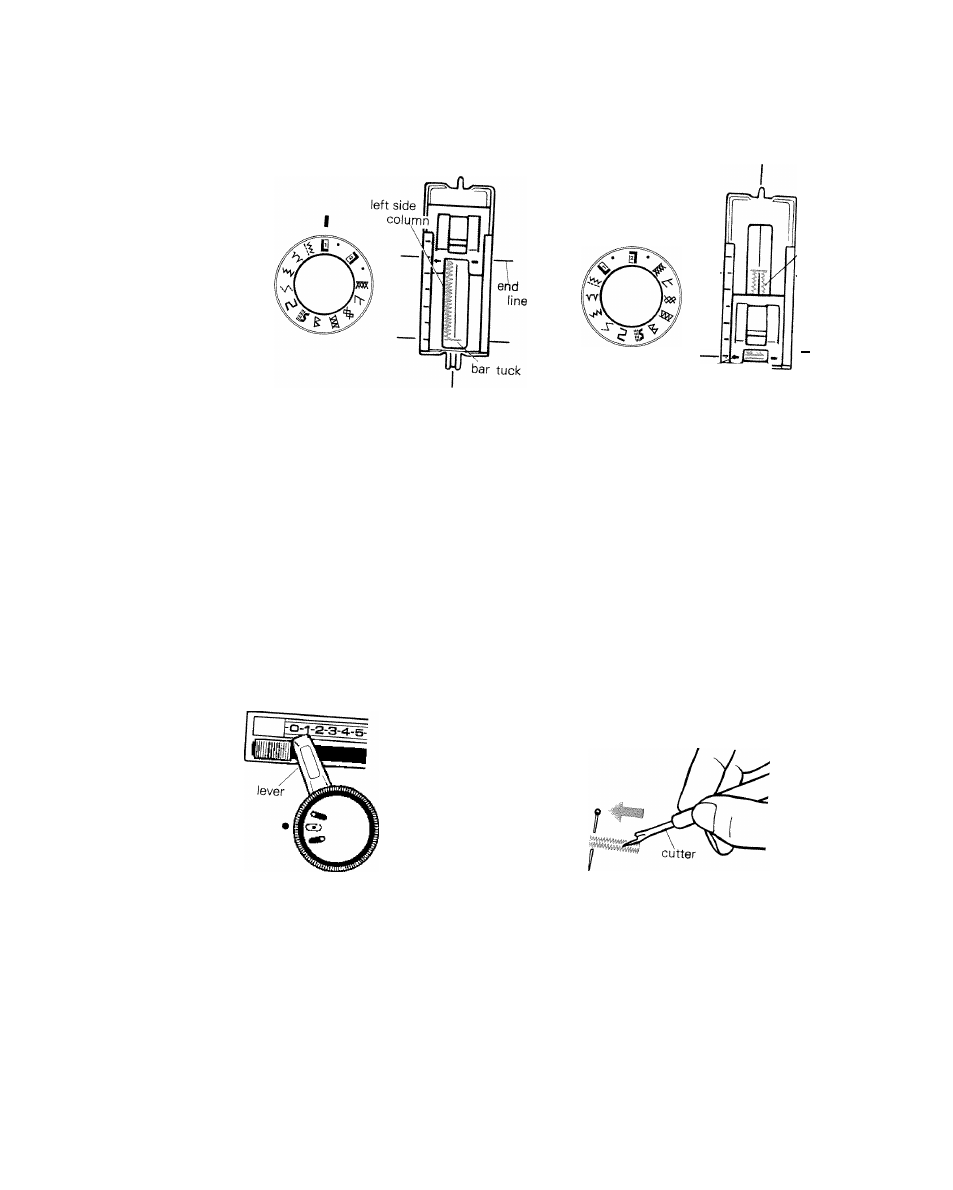
(1) Set pattern selector dial E and start
sewing.
You will hear the click sound for the bar
mii
auto
matically starts sewing the left side
column from the front to the back.
(2) When the arrow mark of the foot meets
the end line, stop sewing.
* When making same-size buttonholes
memorize the point where the arrow
s ows so that it is not necessary to mark
the end lines for all the buttonholes.
Step-5
right side
column
starting
I
line
arrow marine
(1) Set pattern selector dial i and start
sewing.
After sewing the bar tuck with the click
sound, the machine automatically starts
sewing the right side column from the
back to the front.
(2) When the arrow mark of the foot
comes back to the starting line, stop
sewing.
Step-6
knot
i1) Turn the lever to the "0" position.
(2) Sew 5 or 6 stitches to make a knot.
Cut the buttonhole in the middle by
pushing the cutter forward.
* Use a needle to avoid over cut as shown.
When sewing buttonholes on stretch fahri^o •
the fabrics to obtain a better stitch.
to insert interlining between
32