SINGER W910 User Manual
Page 10
Attention! The text in this document has been recognized automatically. To view the original document, you can use the "Original mode".
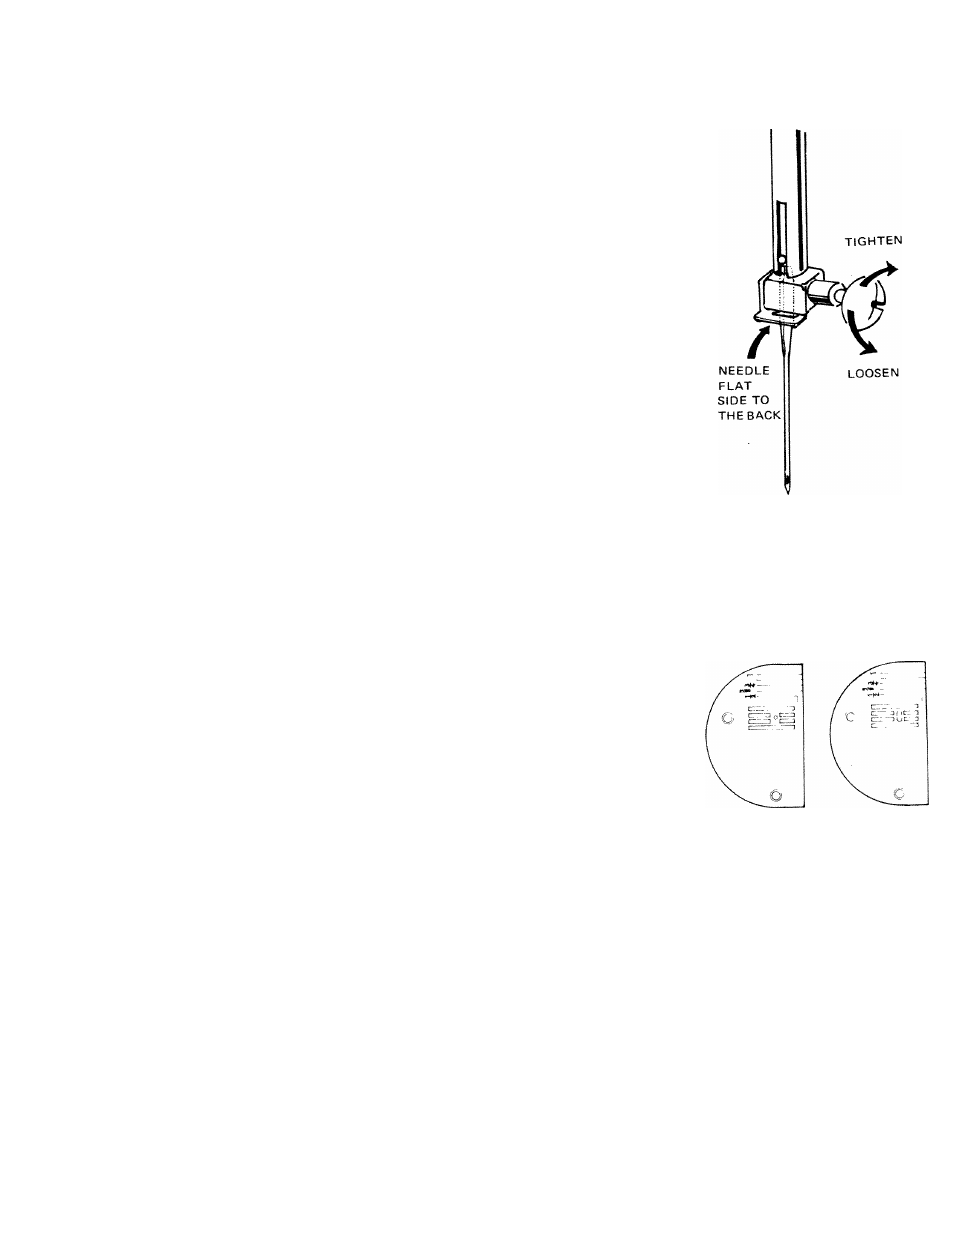
CHANGING NEEDLE
Always change the needle after every
other garment especially when sewing on
polyester and nylon fabrics which dull
needles much faster. When needles are
dull or bent, they damage both your
fabric and the machine. A general rule
when placing sewing machine needles is
that the flat side of the needle is placed
to the back of the machine, when the
bobbin is put in from the front. If the
needle is inserted incorrectly, the stitches
will not form.
To change the needle
1. Raise the needle bar to its highest
position by turning the hand wheel
toward you.
2.
Loosen needle clamp to remove the
needle.
3. Place needle (flat side to the back and
long groova to thefront)in the needle
clamp and push it upward as far as it
will go, tighten needle clamp.
4. After changing the needle, make one
complete Uirn of the hand wheel by
hand to be sure the needle is clearing
the needle plate.
I
I
■
CHANGING NEEDLE PLATE
Although an all-purpose, utility needle
plate is fixed on your machine, for
straight sewing on fine fabric or soft or
very stretchy fabric, you may want to use
the straight stitch needle plate together
with the straight stitch foot, both of
which are included in your accessory box.
To change the needle plate, simply slide
the slide plate as far forward
as
possible.
Remove the two screws holding the
plate in place. Lift the needle plate and
replace.
The needle plate is removed for cleaning
the lint which may pile up between
needle plate and feed dogs.
STRAIGHT STITCH
NEEDLE PLATE
UTILITY
NEEDLE PLATE