SINGER 143G2 User Manual
Page 6
Attention! The text in this document has been recognized automatically. To view the original document, you can use the "Original mode".
8
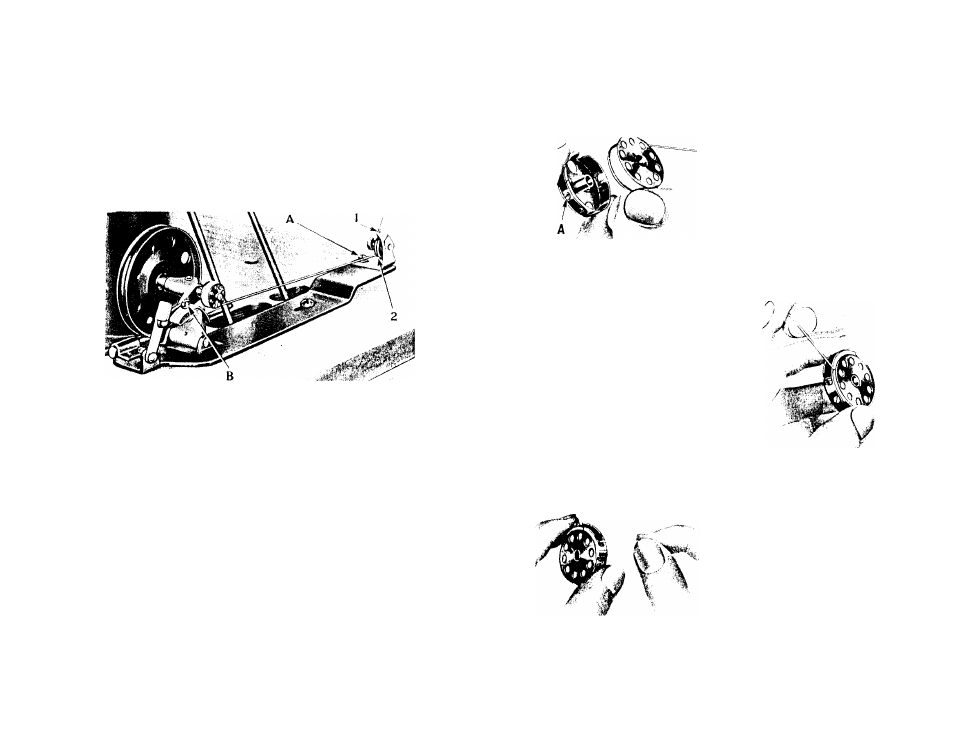
To Wind the Bobbin
(See Fig. 9)
Fasten the bobbin winder to the table with Its driving pulley
In front of the machine belt so that the pulley will drop away
from the belt when sufficient thread has been wound upon the
bobbin.
Fig. 9. Winding the Bobbin
Place the bobbin on the bobbin winder spindle and push It on
as far as It will go.
Pass the thread down through the thread guide (1) In the ten
sion bracket, around the back and between the tension discs (2).
Then wind the end of the thread around the bobbin a few times,
push the bobbin winder pulley over against the machine belt and
start the machine.
When sufficient thread has been wound upon the bobbin, the
bobbin winder will stop automatically.
If the thread does not wind evenly on the bobbin, loosen the
screw (A) In the tension bracket and move the bracket to the
right or left as may be required, then tighten the screw.
The amount of thread wound on the bobbin Is regulated by the
screw (B). To wind more thread on the bobbin, turn the screw (B)
Inwardly. To wind less thread on the bobbin, turn the screw out
wardly.
Bobbins can be wound while the machine Is stitching.
To Thread the Bobbin Case
Hold the bobbin between the
thumb
and
forefinger
of
the
right
hand,
the
thread
drawing
on the top from the left toward
the right, as shown In Fig.10.
Fig. 10
With the left hand, hold the
bobbin case as shown In Fig. 10,
the tension spring being at the
front, and place the bobbin Into
the bobbin case.
!■ yVf'll
Fig. 11
Then pull the thread Into
the slot In the edge of the
bobbin case as shown In Fig.
11, and back under the ten
sion
spring
Into
the
slot
at
the end of the tension spring,
as shown In Fig. 12.
Fig. 12