SINGER 143G2 User Manual
Page 11
Attention! The text in this document has been recognized automatically. To view the original document, you can use the "Original mode".
To Time the Sewing Hook
Remove
the
throat
plate
and
with
needle
vibration
at
zero,
turn the machine pulley over toward you until the LOWER timing
mark, on the needle bar Is Just visible at thé end of the needle
bar frame (or until the needle bar has risen 3/32 Inch); if the
needle and hook are In correct time, the point of the hook will
be opposite the centre of the needle.
To time the hook, loosen the set screws in the lower belt
pulley
(J,Elg.6)
and
turn
the
hook
as
required.
Before
tighten
ing the set screws, see that there Is no end play In the shaft.
18
CC
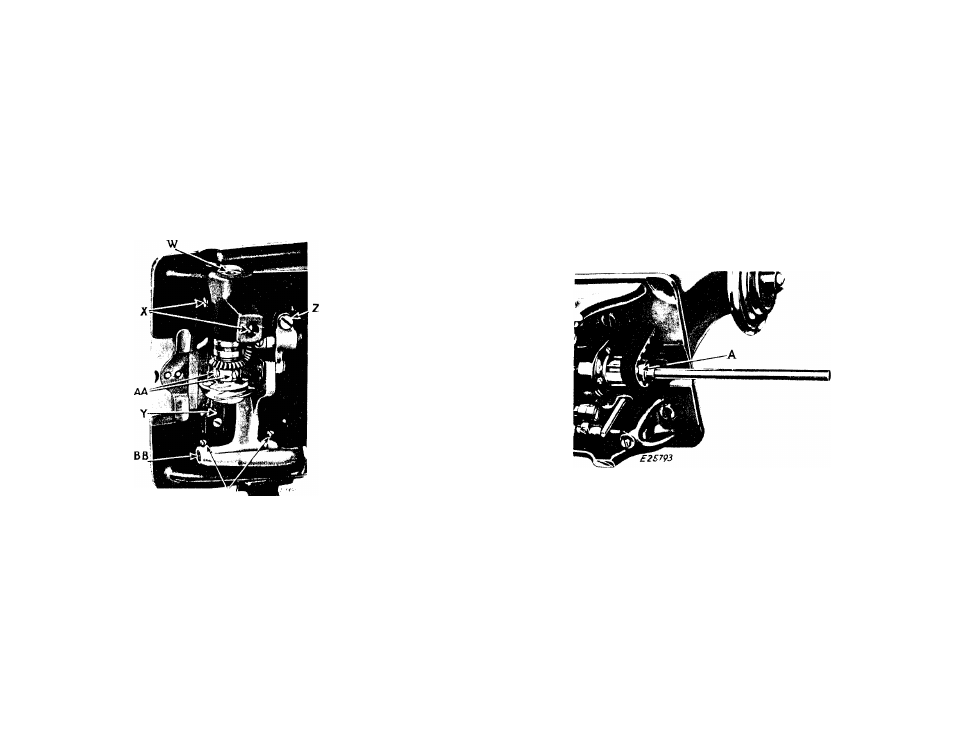
Fig. 21
To Set the Hook To or From the Needle
The point of the hook should come as close as possible to the
needle without touching It. Loosen the four screws (X and AA,
Fig.21) and slide the hook to the correct position, then tighten
the two screws (X). Reset the gear on the hook shaft and tighten
screws (AA).
To Remove the Hook
Remove
the
bobbin
case
stop
(Y,Fig.21),
loosen
the
hook
spindle screw
(w)
a few turns and tap It lightly to loosen the
hook. Then remove the screw (W) and withdraw the hook from Its
socket.
19
To Remove the Belt from Within the Arm
Slide Che arm shaft connection belt off the hook driving
shaft belt pulley (J, Fig. 6), and remove the machine pulley loosen
the am shaft ball bearing bushing (back) set screw (D, Flg.3) at
the back of the am, and remove the bushing; lift the belt up
through the am cap hole as far as possible and draw It out
through the space formerly occupied by the bushing.
When replacing the belt see that the sewing hook and needle
are In correct time before running the belt on the lower pulley
and verify the correctness of the timing before commencing to
sew.
Fig. 22. Putting Belt on Lower Pulley with
Belt Replacer 244005
To facilitate Che replacing of the belt on tne lower pulley,
use belt replacer 244005 (A, Fig. 22). Rest the replacer In Che
loop
of
the
belt
and
slide it over the
hub
of the
pulley, as
shown
In
Fig.22,
having
the
notches
In
the
replacer
engage
the
two set screws In the Tiub of the pulley. Turn the machine pul
ley toward you until the belt Is fully over the pulley, then re
move the replacer.
NOTE: As belt replacer 244005 will serve for several machines,
It Is not regularly furnished with the machine, and must be
ordered separately.