Basic operation – Sears 113.226424 User Manual
Page 16
Attention! The text in this document has been recognized automatically. To view the original document, you can use the "Original mode".
basic operation
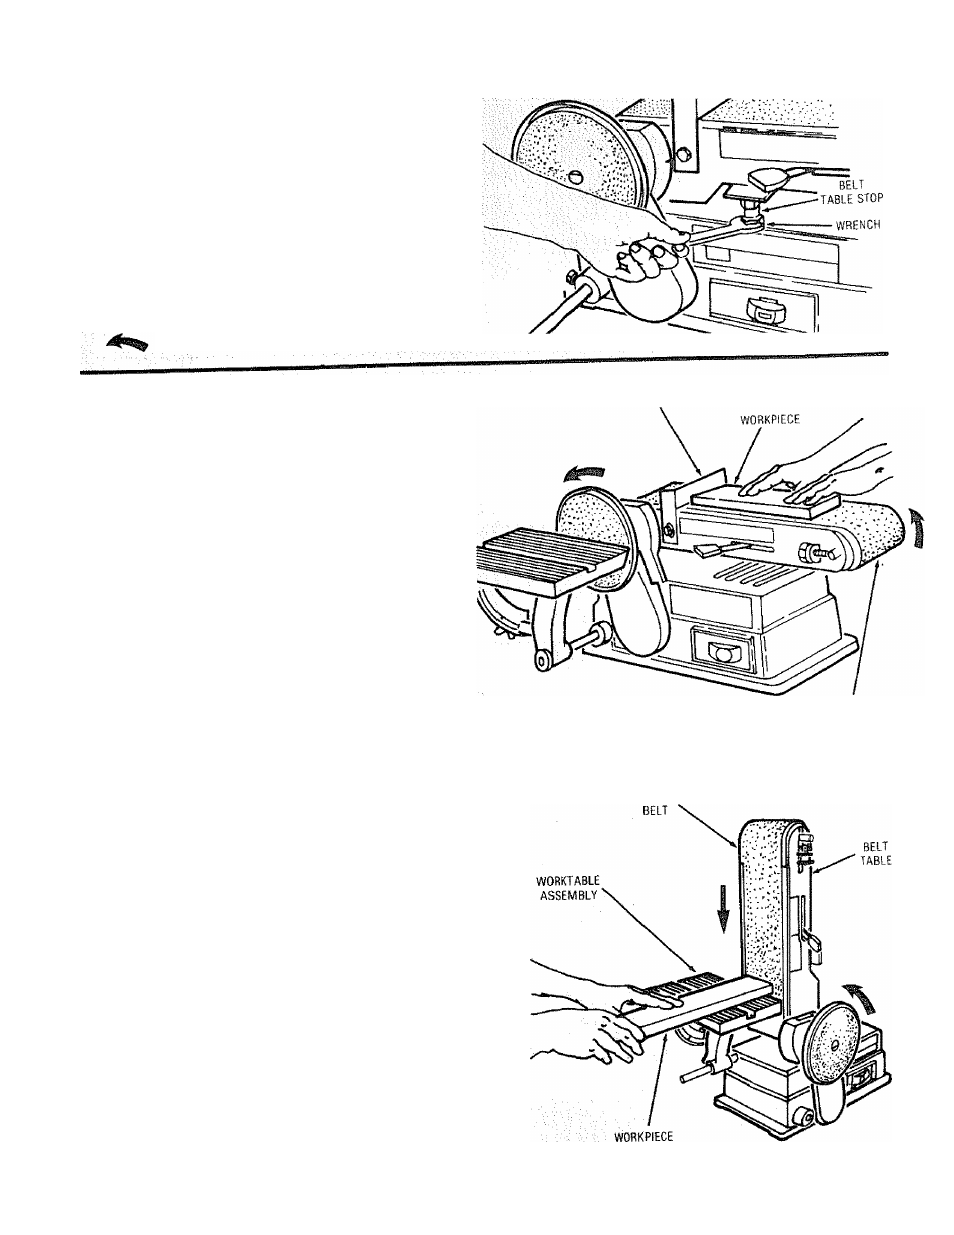
BELT TABLE STOP CAN BE ADJUSTED SO
THAT THE ABRASIVE BELT TABLE IS LEVEL
WITH THE FLOOR WHEN IN A HORIZONTAL
POSITION.
a.
b.
c.
Loosen the lock nut using a 3/4-inch wrench.
Place a level on the abrasive belt table and
using a 3/4-inch wrench, screw thè stop bolt
in or out until the belt table is level.
Tighten the lock nut.
Arrow shows direction of rotation
BACKSTOP
SURFACE SANDING ON THE SANDING BELT
Hold the workpiece firmly with both hands,
keeping fingers away from the sanding belt.
Keep the end butted against the backstop and
move the work evenly across the sanding belt.
Use extra caution when sanding very thin pieces.
For sanding long pieces, remove the backstop.
Apply only enough pressure to allow the sanding
belt to remove material.
SANDING BELT
SANDING
END SANDING ON THE SANDING BELT
It is more convenient to sand the ends of long
workpieces with sanding belt in a vertical posi
tion.
See “Basic Operation - Positioning Belt Table”
for adjusting the belt table, and see “Assembly -
installing Table Assembly” for adjusting work
table.
Move the work evenly across the sanding belt.
For accuracy, use a miter gauge (accessory).
16