Connect battery {see fig. 2), Install seat (see fig. 3), Assembly – Sears 917.25148 User Manual
Page 8
Attention! The text in this document has been recognized automatically. To view the original document, you can use the "Original mode".
ASSEMBLY
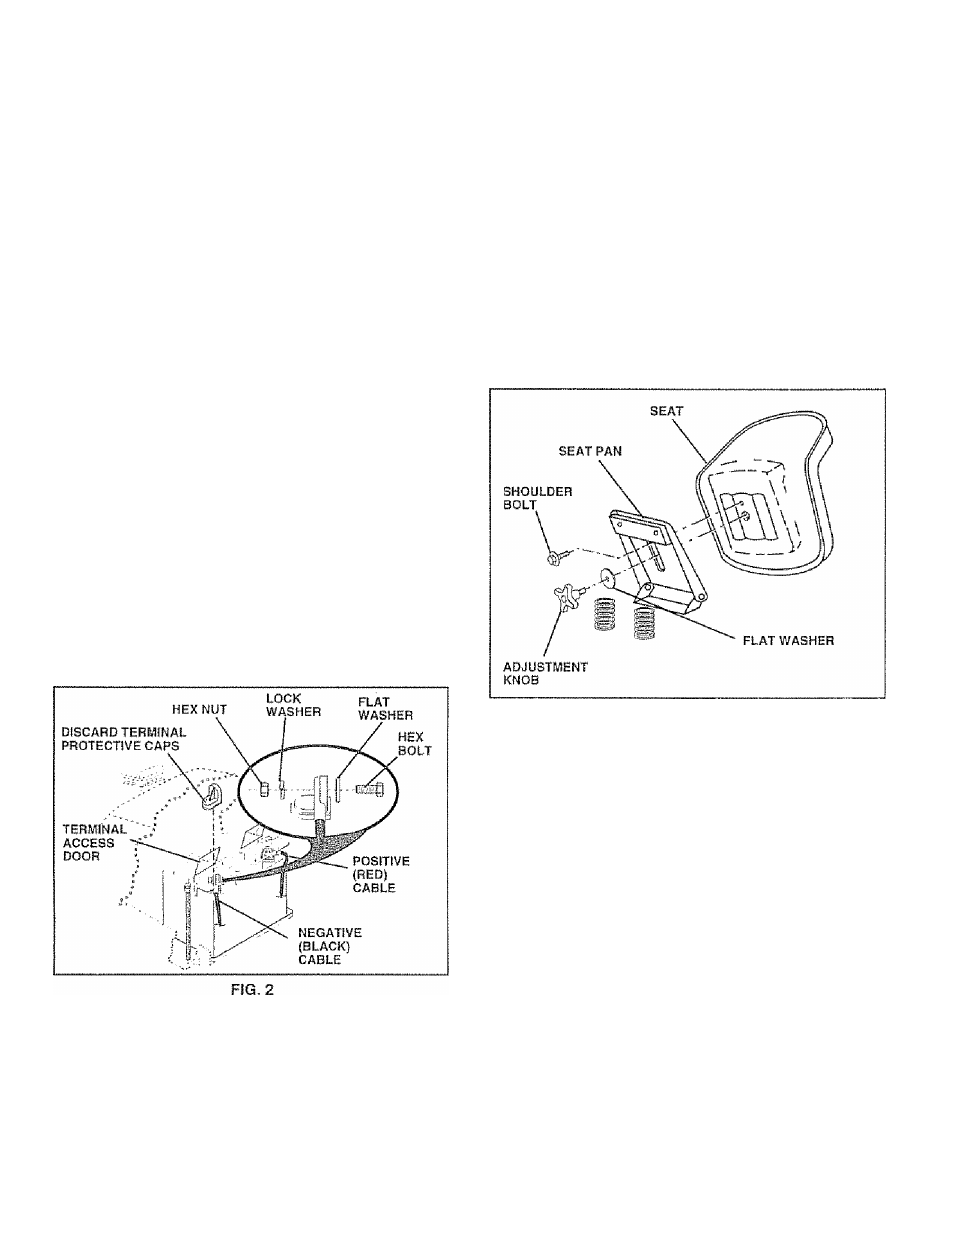
CONNECT BATTERY {See Fig. 2)
A
CAUTiON: Do not short battery termi
nals. Before connecting battery, re
move metal bracelets, wristwatch
bands, rings, etc.
Positive terminal must be connected
first to prevent sparking from acciden
tal grounding.
<■ Lift hood to raised position.
” Open terminal access doors, remove terminal protec
tive caps and discard.
• if this battery is put into service after month and year
indicated on label (label located between terminals)
charge battery for minimum of one hour at 6-10 amps.
« First connect RED battery cable to positive {-r) battery
terminal with hex bolt, flatwasher, lockwasherand hex
nut as shown. Tighten securely.
" Connect BLACKgrounding cable to negative (-) battery
terminal with remaining hex bolt, flat washer, lock
washer and hex nut Tighten securely.
" Close terminal access doors.
Use terminal access doors for:
” Inspection for secure connections (to tighten hard
ware),
» Inspection for corrosion
" Testing battery.
" Jumping (if required),
« Periodic charging.
INSTALL SEAT (See Fig. 3)
Adjust seat before tightening adjustment knob.
“ Remove cardboard packing on seat pan
'> Place seat on seat pan and assemble shoulder bolt.
» Assemble adjustment knob and flat washer loosely.
Do not tighten.
0
Tighten shoulder bolt securely.
“ Lower seat into operating position and sit on seat.
“ Slide seat until a comfortable position Is reached which
allows you to press clutch/brake pedal ail the way
down.
'> Get off seat without moving Its adjusted position.
» Raise seat and tighten adjustment knob securely.
FIG. 3
8