Changing the friction wheel, Note, Auger shear bolt replacement – Sears 247 886510 User Manual
Page 18: Spark plug
Attention! The text in this document has been recognized automatically. To view the original document, you can use the "Original mode".
Friction
Wheel
FIGURE 34.
CHANGING THE FRICTION WHEEL
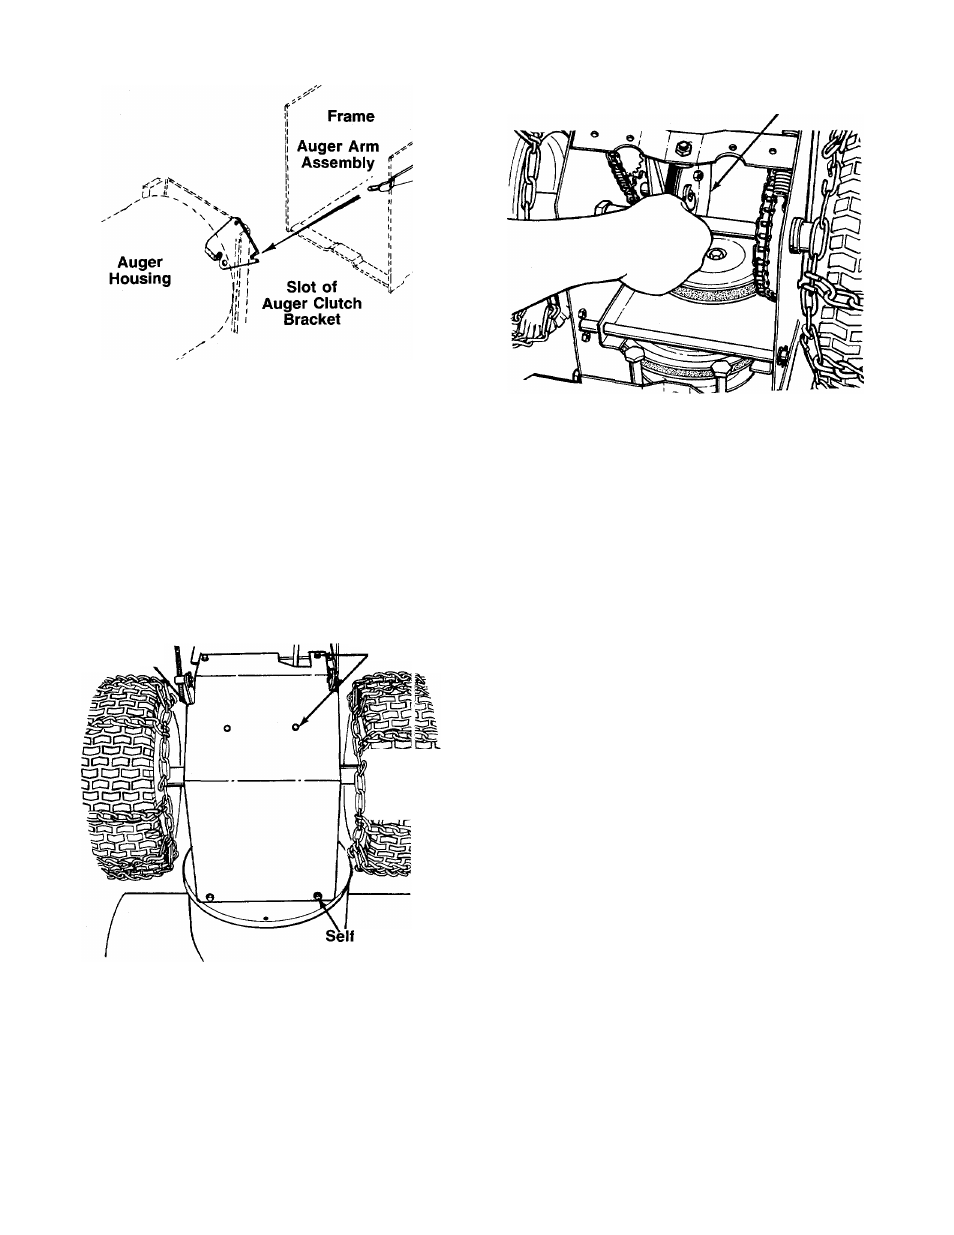
1. Place the speed select lever into the sjcond
reverse position. (Friction wheel will move ever to
the extreme left side, inside the frame.)
2. Tip the snow thrower up and forward, so i rests
on the auger housing. Block securely ii this
position.
3. Using a 3/8" wrench, remove the bottom frame
cover by removing six self-tapping screw?;. See
figure 35.
Bottom
Frame
Cover
Self-Tapping
Screv's
pacac
nc^enc::
acrcpc
gCDcao
-Tapping
/ Screws
FIGURE 35.
4. Using a 1/2" wrench, remove the three he> bolts
which hold the friction wheel to the friction iwheel
adapter. See figure 36.
NOTE
If may be necessary to tap the friction
wheel with a hammer to knock it loose.
FIGURE 36.
5. Assemble the new friction wheel so the cupped
side is opposite the friction wheel adapter.
6. Fasten the friction wheel to the friction wheel
adapter with the three hex bolts. Tighten each nut
in rotation until they are finger tight.
7. Spin the wheel to see that it is not cocked on the
hub. Then, using a 1/2" wrench, tighten securely.
8. Replace the bottom frame cover.
AUGER SHEAR BOLT REPLACEMENT
The augers are secured to the auger shaft with two
special shear bolts and hex lock nuts. If you hit a foreign
object or ice jam, snow thrower is designed so the bolts
will break (to protect the snow thrower). Refer to figure
25.
If the augers will not turn, check to see if the hex bolts
have sheared. Two spare bolts and hex lock nuts have
been provided with the snow thrower. Use only original
equipment shear bolts and nuts, part numbers
710-0890 (shear bolt) and 712-0429 (hex lock nut).
SPARK PLUG
Clean spark plug and reset gap periodically. Clean area
around spark plug base before removing to prevent dirt
from entering engine. Replace spark plug if electrodes
are pitted or burned, or if porcelain is cracked. Spark
plug replacement is recommended at beginning of each
season. Refer to Engine Repair Parts section of this
manual for proper replacement plug. If reusing spark
plug, clean by carefully scraping electrodes (do not
sand blast or use wire brush). Be certain entire spark
plug is clean. Cleck electrodes gap with a wire feeler
gauge, and reset gap to 0.030 if necessary. See figure
37.
Install spark plug in engine, and tighten securely. If tor
que wrench is available, torque plug to between 18 and
23 foot pounds.
18