Note – Sears 247 886510 User Manual
Page 17
Attention! The text in this document has been recognized automatically. To view the original document, you can use the "Original mode".
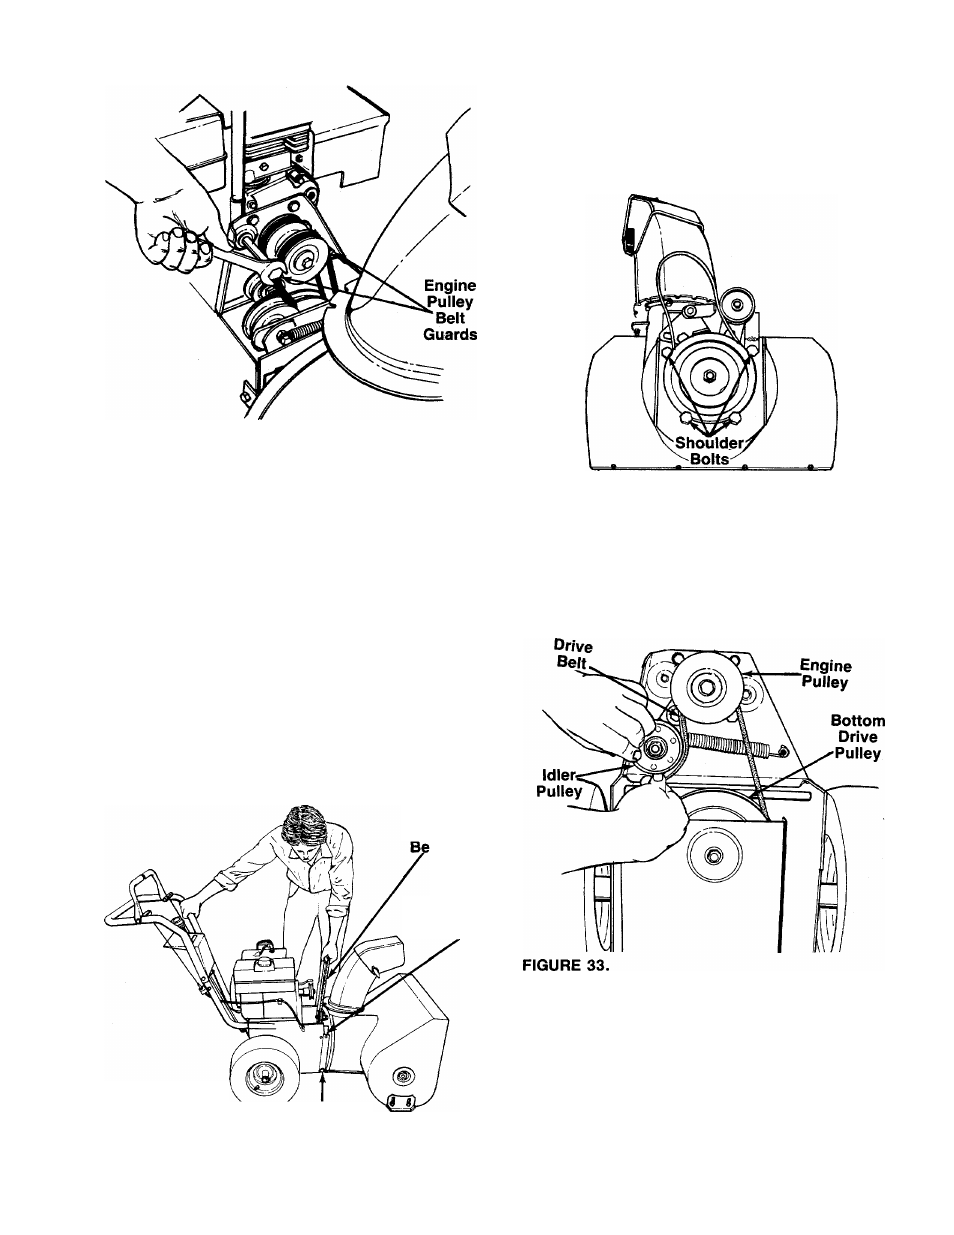
FIGURE 30.
6
.
a.
b.
Separate the snow thrower into two halves as
follows.
Using a 9/16" wrench, remove the top bolts
which attach the auger housing to the frame
assembly. Loosen (do not remove) the bottom
bolts. See figure 31.
Lift up on the auger drive belt to pull the auger
housing off the frame assembly. The snow
thrower will separate into two halves.
c. Tip the auger housing forward so it rests on the
front of the housing.
NOTE
Be certain to check the condition of
the drive belt when the two halves of
the unit are separated. Replace if
necessary.
Auger
It
Remove
Bolt
7.
8
.
9.
Using a 15/16" wrench, remove the four shoulder
bolts and cupped washers which act as belt
keepers. See figure 32.
Roll belt off the auger pulley.
Reassemble new belt in reverse order.
FIGURE 32.
Drive Belt
1. Follow steps 1 through 6 of the previous section.
2. Disconnect the extension spring at the engine
plate. See figure 33.
3. Remove the drive belt from the engine pulley and
bottom drive pulley. See figure 33.
figure
31.
Loosen
(Do Not Remove)
Replace belt. Reassemble snow thrower, follow
ing instructions in reverse order.
NOTE
Be certain the auger arm assembly pin is
in the slot of auger clutch bracket before
inserting top bolts into auger housing
and frame. See figure 34.
17