Proper operating procedures – Sears 113.299131 User Manual
Page 18
Attention! The text in this document has been recognized automatically. To view the original document, you can use the "Original mode".
proper operating procedures
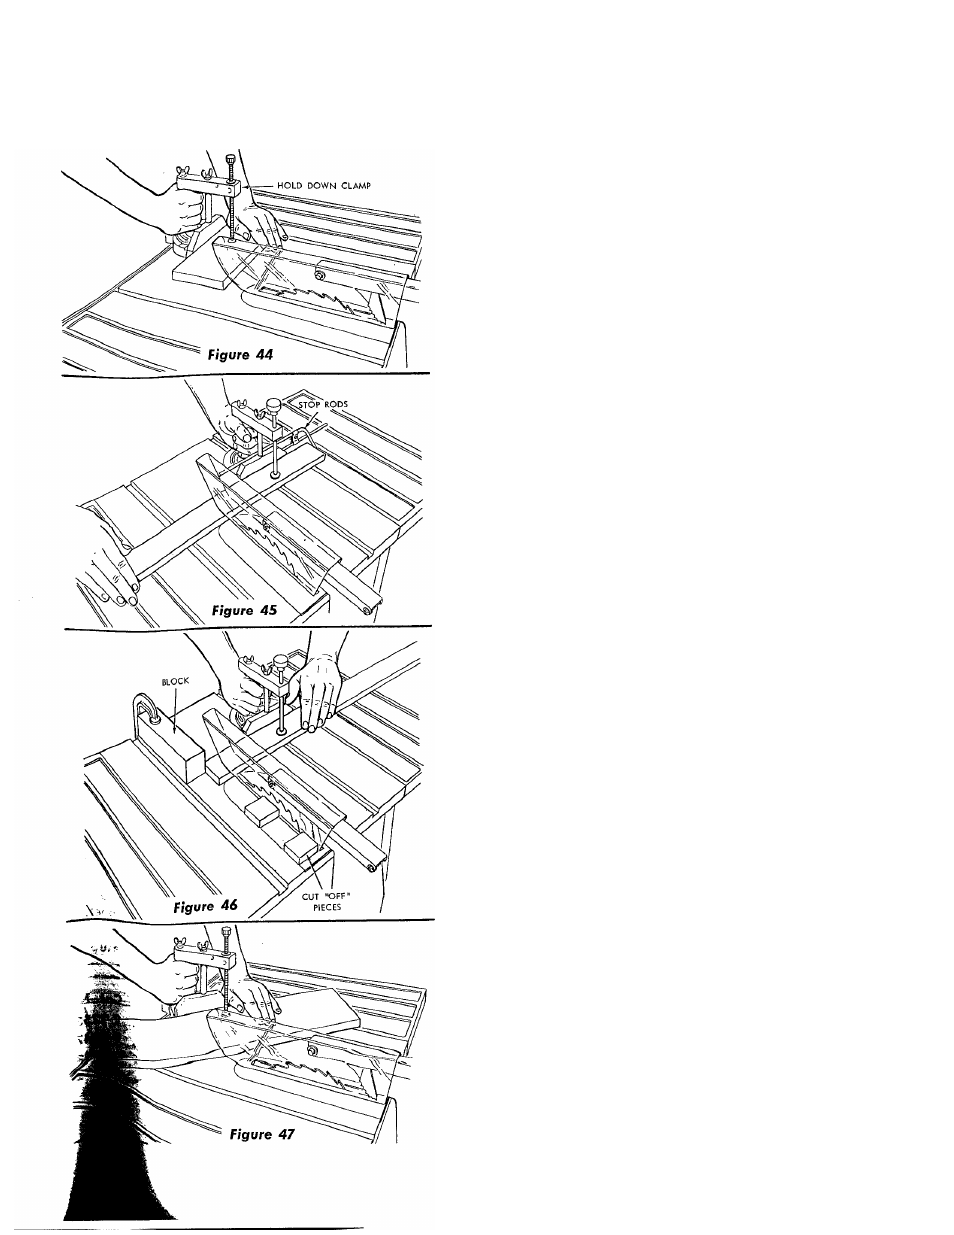
CROSSCUTTING
CROSSCUTTING is known as cutting wood across the
grain, at 90°, or square with both the edge and the flat side
of the wood. This is done with the miter gage set at "0".
The miter gage may be used in either of the grooves in the
table. Make sure it is locked.
When using the miter gage in the LEFT hand groove, hold
the workpiece firmly against the miter gage head with your
left hand, and grip the lock handle with your right ... or
use Hold-Down Clamp (Optional Accessory) (See figure
44.)
When using the RIGHT hand groove, hold the workpiece
with your right hand and the lockhandle with your left
hand.
REPETITIVE CUTTING
REPETITIVE CUTTING is known as cutting a quantity of
pieces the same length without having to mark each piece.
Use the Stop Rods (Optional Accessory) for cutting pieces
6
inches long or longer. (See figure 45.)
When making repetitive cuts shorter than
6
inches, DO
NOT USE THE RIP FENCE AS A LENGTH STOP ...
BECAUSE
THE
CUT
OFF
PIECE
COULD
BIND
BETWEEN THE FENCE AND BLADE AND CAUSE A
KICKBACK.
ALWAYS clamp a block of wood at least 2 inches thick and
3 inches long to the table to act as a length stop. (See figure
46.)
1. Slide the workpiece along the miter gage until it touches
the block .. . hold it securely or clamp it with the
Hold-Down Clamp (Optional Accessory).
2. Make the cut ... pull the workpiece back ... push the
cut off pieces off the table with a long push stick ...
DO NOT ATTEMPT TO PICK THEM UP AS THIS
COULD ENDANGER YOUR HANDS.
MITER CUTTING
MITER CUTTING is known as cutting wood at an angle
other than 90° with the edge of the wood. Follow the same
procedure as you would for crosscutting.
Adjust the miter gage to the desired angle, and lock it.
The miter gage may be used in either of the grooves in the
table.
When using the miter gage in the LEFT hand groove, hold
the workpiece firmly against the miter gage head with your
left hand, and grip
the lock handle With vour right ... or
use Hold-Down Clamp (Optional Accessory). (See figure
47.)
When using the RIGHT hand groove, hold the workpiece
with your right hand and the lockhandle with your left
hand.
18