Cfio, Note, Pull down ф swing ш 0 – Sears KENMORE 233.5534559 User Manual
Page 4: Vertically vented installa- -tions (rg. 3, Horizontally vented installations (fig. 4), Converting to ventless (fig. 6 a fig. 7), Fig. 6, Fig. 7, Fig. 5
Attention! The text in this document has been recognized automatically. To view the original document, you can use the "Original mode".
VERTICALLY
VENTED
INSTALLA-
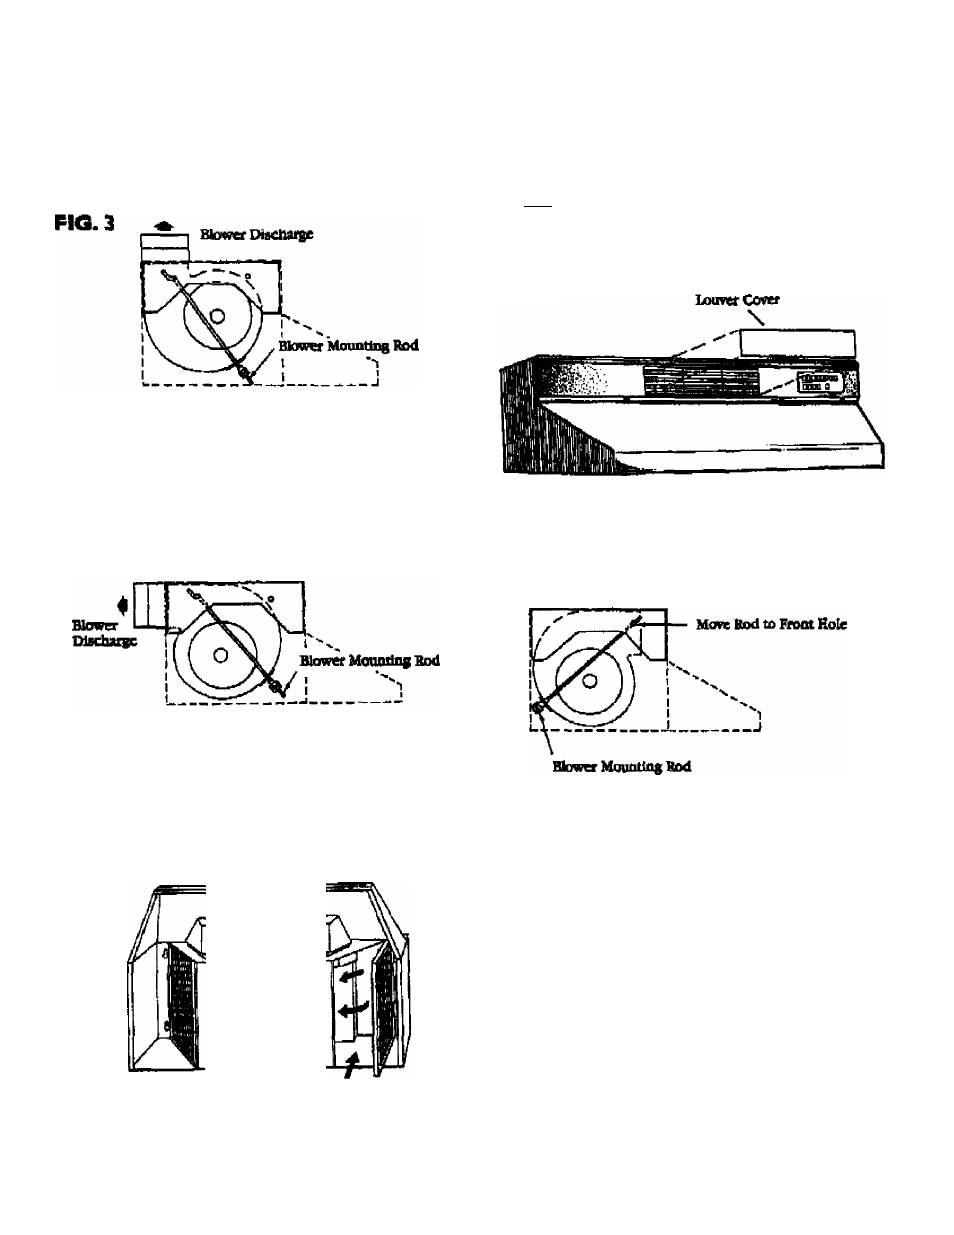
-TIONS (RG. 3}
lice sure th;it the blwcr discharge lines up with the duct
opening in the top of the liood. Lift up the blower, slip the
blower mounting md$ into brackets on blower and tighten
knurled nuts securely. Plug in blower.
HORIZONTALLY VENTED
INSTALLATIONS (FIG. 4)
Make sure that the blower discharge Uncs up with the duct
opening in the back of the hood. Lift up the biower, slip the
blower mounting rods into brackets on blower and tigluea
knurled nuts securely. Plug in blower.
FIG. 4
FILTER INSTALLATION -
VENTED INSTALLATIONS (FIG. S)
Push filters up into rcccss at cop of liood. Swii^ filtcis in and
pull down. Make sure that tab on filter is tow^ outside and
bottom of hood-
CONVERTING TO VENTLESS (FIG. 6
A FIG. 7)
Order a Veiukss Hlter KA #50185 • Contains two (2) Clean
Cooking System IV filters.
1. Kemovie touvrr cover. Fry off ctwer with acnewdriver or knife'
CFIO. $}.
........
'
Note---------------------------------
DJecard damper/duct connector, 1/4* black sheet metal
screws, and louver cover.
FIG. 6
2. tosiall blower Move blower mounting rods to front holes i n
hood support channels. Position blower so that blower lines
up with iMveted opening on hood front (PIG. 7).
FIG. 7
5. Slip blower mounting rods into brackets on blower and
tighten knurled nuts secnrely.
FIG. 5
Pull Down Ф
Swing ш 0
Push
In Ф