Adjusting handle height, Adjusting cutting height – Sears 247.37035 User Manual
Page 16
Attention! The text in this document has been recognized automatically. To view the original document, you can use the "Original mode".
properly due to suspected carburetor problems,
take your lawn mower to your nearest SEARS
service center.
• Engine performance may be affected in
altitudes above 4000 feet. To improve engine
performance, install a high altitude adjustment
kit, available at the SEARS service center.
NOTE:
A dirty air cleaner wili cause an engine to run
rough. Be certain air cleaner is dean and attached to
the carburetor.
Engine Speed
WARNING: Overspeeding engine above
the factory setting can be dangerous. Do not
attempt to increase engine speed or it may
result in personal injury. Changing of engine
governed speed will void engine warranty.
•
If you believe the engine is running too fast or
too slow, take your lawn mower to the nearest
SEARS service center.
ADJUSTING HANDLE HEIGHT
Your mower is shipped with the handle in the higher
height position. To lower the handle height, proceed
as follows.
•
Remove the starter rope from the rope guide.
•
Remove the upper handle by removing the hand
knobs and carriage bolts. Lay the upper handle
out of the way, being careful not to bend or kink
the cables.
•
Remove the hairpin clips from the weld pins on
the handle brackets. Refer to Figure 3 inset.
Press out on the legs of the lower handle.
Remove lower handle from the mower.
•
Turn the lower handle around so the notch on
the bottom of the lower handle Is facing forward
as shown in Figure 15. Reassemble, placing the
bottom holes in the handle over the weld pins in
the handle mounting bracket.
Reassemble the upper handle to the lower
handle.
Place the hairpin clips in the inner holes in the
weld pins and attach the starter rope as
instructed in the Assembly section.
ADJUSTING CUTTING HEIGHT
IMPORTANT: All wheels must be placed in the same
relative position. For rough or uneven lawns, move
the height adjustment lever to a higher position. This
will help stop scalping of the grass.
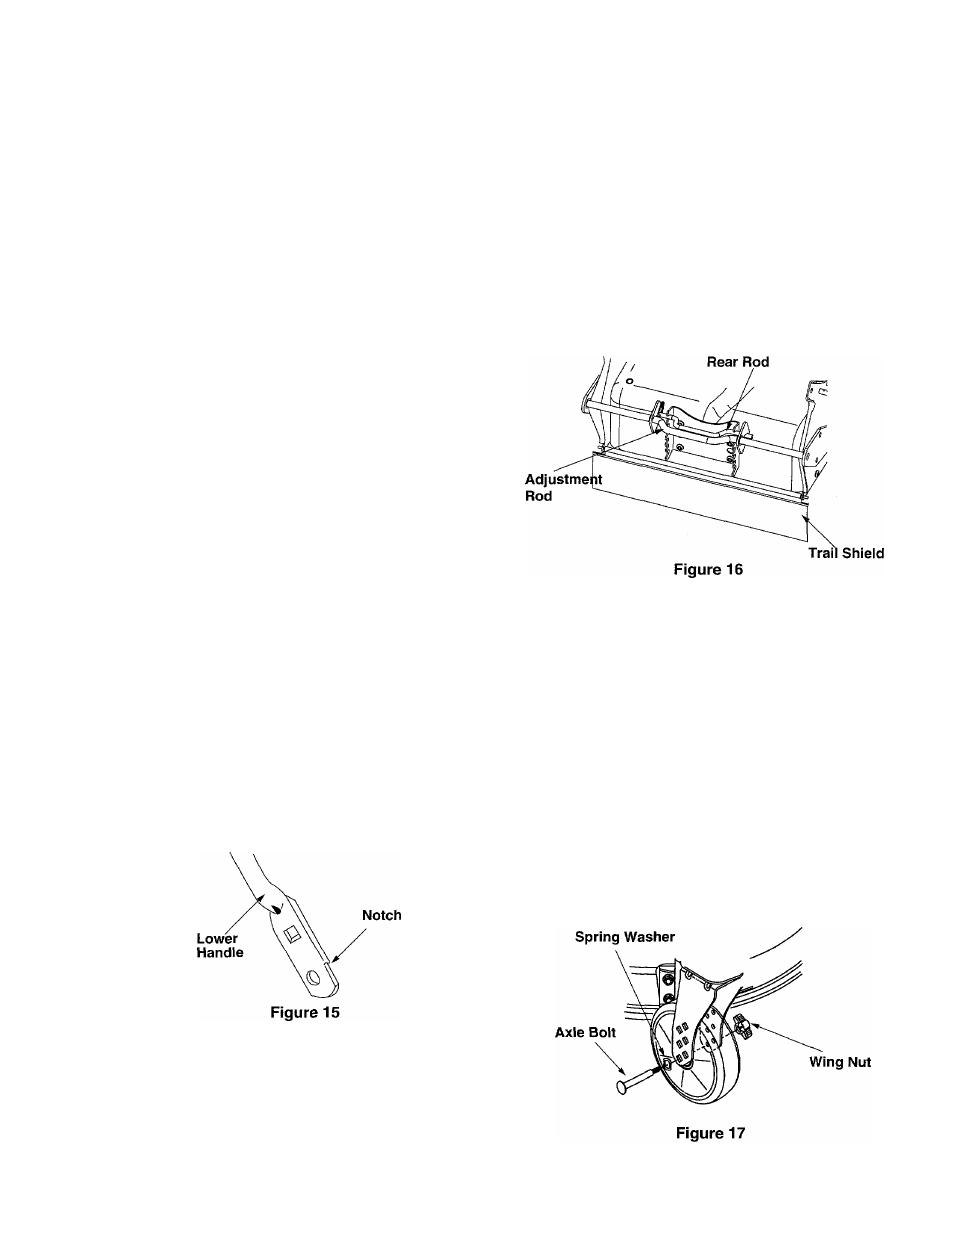
Rear Wheel Adjustment
The rear wheel cutting height adjustment rod is
located between the two rear hi-wheels.
•
Squeeze the two adjustment rods together and
pull towards the operator.
•
Move rods upward or downward to any one of the
six height positions and reinsert. See Figure 16..
•
Make sure that the rear rod sits in the groove of
the new height position.
Front Wheel Adjustment
The front wheel cutting height is determined by
placing the axle rod in one of the six height
adjustment positions in each caster assembly on the
front wheels.
•
To adjust, remove the wing nut from the axle
bolt. See Figure 17.
•
Slide the axle bolt and spring washer from the
assembly and select a cutting height.
•
With the spring washer on the axle bolt,
reinsert the axle bolt in the square hole
desired, through the wheel assembly. See
Figure 17.
•
Secure with wing nut previously removed.
16