Warning – Sears 153333531 User Manual
Page 15
Attention! The text in this document has been recognized automatically. To view the original document, you can use the "Original mode".
-WARNING-
BEFORE
LICHUNG
[PROPANE
(LP.)
GAS
WATER
HEATERS]:
Propane
(L.P.)
gas
Is
heavier
than
air.
Should there be a leak in the system, the gas will settle
near
the
ground.
Basements,
crawl
spaces,
skirted
areas
under
mobile
homes
(even
when
ventilated),
closets
and
areas
below
ground
level
will
serve
as
pockets
for
the
accumulation
of
this
gas.
Before
attempting to light or relight the water heater's pilot or
turning on a nearby electncal light switch, be absolute
ly sure there is no accumulated gas in the area. Search
for odor of gas by sniffing at ground level in the vicini
ty of the appliance. If odor is detected, follow the steps
indicated at "For Your Safety" on the cover page of
this manual, then leave the premises.
Lighting and operating instructions are located on front of
the water heater, above or to one side of the gas control
valve
-WARNING
AN ODORANT IS ADDED TO THE GAS USED
BY THIS WATER HEATER,
FOR YOUR SAFETY
IF YOU SMELL GAS:
1. Do not try to light any appliance.
2. Do not touch any electrical switch; do not use any
phone in your building.
3. Immediately call your gas supplier from a neighbor's
phone, follow the gas supplier's instructions.
4. If you cannot reach your gas supplier, call the fire
department.
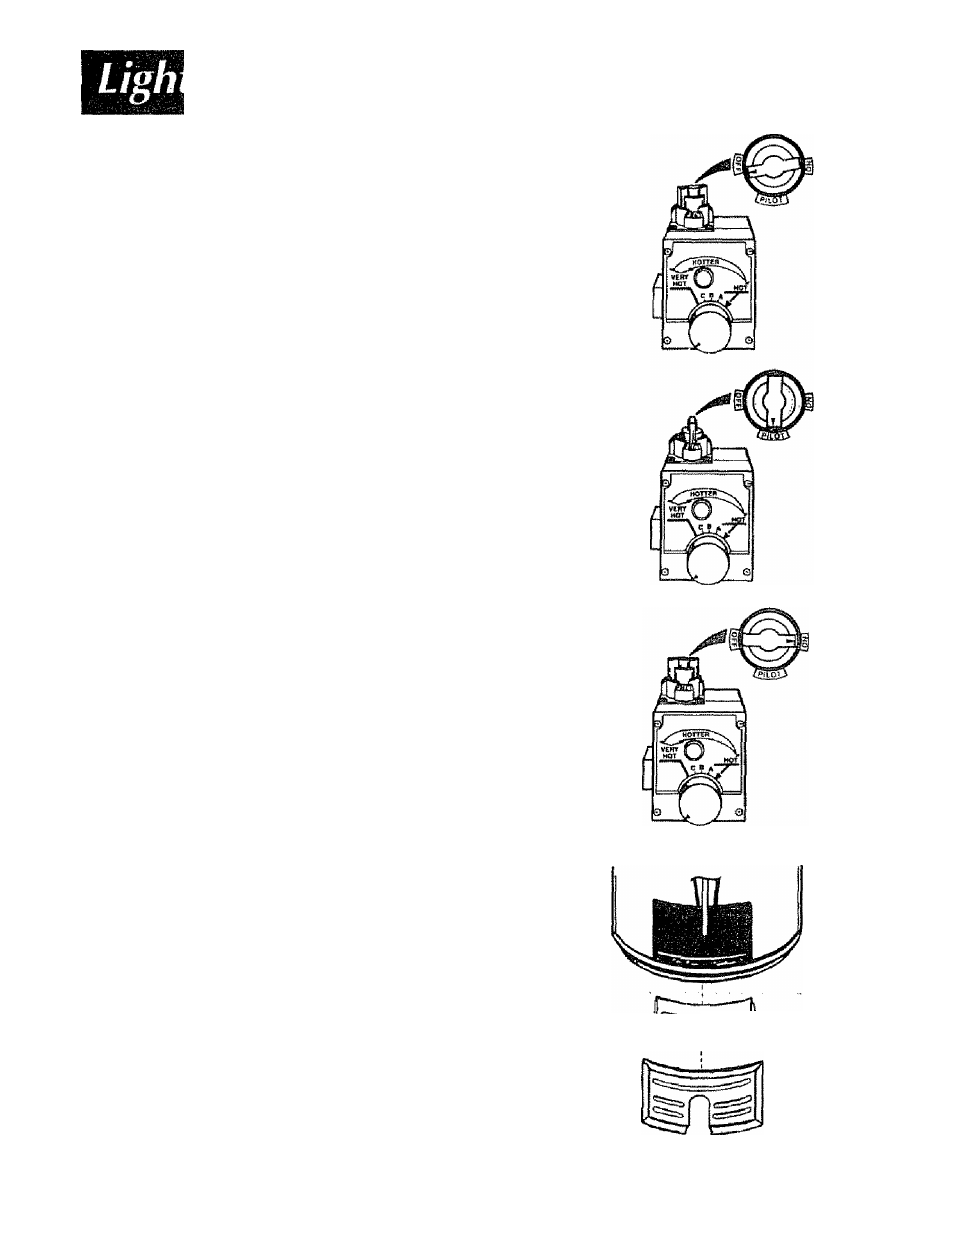
WARNING
DO NOT force the gas control knob. Use only your
hand to push it down to light the pilot, or to turn it to
"ON", "OFF" or "PILOT", Never use a tool such as a
lever, wrench or pliers- Do not hit or damage the knob.
A damaged knob may result in an explosion and seri
ous injury. If you have problem turning the knob, call
the gas supplier immediately.
CHECK FOR LEAKS
Be sure to check afi your gas pipes for leaks before light
ing your water heater Use a soapy water solution, not a
match or open flame. Check the factory gas fittings after
pilot is lit and gas control knob is still in "PILOT" position.
Then, check the fittings when the main burner is turned
"ON". Use a soapy water solution for this, too.
Figure 6
Figure 7
Figure 8
• * * * * — , , , ■■—-***^
I .....
Figure 9
INNER DOOR
OUTER DOOR
15