Carrier 51QC/QG User Manual
Page 12
Attention! The text in this document has been recognized automatically. To view the original document, you can use the "Original mode".
\.9 'rf
ikssi Insert casing (without chassis) into framework
now secured in window. Push casing outward, until
bottom slides up and over bend in lower track and
casing’s top channel rests against upper guide of
wing panel assembly.
•isaki. Make pencil mark through center hole in
bottom of casing. Drill hole into window sill
at spot. Screw casing to window sill.
1
Align center hole in top channel of casing with
center hole in upper guide and previously drilled
hole in sash. Replace and fasten screw removed in
Step #22, TIGHTEN SECURELY.
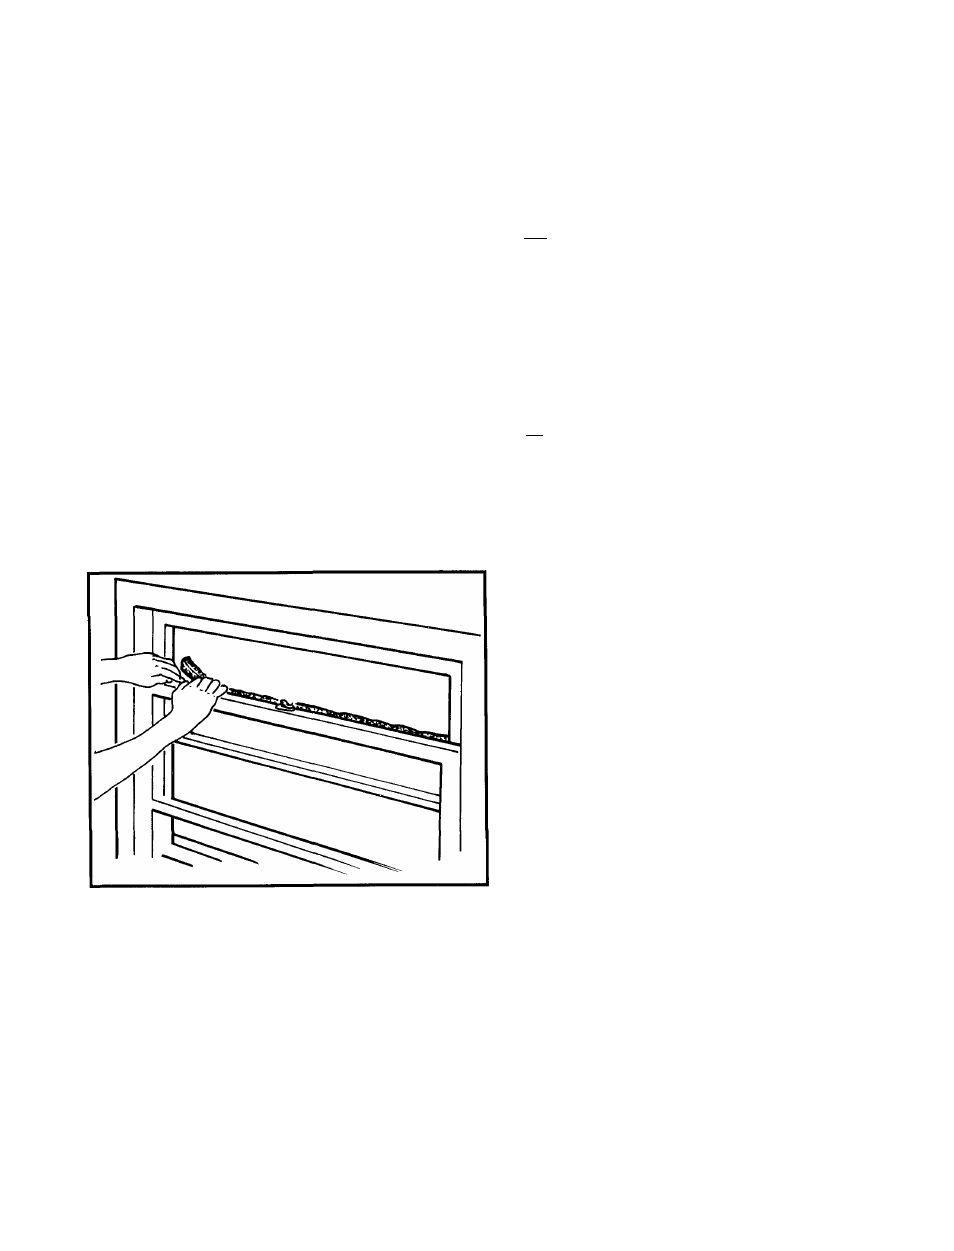
laik Cut foam window seal from unit mounting
accessory kit to fit window width. Insert foam down
between top raised lower sash and glass panes
of upper sash making sure of a firm fit to provide
an air seal. This also prevents insects from gaining
entrance.
Expand accordion folds to meet sides of
installed casing. Screw accordion side panels to
casing sides through pre-made screw openings in
panels. Be sure to use all (three) screw openings S
to prevent air seepage.
^
fcki With one person on each side, lift chassis
and slide into casing in window. Slide in chassis
all the way.
iksS With chassis back in casing, slide security
screw to locked position and tighten. Refer to
Step #6. *5
■kk: Replace grille frame on front of unit and fasten
securing screw removed in Step #5.
Replace grille insert removed in step #4.
Plug in unit, slide excess cord into cord storage
opening.
*5 Unit is designed with power cord extending from right side.
Should socket be located on leftside, unit can be modified for
leftside power cord exit. Remove front grille by grasping top
and bottom of insert and pulling forward. Remove grille frame
by unscrewing screw in frame. Redirect power cord to exit at
bottom left corner. Use pliers to snap out indicated plas^c
area on lower left side of front grille frame. Replace grille
frame and insert.
11