Electric trolling motor mounting – Vexilar FL-22 User Manual
Page 38
38
Electric Trolling Motor Mounting
There are two main styles of trolling motors: manual steer and electric steer. The proper
mounting method depends on the style of trolling motor.
m
oUntinG
to
e
LeCtriC
S
teer
m
otorS
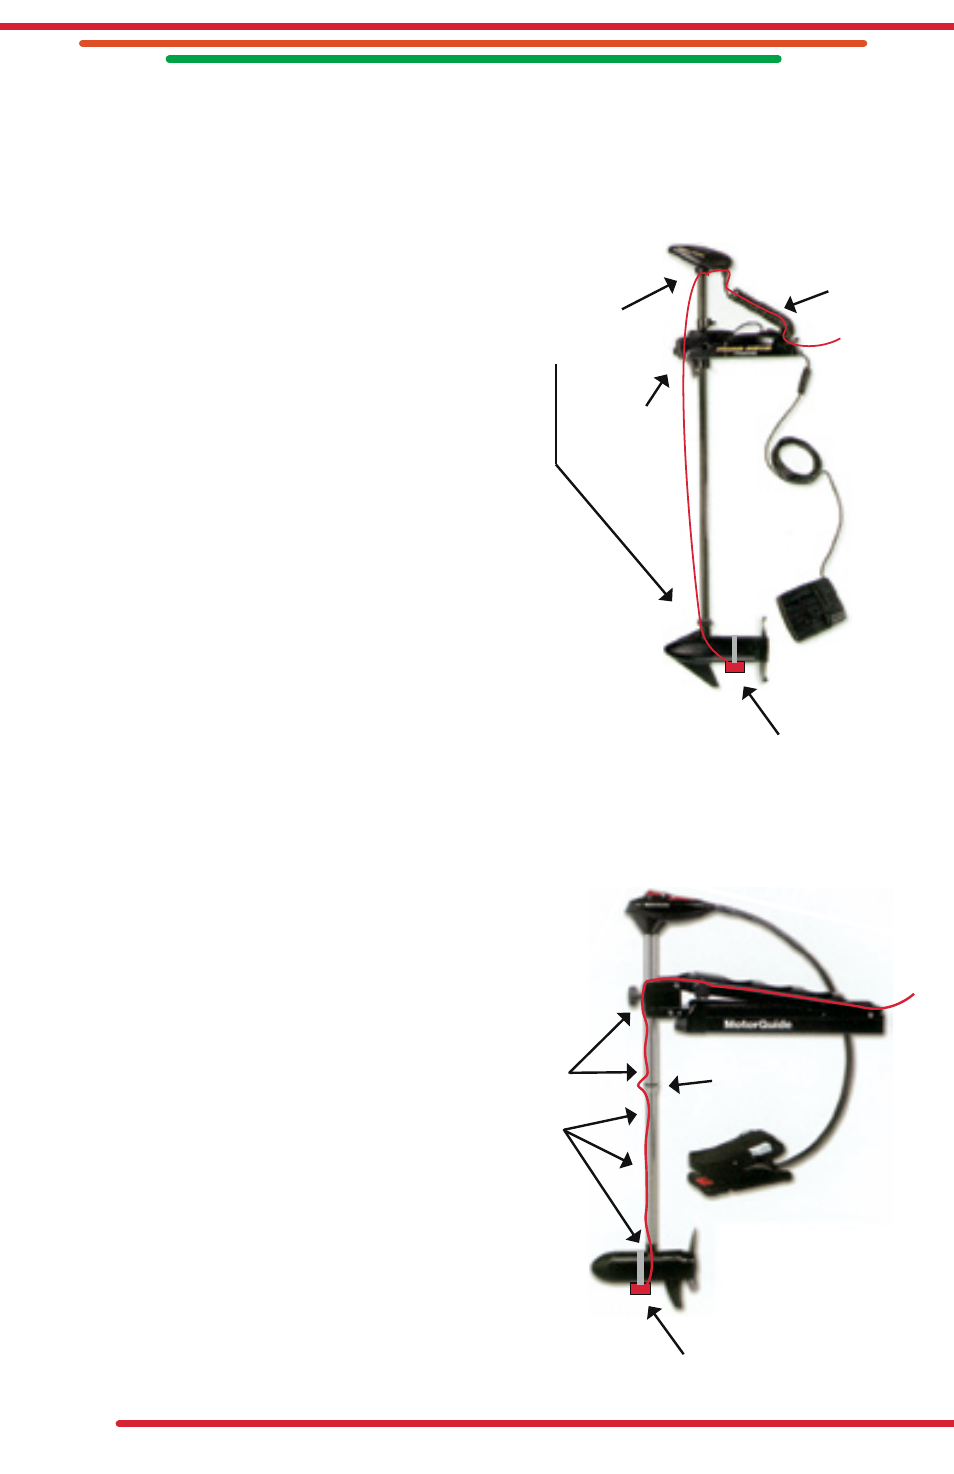
1. Position the transducer on the bottom side of
the motor housing as close to the center of
the steering rotation as possible.
2. Attach the transducer to the motor using the
supplied cable tie.
3. Secure the cable to the lower-most part of
the vertical motor shaft.
4. Run the cable through the carry handle
on the motor’s steering drive motor. (If your
motor does not have this, you’ll need to come
up with an “eye” to keep the cable in place as
you stow and deploy the motor)
5. Secure the cable near the motor’s head at the top of
the vertical shaft.
6. Route the cable down through the “coil cord” and out to
your flasher’s mounting location.
7. Stow and deploy the motor to insure the cable can move freely
with the motor and that it cannot get pinched in any of the motor workings.
m
oUntinG
to
m
anUaL
S
teer
m
otorS
1. Position the transducer on the bottom side of the
motor housing as close to the center of the steering
rotation as possible.
2. Attach the transducer to the motor using the
supplied cable tie.
3. Secure the cable to the lower-most part of the
vertical motor shaft.
4. Route the cable up the shaft, securing it
every 3 or 4 inches using cable ties or
electrical tape. Be sure to leave a loop near
the section where the two vertical shafts meet
to allow for motor rotation.
5. Route along the motor’s mounting bracket and
out to your flasher’s mounting location.
6. Stow and deploy the motor to insure the cable
can move freely with the motor and that it cannot
get pinched in any of the motor workings.
Transducer
Secure
Cable
Route
Through
Handle
Route
Through
Cord
Transducer
Secure
Cable
Leave
Loop