Vexilar Transom Mount Transducer User Manual
Transom mount transducer instructions
9/9/12
Vexilar Transom Mount Transducer Instructions
1/2
vexilar.com/pages/support/instructions/instructions_transom.php
Transom Mount Transducer Instructions
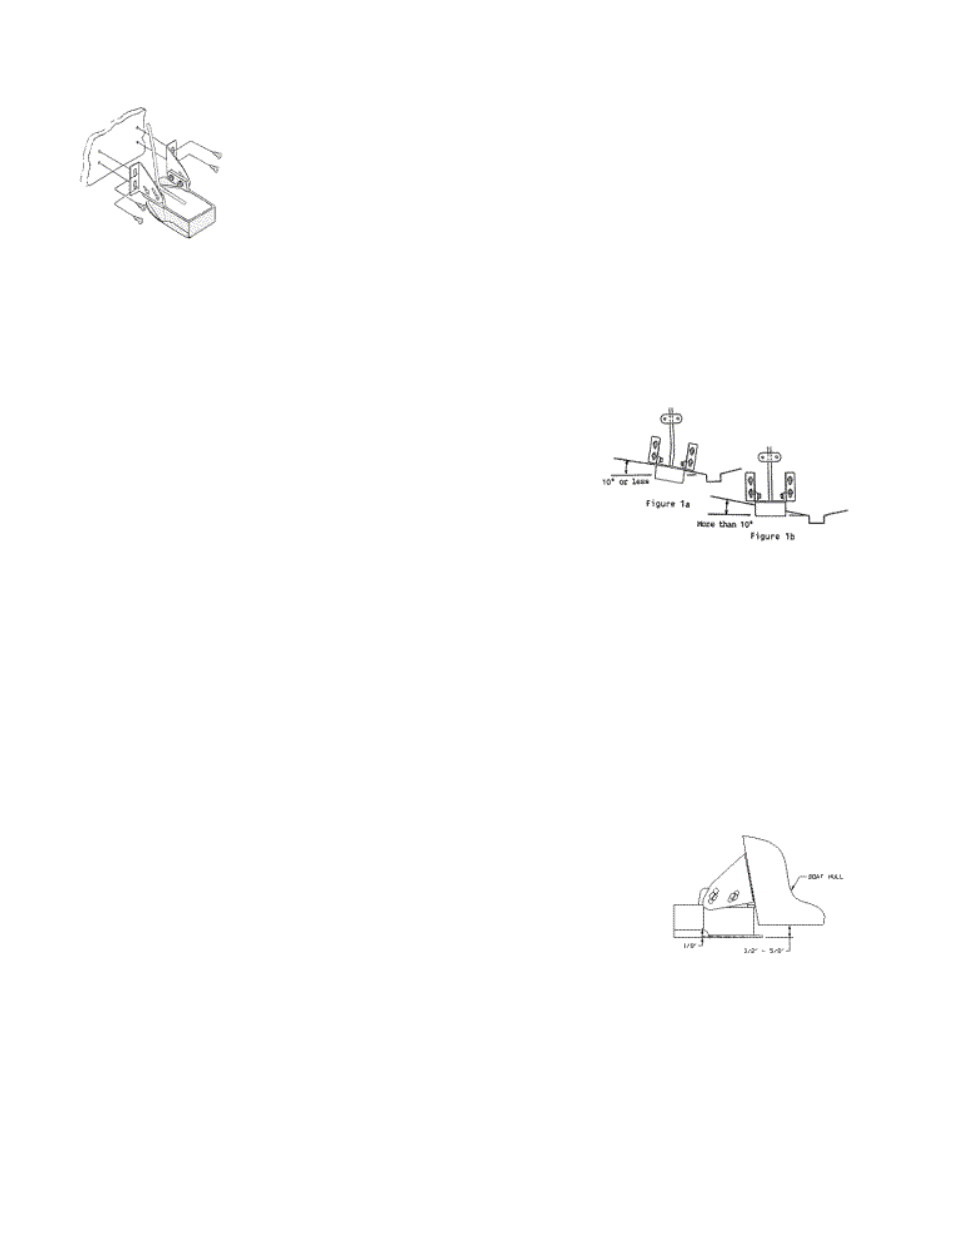
To get a true vertical depth reading, the transducer
should be mounted parallel to the water line. A 10 degree
variation is acceptable. If the hull is reasonably flat with a
dead rise of 10 degree or less, mount as shown in Figure
1a. If dead rise is greater than 10 degree, mount as
shown in Figure 1b.
1. Assemble the stainless steel brackets to the transducer using the
hardware furnished. Do not tighten until final adjustments are made.
2. Place assembly on transom at selected
location with the front of the transducer
extending 1/2" to 5/8" below the bottom of
the boat and with the front part against the
transom. The least amount that the
transducer extends below the bottom is
desired. If too low, spray and turbulence will
occur.
3. With transducer in place, mark location of slotted holes in brackets.
4. Drill in center of slot outline with a 9/64" (3.5mm) drill, 3/4" (19mm)
deep.
5. Fasten the transducer to the transom using the #10 x 3/4" screws.
6. Before final tightening the 4 screws holding the brackets to the
transducer, tip the rear edge down approximately 1/8" as shown.
7. Tighten all screws. CAUTION. DO NOT use any
thread locking compound on the screws. Most
products such as LOCTITE contain chemicals that
attack and weaken plastics. IMPORTANT. There
should be no gap between the brackets and the
transducer. A wide space between these parts will
cause stress on the transducer mounting ears and result in breakage
with time.
8. In running the cable to the sounder, avoid proximity to other wiring on
the boat, particularly ignition and alternator cables. They can be a
source of noise on the sounder display.