Vexilar P-100 User Manual
P-100 carrying case assembly instructions
9/9/12
Vexilar P-‐‑100 Carrying Case Assembly Instructions
1/2
vexilar.com/pages/support/instructions/instructions_p-‐‑100.php
P-100 Carrying Case Assembly Instructions
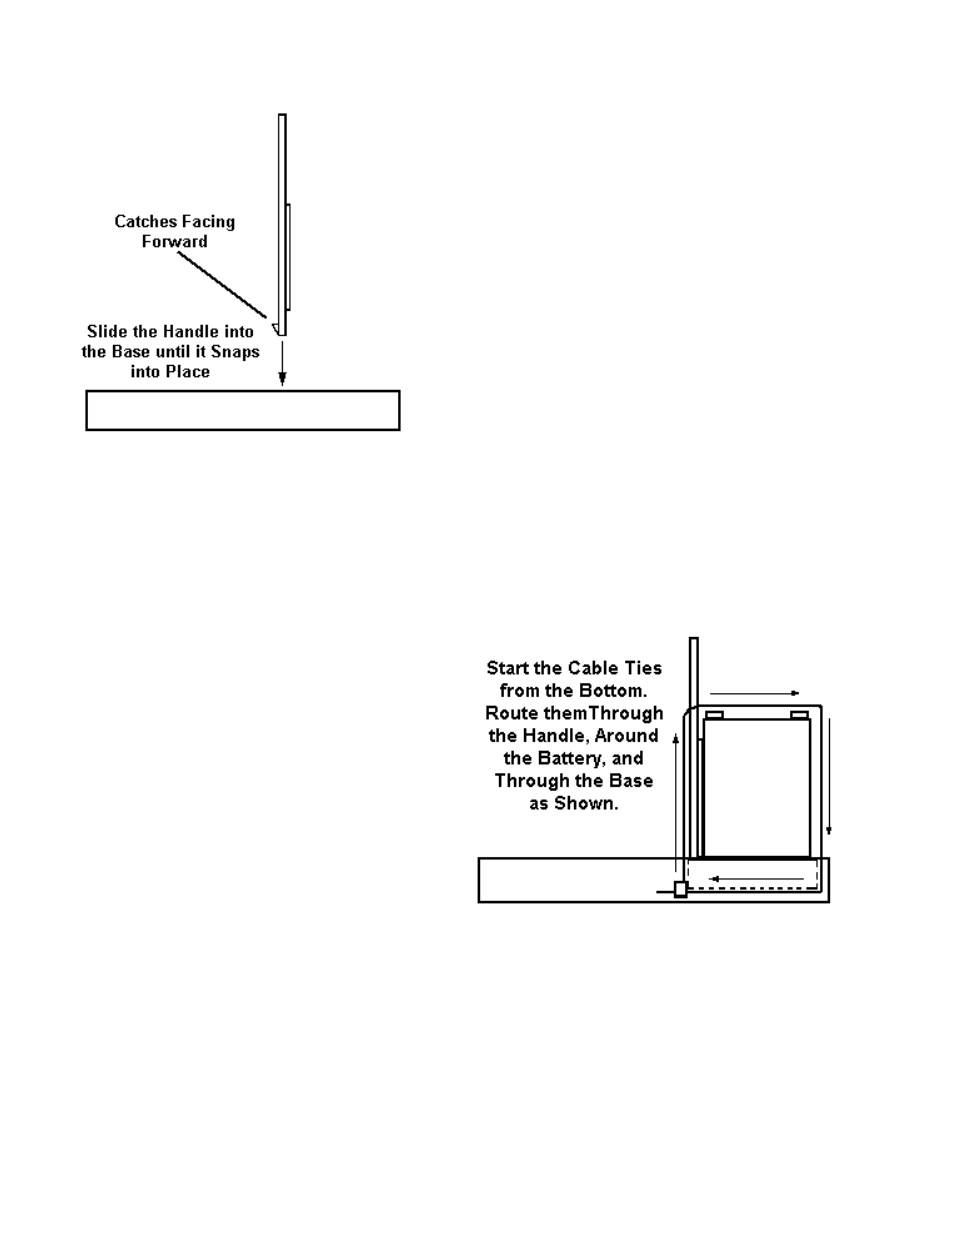
Locate the base section and set it down
on a sturdy surface with the flat side up.
Now, locate the handle section and insert
it into the base as shown. Slide the
handle down into the base until it snaps
into place.
Locate the rubber transducer holder and
insert it into the large hole in the base.
Start at one side and work it around so
the groove in the holder fits over the
plastic edge of the hole.
Set your battery into the battery tray in
the base. The tray is made to fit a
standard size, sealed lead acid or gel
cell, battery. Locate the cable ties. Insert one of them, starting from the
bottom center of the base, up through the rectangular hole, then through
the rectangular hole in the handle. Now, go over the top of the battery,
down through the remaining hole in the base, and into the head of the
cable tie. Do the same with the other tie. Using a pair of pliers, pull the
ends of the ties until they are tight. The battery should not move around
at all.
If your mounting a Vexilar FL series
depth finder, you can use the
provided plastic fasteners to attach it
to the base. Simply push the
fasteners down through the bracket
and into the base. They will snap
into place.
Push-on terminals are also provided
to connect the units power cord to
the battery. Cut the cord to the
proper length and crimp the
terminals onto the power cord.
Route the wires through one of the
round holes in the handle. Push the terminals onto the battery posts. Make
sure you connect with the proper polarity.
Tip - You can wrap the extra transducer cable around the units mounting
bracket and the carry case handle.