Cleaning and inspecting the pump heads – VACUUBRAND MV 10 User Manual
Page 38
page 38 of 51
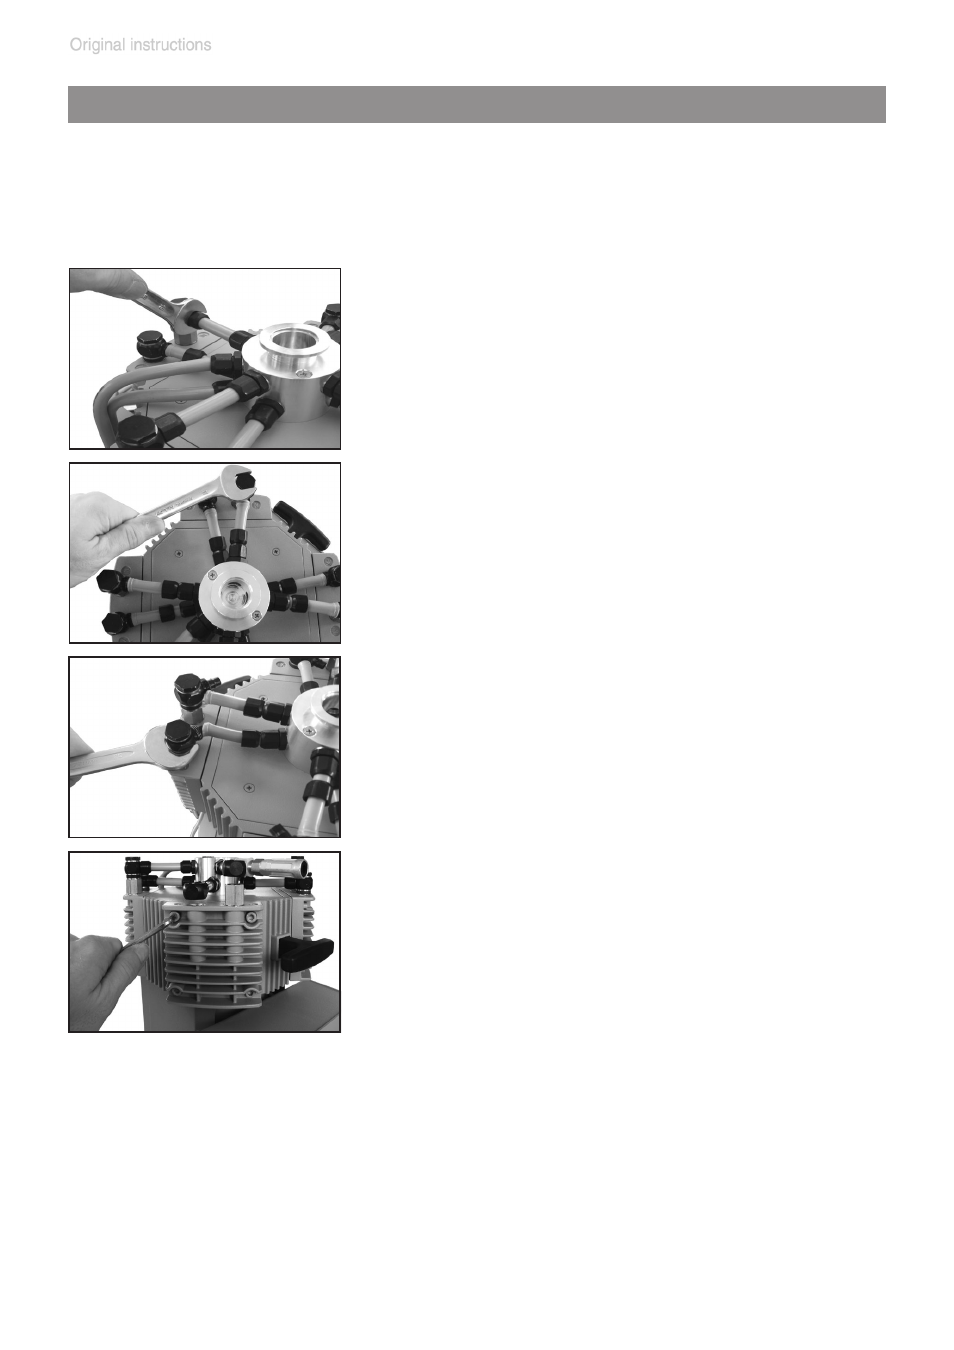
Cleaning and inspecting the pump heads
➨
Loosen the union nuts (N) of the hose con-
nections at the pump heads with an open-
ended wrench (w/f 15).
➨
Loosen the fittings (Q) at the pump heads
with an open-ended wrench (w/f 17).
➨
Turn the fittings (Q) with an open-ended
wrench (w/f 20) to detach the hoses from
the pump heads.
+
Pull off the one curved connecting hose (R)
at the outlet side of the pump (only MD 12 /
MV 10) directly at the pump head.
➨
Disassemble the housing cover (A) to check
the valves (C).
➨
Unscrew four Allen screws with a 5mm wide
Allen key. Remove the housing cover (A) to-
gether with head cover (D), valves (C) and
O-rings (B, only MD 8 / MD 12 / MV 10).
+
Never use a pointed or sharp-edged tool to remove parts (e.g., screw-
driver). We recommend to use a rubber mallet or compressed air (to
be blown carefully into port).
➨
Remove the head cover (D) carefully from the housing cover (A). Note
position and alignment of valves (C). Remove the valves.
+
Replace valves or O-rings if necessary.
+
Use petroleum ether or other industrial solvent to remove deposits. Do
not inhale vapors.
+
Service only one side of the pump at a time to avoid the mixing of
parts.
➨
In case, position the pump on edge (place pump onto inlet distributor
or outlet distributor respectively). Support the pump appropriately.