Top Flite TOPQ8413 User Manual
Page 3
sidewall to the floor at this time. Once the rear wall has been glued in
place to each sidewall, then you can wick some thin CA under the
bottom of the sidewalls, which will attach the floor to the sidewalls.
❏
10. Install the right sidewall in the same manner that you installed
the left sidewall in step 9.
❏
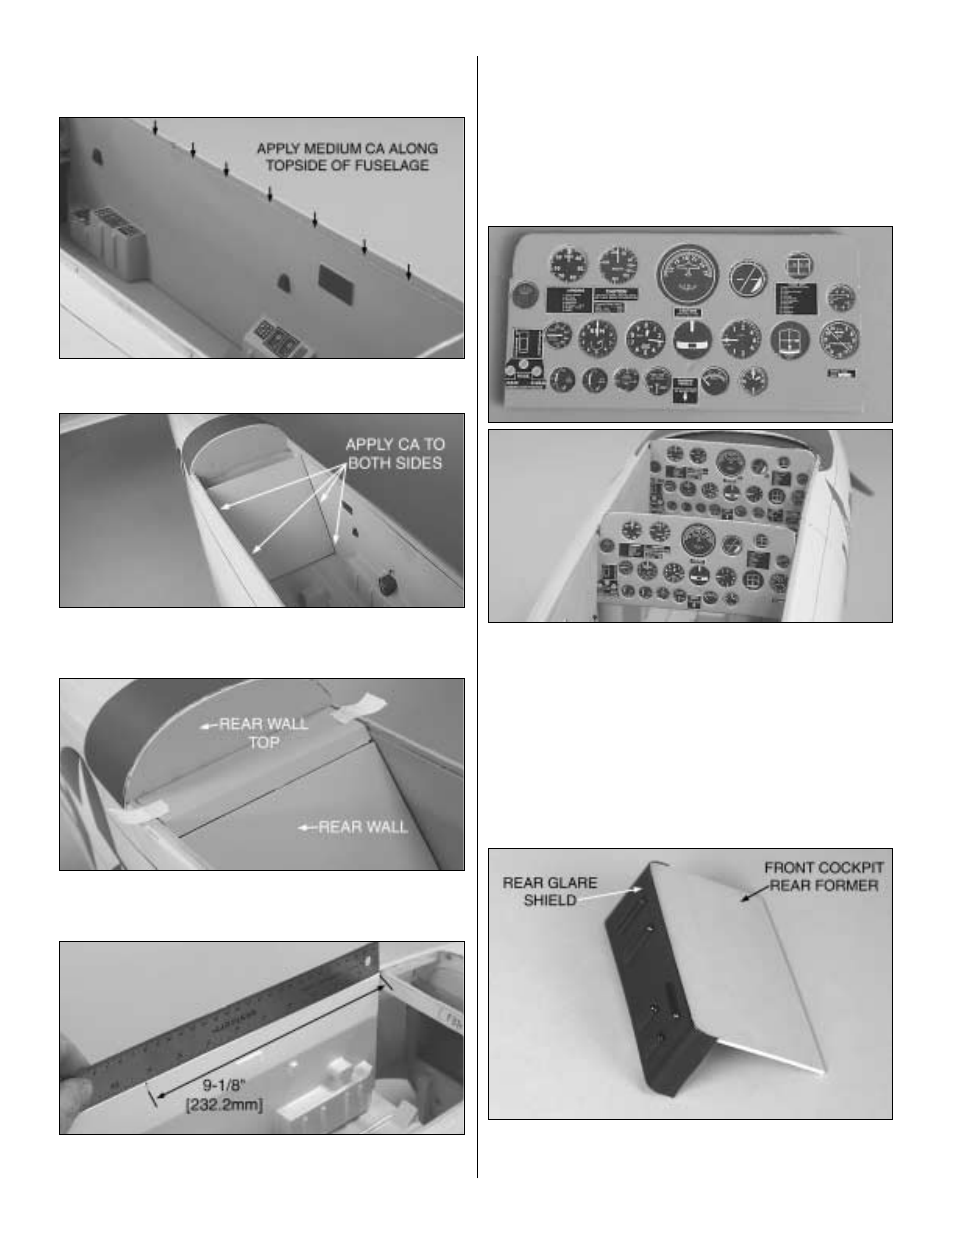
11. Located at the rear of the sidewalls are two angled rails. These
are the gluing surfaces for the rear wall. Apply a bead of medium CA
to each rail and install the rear wall.
❏
12. Use two pieces of masking tape to set the rear wall top into
position. Use thin CA to glue the rear wall top to the sides of the
fuselage, and to the top of the rear wall.
❏
13. After you have finished applying the gauges to the rear
instrument panel, attach a leftover piece of balsa (not included) across
the back of the instrument panel for strength. Make a mark 9-1/8"
[232.2mm] from former F3 on both sides of the fuselage. This will be
the location of the rear instrument panel.
❏
14. Trim the rear instrument panel to the shape shown in the above
photo. Install the rear instrument panel at the marks you made in step
13. Place the rear glare shield on top of the rear instrument panel to
determine how much of the top is raised above the fuselage sides.
Once the instrument panel is in place, remove the glare shield and
glue the rear instrument panel in position.
❏
15. Before installing the rear former of the front cockpit, glue the
rear glare shield to the former. This will make it easier to determine
where the former should go.
3