Toa C-BC850U User Manual
Page 5
5
Camera
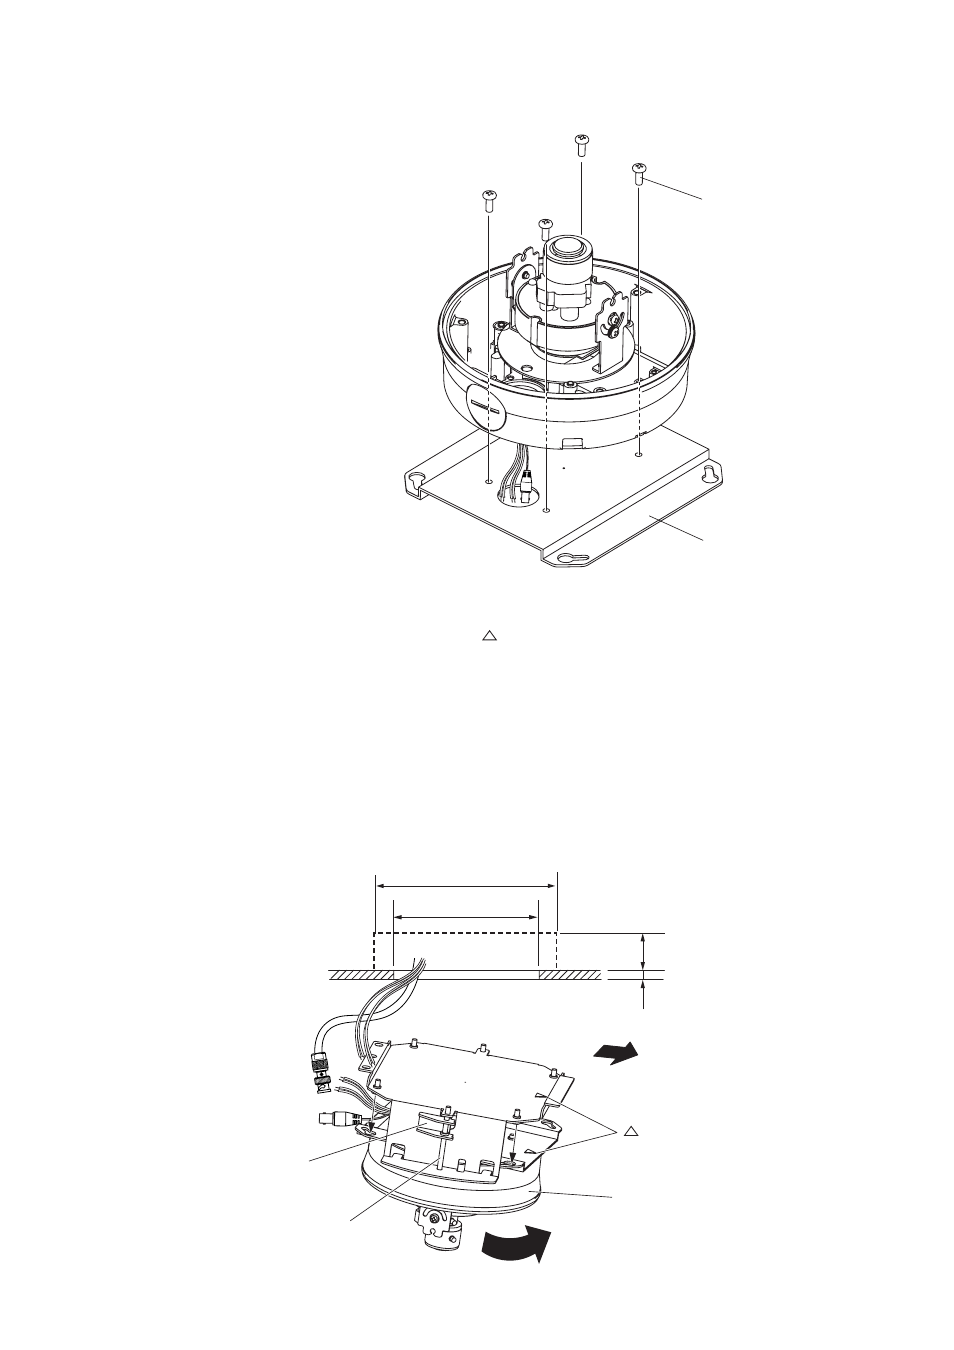
mounting bracket
Camera mounting screw
M4 x 10 (accessory)
100 mm
25 mm or less
Camera unit
To desired direction
mark
Ceiling clamp plate
Bracket fixing screw
ø250 mm
ø200 mm
3. Install the camera to the removed camera mounting bracket using the supplied M4 x 10 camera mounting
screws.
Note
Water-resistant treatment needs to be
applied for the camera depending on
the installation location. For details,
refer to the instruction manual attached
to the camera.
4. Fix the flush ceiling mounting bracket to the mounting hole.
• When inserting it into the mounting hole, direct the
mark (camera direction mark) on the bracket to the
desired direction.
• After inserting the bracket into the mounting hole, turn 2 bracket fixing screws clockwise with an electric
screwdriver. The ceiling clamp plates are lowered to grip the ceiling.
Note: Confirm that the flush ceiling mounting bracket is securely fixed to the ceiling.
5. Connect the cable pulled out of the ceiling hole to the camera’s cable.