Microphone/instrument input connection, Connection procedure, Lemo 3-pin connector’s pin layout – Toa S-D7300 User Manual
Page 10: Microphone/instrument input, Connection
10
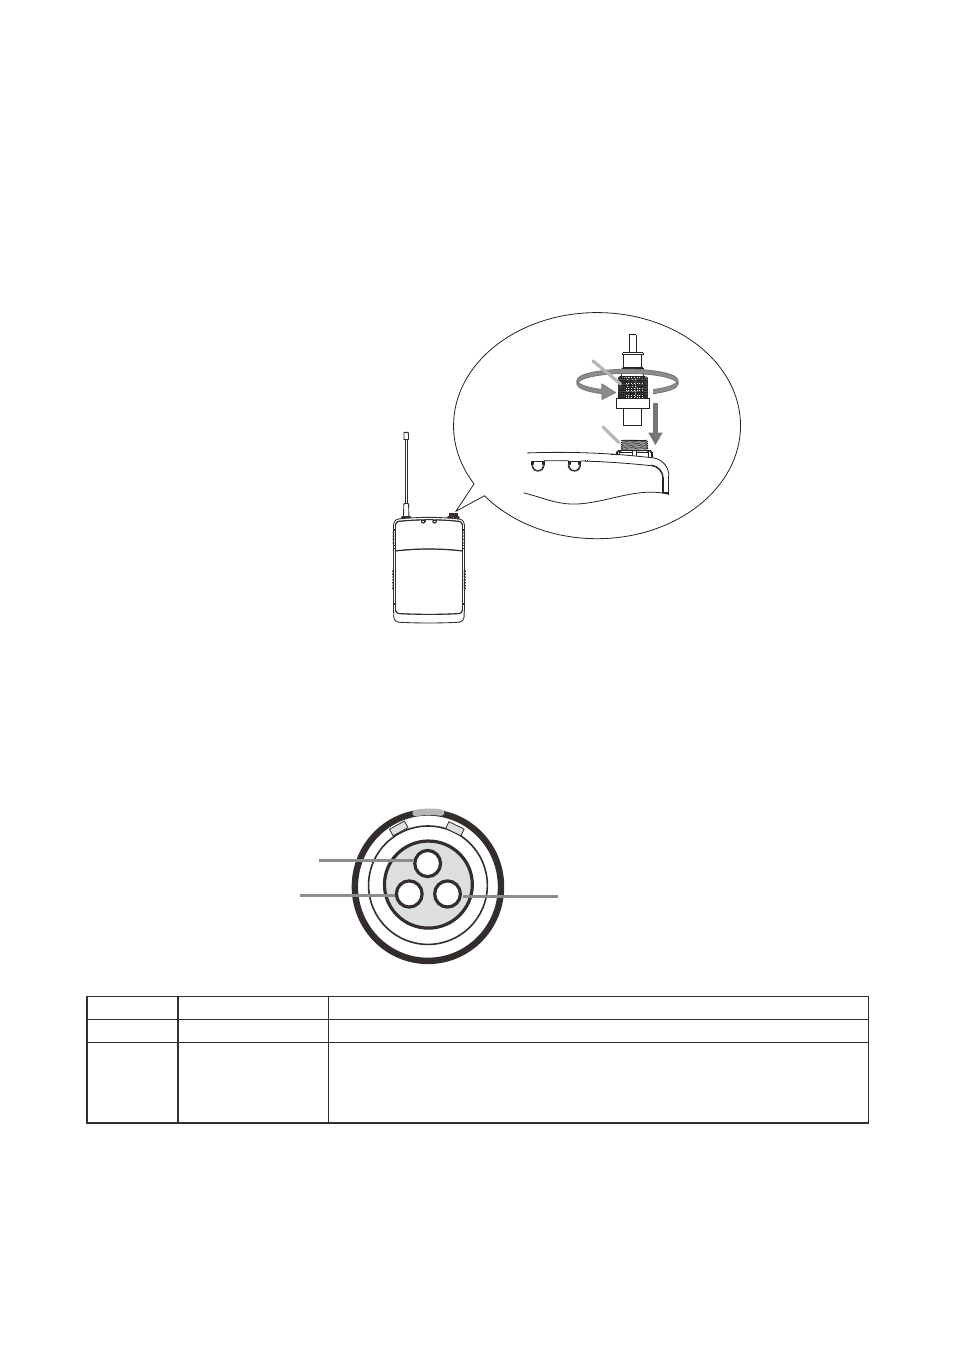
14. mICROPHONE/INSTRUmENT INPUT CONNECTION
The microphone with LEMO 3-pin connector or the LEMO 3-pin connector cable (separately prepare) for
musical instruments can be connected to the Microphone/instrument input.
14.1. Connection Procedure
Step 1. Turn off the unit’s power.
Step 2. Plug the output terminal from the microphone or musical instrument into the Microphone/instrument
input aligning with the input terminal’s slots.
Step 3. Fully screw in the joint knob of the microphone or musical instrument cable.
14.2. lEmO 3-pin Connector’s Pin layout
When connecting the microphone or musical instrument, refer to the data below.
Pin No. 1
GND
Grounded to both the internal signal GND and LEMO Connector's case.
Pin No. 2
+5 V DC
Connect when using a 3-wire microphone.
Pin No. 3
Audio signal input Whether the internal phantom power (+5 VDC) is supplied or not depends
on the Microphone/instrument selector switch position as follows.
• "MIC" position : Supplies the internal phantom power.
• "INST" position : Not supply the internal phantom power.
Pin No. 1
Pin No. 2
Pin No. 3
3
2
Joint knob
Microphone/instrument
input