Tie Down Replacement Brake Shoes User Manual
Page 4
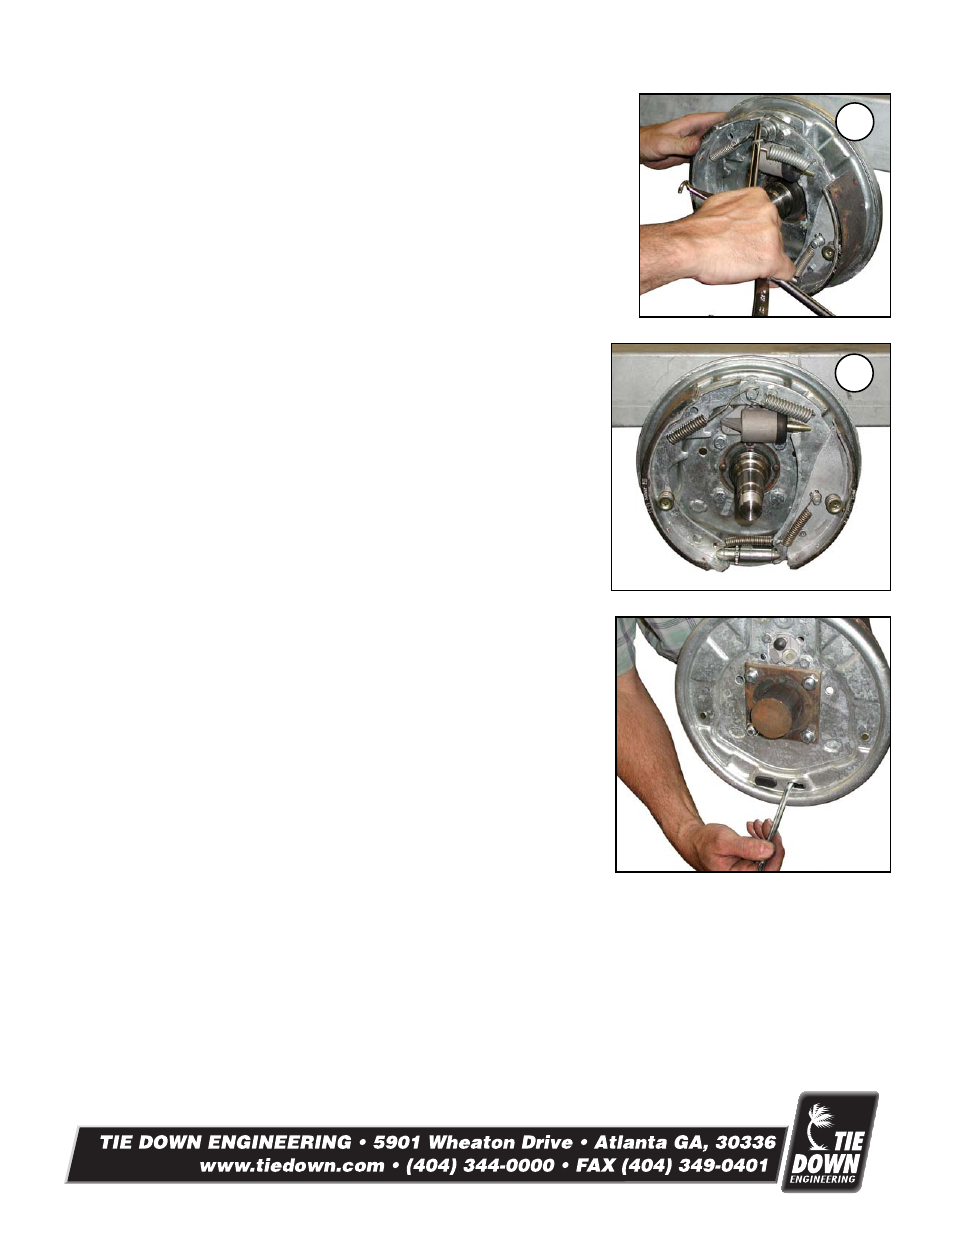
6. Install the new primary return spring with the installation tool.
7. Inspect the assembly to be certain all components are in place. Both shoes should be
firmly seated against the anchor pin, star adjuster ends seated against the shoes, retain-
ing springs and keepers properly installed, etc.
8. Remove the rubber dust plug from the rearmost access hole in the backing plate.
Insert a brake adjusting spoon or flat screw driver in the access hole and TAKE NOTE
which direction the spoon needs to be moved in order to open the star wheel. It is advis-
able to try the star wheel in both directions so that you are familiar with the adjustments
prior to installing the hub and drum.
9. Install brake drum on the spindle and be certain the grease seal is seated
(push hub in place firmly). Install the outer bearing and thrust washer nut locking tab
washer. If applicable, install the castle nut and tighten to approximately 35 ft. lbs. to
seat the bearings while rotating the hub in the direction of forward travel. Important:
Back off the castle nut and then retighten it to ‘HAND TIGHT ONLY’. Bend tab on
locking tab washer or install cotter pin if applicable. Bend one of the retainer tabs
into the adjacent castle nut openings OR install a new cotter pin (if so equipped).
A) Install the dust cap by tapping it squarely with a wooden block and hammer.
B) Install the tire and wheel assembly and tighten the lug nuts to 85-90 foot pounds
of torque.
Brake adjustment
1. With trailer wheel off the ground and tire mounted. Remove the rubber
access hole plugs from the rear of the brake backing plate.
2. Using a brake spoon or flat head screwdriver, tighten the star adjuster while
rotating the wheel in the forward direction. NOTE: Always spin wheel in the forward
direction as if the trailer was traveling forward on the road. Tighten the star adjuster
until the wheel reaches a point where the brake shoes start to engage.
3. Loosen the star adjustor one click at a time while turning the wheel in a forward
rotation. Continue adjusting one click at a time until the wheel rotates with little effort.
4. Replace the rubber access hole plugs.
5. Repeat this procedure for all braking wheels.
Be certain that the trailer is properly supported with adequate capacity support stands and that the opposite tires are blocked to
prevent all movement.
6
7
4