Tie Down Master Cylinder Rebuild Kit for Model 660 Actuators User Manual
Page 2
6. Place one 1/2” flat washer on the dampener rod. Slide the master cylinder into the coupler so that the
dampener rod goes into the hole in the plate. Place another flat washer on the dampener rod. While
holding the dampener rod with a 10mm wrench, add the lock nut and turn the loc nut with a 14mm wrench
until the rod is tight to the coupler plate.
7. Thoroughly clean the underside of the housing where the master cylinder will be attached. Surface must be
smooth and clean for the gasket to seal properly.
8. Coat both sides of the gasket provided with a thin coat of Permatex 51845 or equivalent “gasket sealer”. Be
careful not to apply so much that it will fall into the master cylinder. “More is not better”. Place the gasket on
the master cylinder reservoir.
9. Slide the “new” assembly back into the housing.
10. Insert the new pins/bolts with the zercs lining up the rollers with the holes in the housing.
11. Line up the master cylinder so that you can re-install the top four (4) SS screws into the master cylinder top
plate. Use a Loc-Tite or similar coating to insure the screws stay in place. Torque to 150 INCH lbs.
(not foot lbs, 150 INCH lbs is 12.5 foot lbs)
12. Tighten the jam nuts on the roller pins to a “just snug” position. Pins must be able to rotate.
13. Re-attach the flat spring on the E-stop cable. The “ball” attachment on the cable must be to the inside
of the housing
14. Re-install housing/actuator on trailer tongue if required
15. Re-install brake line to master cylinder
16. Bleed brakes using instructions from brakes or actuator.
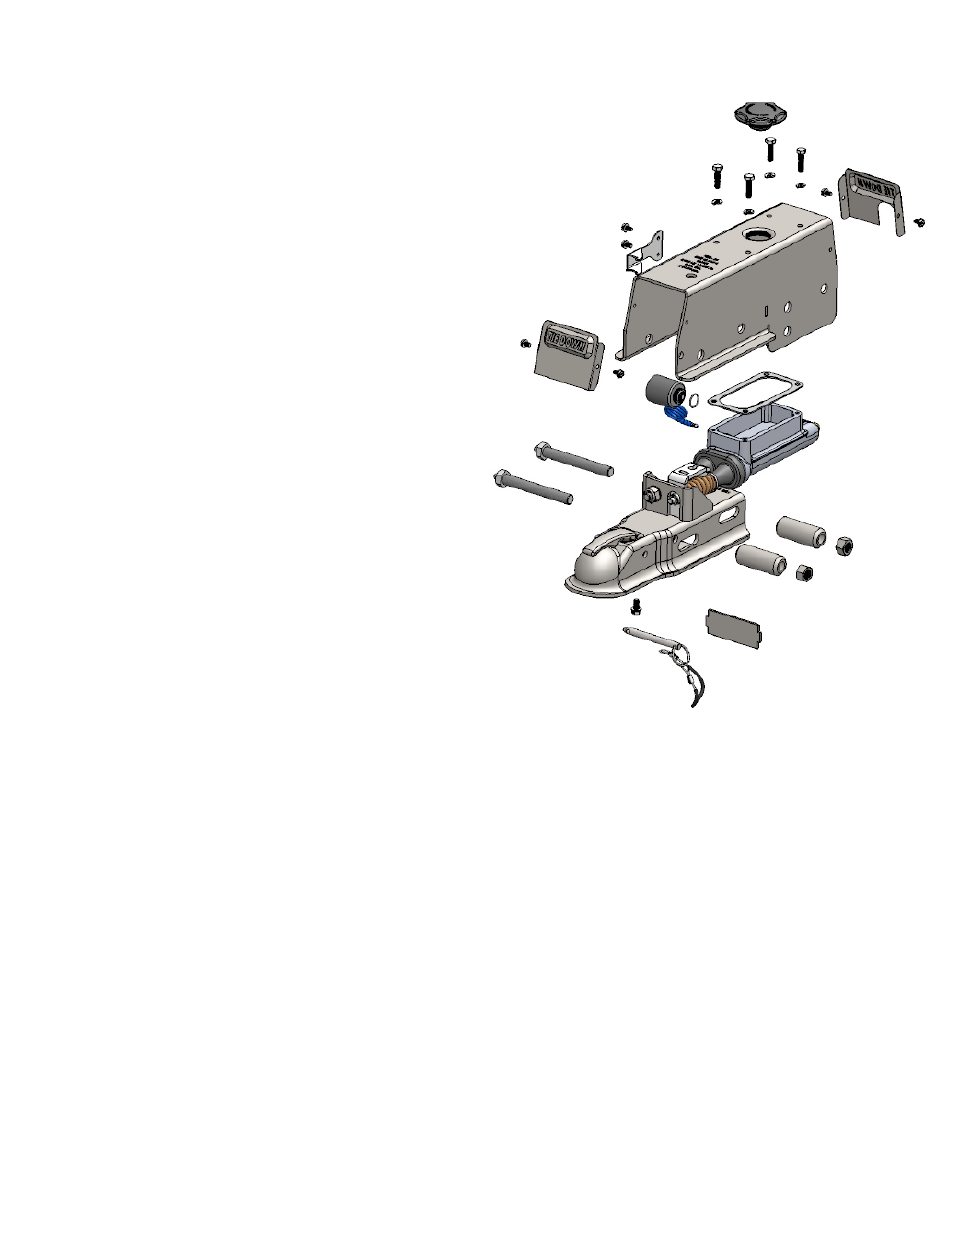
Installing New Master Cylinder:
1. Now would be a good time to clean the coupler and the
actuator housing of road grime and dirt.
2. Your kit contains parts to replace the gasket, rollers,
pins/bolts and the top SS screws. Do not reuse old parts
where new parts are available in the kit.
3. If your old master cylinder has a disc brake solenoid you
need to remove and reinstall on your new master cylinder.
4. Insert the new rollers into the coupler body. This must
be done before reassembly of the master
cylinder to the coupler.
5. Re-connect the emergency cable to the
“L” bracket and wrap the steel cable
around the master cylinder at the top.