Tie Down 80 Weld-On Actuators User Manual
Page 2
Washer
Two angle plates set at 90˚ on the
underside of the master cylinder
“Tack” weld
(one on each side)
“Full” weld
(on both sides)
Trailer
Tongue
Washer
Two angle plates set at 90˚ on the
underside of the master cylinder
“Tack” weld
(one on each side)
“Full” weld
(on both sides)
Trailer
Tongue
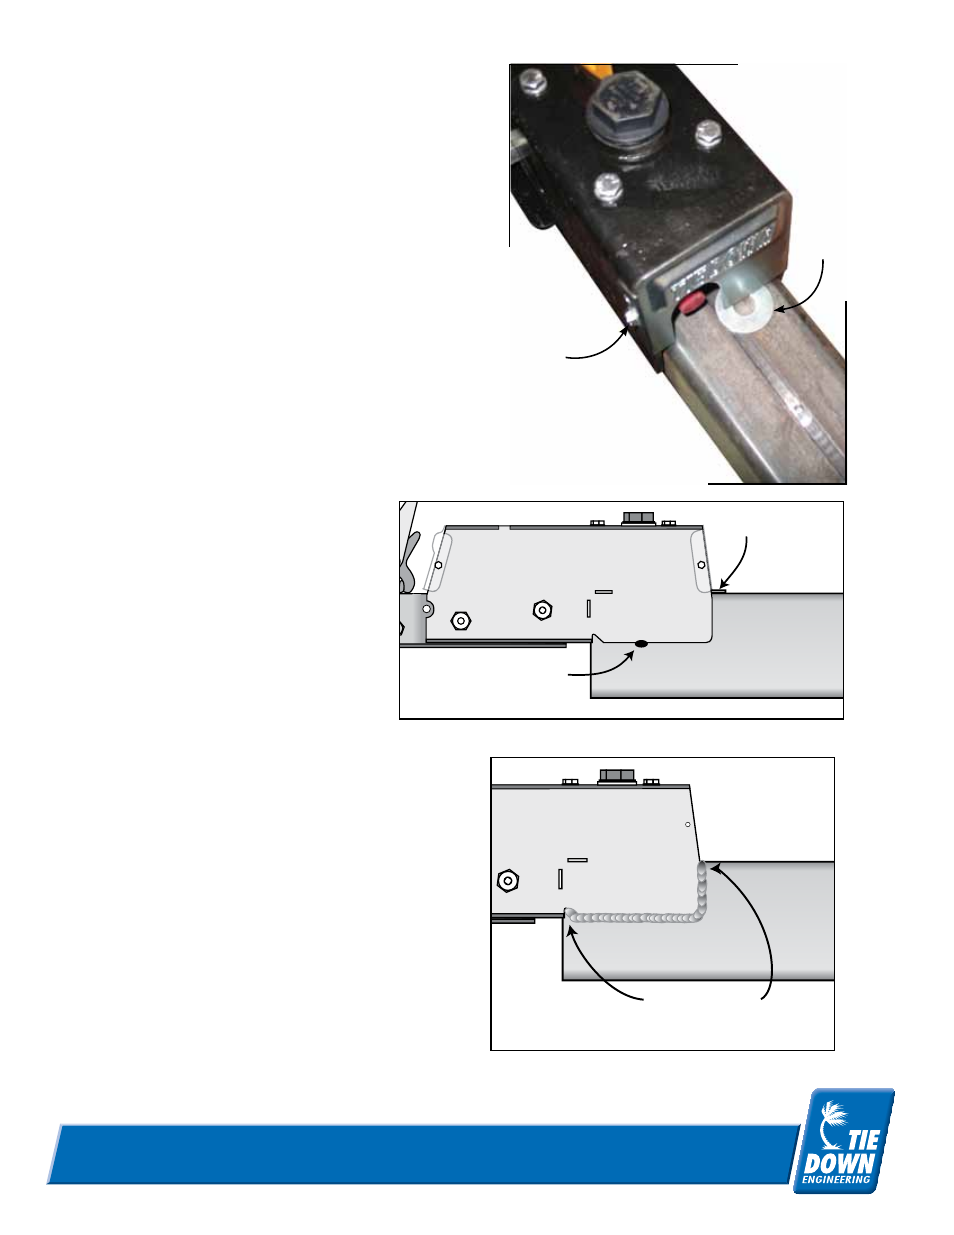
3. Place the supplied flat washer under the rear cover
as shown in pictures 3 & 4. The purpose of the
washer is to level the actuator on the tongue and
elevate the actuator slightly so that it does not rest on
the master cylinder.
4. Tack weld the actuator on both
sides to hole the actuator in place
(picture #4).
5. Remove the rear cover and
the flat washer (picture #3).
6. Weld 1/4” fillet as shown on both sides of the
actuator (Picture #5).
7. replace rear cover
Follow actuator instructions for filling accutator
master cylinder, loading the dampener with brake
fluid and bleeding the brakes.
Picture #3
Picture #4
Picture #5
Washer
Rear Cover
(one screw on
each side)
4 color
TIE DOWN ENGINEERING • 255 Villanova Drive SW • Atlanta, GA 30336
www.tiedown.com (404) 344-0000 Fax (404) 349-0401
TIE DOWN ENGINEERING • 255 Villanova Drive SW • Atlanta, GA 30336
www.tiedown.com (404) 344-0000 Fax (404) 349-0401