Lighting instructions – Sure Heat VMO Vented User Manual
Page 9
LIGHTING INSTRUCTIONS
1.
STOP! Read the safety information label found on the unit.
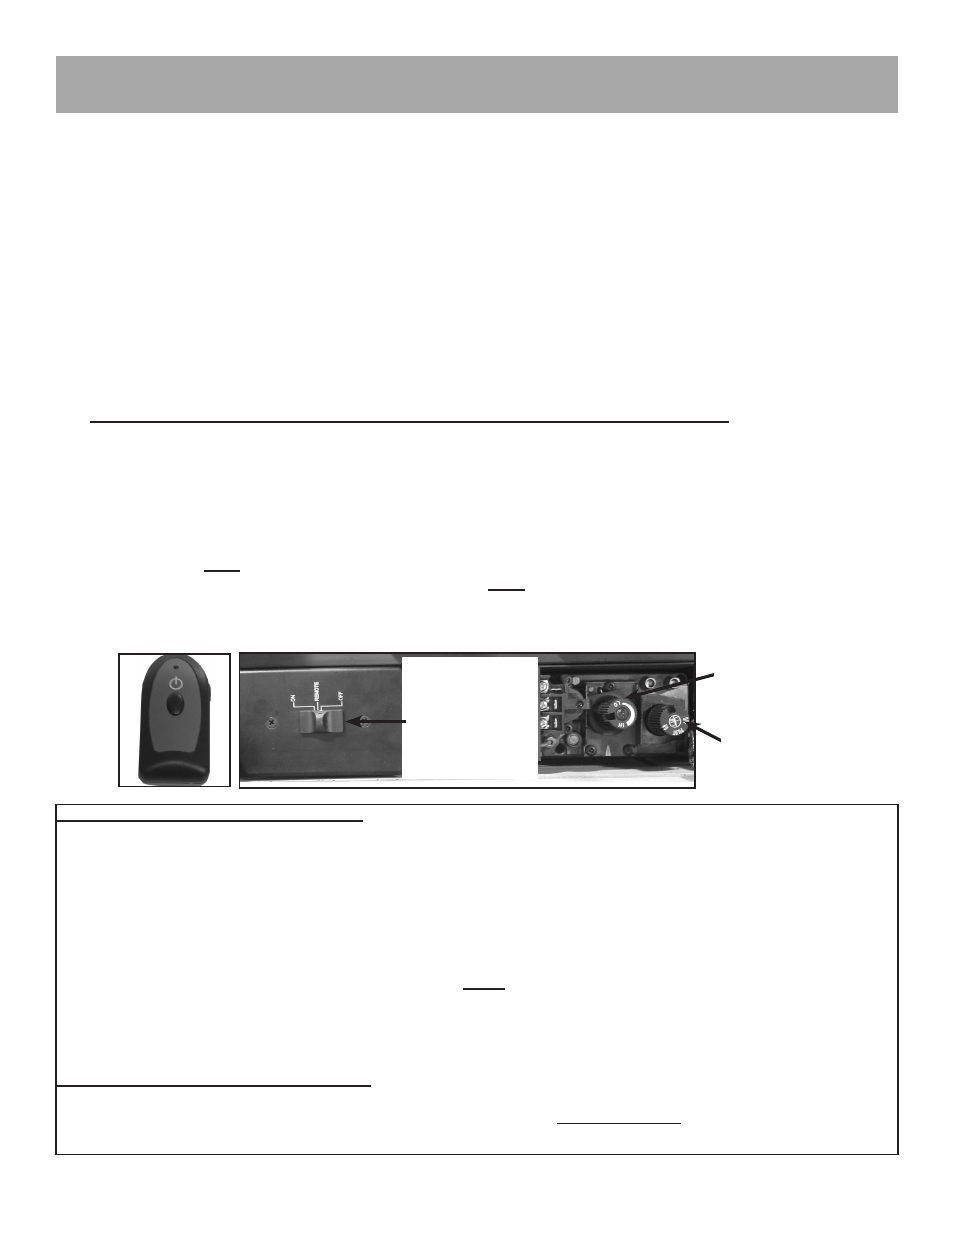
2. Make sure the switch (Not the Pilot Control Knob) is turned to “OFF” (See Figure 4)
3. Turn off all electrical power to the unit.
4. Push in Pilot Control Knob slightly and turn clockwise to “OFF”.
5. Wait five (5) minutes to clear out any gas. Then smell for gas, including near the floor.
• If you smell gas,
STOP! Follow “B” on the Safety Information label.
• If you don’t smell gas continue on to the next step.
6. The pilot is located by the main burner.
7. Push in the Pilot Control Knob slightly and turn counter-clockwise to “Pilot”.
8. Hold the Pilot Control Knob slightly and turn counter-clockwise to “Pilot”.
9. Continue holding the Pilot Control Knob for up to one (1) minute before releasing. The knob will pop back out upon
release. Pilot should remain lit. If it goes out repeat steps 5 through 8.
• If knob does not pop out when released, stop and immediately call your service technician.
• If the pilot will not stay lit after several tries, turn the gas control knob to “OFF” and call your service technician.
10. Push in the Pilot Control Knob and turn counter-clockwise to “ON”.
11.
It will take 2-3 minutes for thermocouple to heat up and flame to appear.
12. This valve is equipped with a HI/LO feature. Set unit to desired flame height. The valve is also equipped with a
safety lockout feature that will prevent the relighting of the pilot after it is extinguished. You must wait one (1) minute
for valve to reset itself before relighting the pilot.
13. Then move switch to remote. You will then be able to switch the unit “ON” or “OFF” using the remote.
14. To operate unit with remote:
a. Make sure switch is turned to “REMOTE”
b. Make sure Pilot Control Knob is switched to “ON”
c. Press button
once to turn unit “ON”. You will hear a soft beep than the flame will appear.
d. To turn the unit “OFF”. Press the button on the remote
once after five (5) seconds the flame will disappear and
the unit will turn off (NOTE: the pilot light will remain on).
Make sure switch
is turned to
“OFF”
when lighting; and
“REMOTE” to use
the remote.
HI/LO
Setting
Pilot Control
Knob
Figure 4
MATCH LIGHTING INSTRUCTIONS
If the pilot cannot be ignited with the piezo, it can be manually lit with a match. Follow steps 2 through 8 in the above
Lighting Instructions then:
• Push the Pilot Control Knob in fully and hold it in.
• Immediately light the pilot with a match. Continue to hold the Pilot Control Knob in for about one (1) minute.
• After one (1) minute, release the knob and it will pop back out. The pilot should remain lit. If it goes out, repeat
steps 2 through 8.
• If the control knob does not pop out when release,
STOP and immediately call your service technician
or gas supplier.
• If the pilot will not stay lit after several tries, turn the Pilot Control Knob clockwise to “OFF” and call your service
technician or gas supplier.
TO TURN GAS OFF TO APPLIANCE
1. Turn the switch to “OFF”
2. Push in the Pilot Control Knob slightly and turn clockwise to “OFF”.
DO NOT FORCE.
Page 9