Slant/Fin EC-10 Assembly Instructions User Manual
Page 10
10
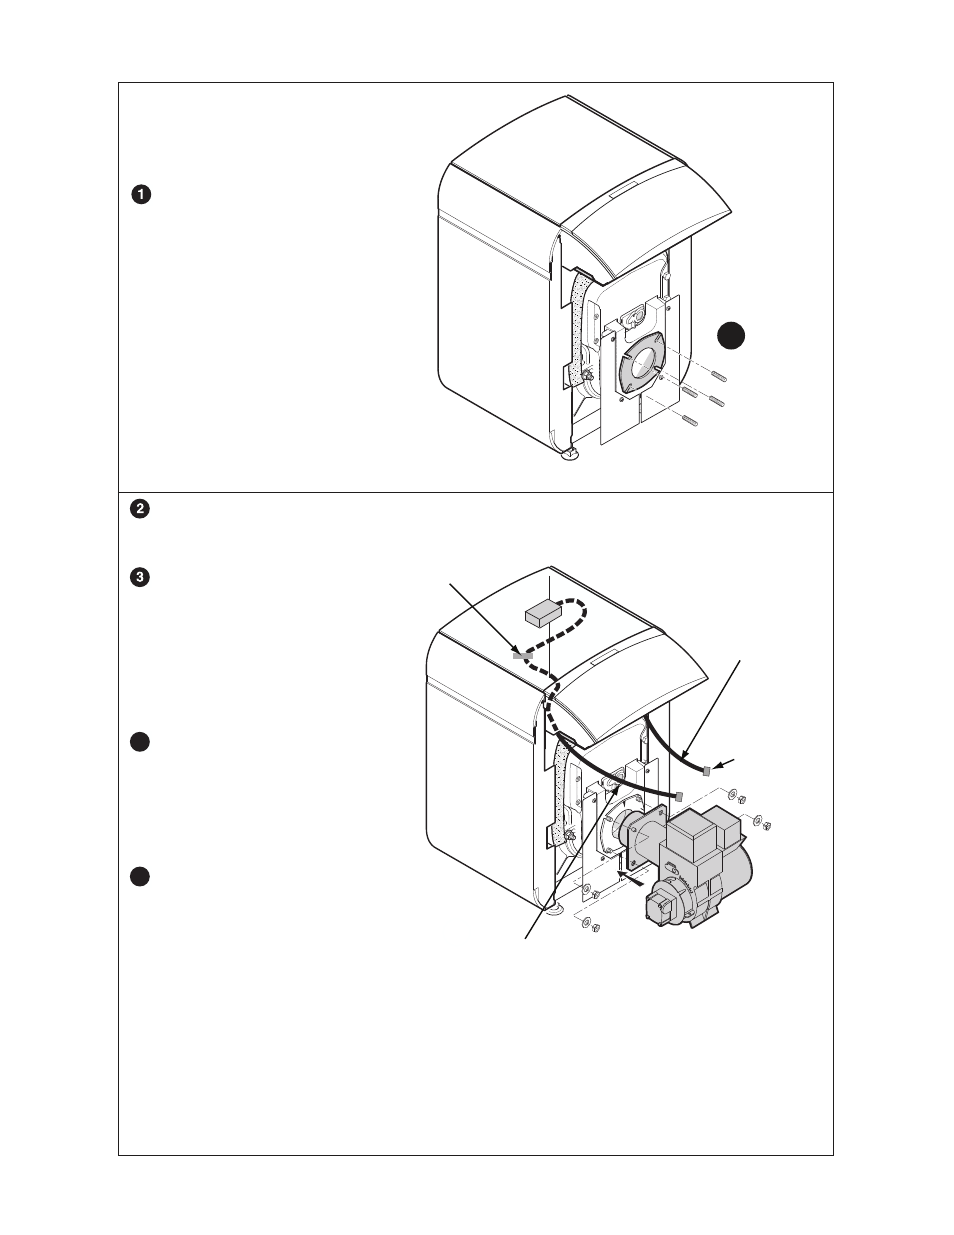
Push the burner into the burner
door until it will not go any further.
Fix the burner using four washers
and hex nuts, supplied.
Note:
After the installation has been
connected and filled with water, start
the burner into service following the
instructions supplied with it.
Connect the connector into the
burner connector after having secured
the burner.
Adjust the cable length so that the bur-
ner cable has to be disconnected to
open the burner door.
Fix the cable in position using the
cable clamp and the 2 ø 3.5 x 25
screws.Slide the surplus cable back-
wards between the insulation and the
side panel. Secure cable clamp after
slack is removed from cable to make
sure cable will disconnect when burner
door is opened.
- Replace the burner cover.
4
Assembling the burner
14
8575N
239B
1
Fix the gasket with the flange on the burner
door using four 3/8”–16 studs, supplied.
(screw shorter length of metric thread into
burner door.)
To be plugged
into molex plug
on burner.
Cable routine must come
from left side for right hand
hinge (factory equipped).
5
If hinged door is changed
to left side, cable routing
must be moved to the right.
Cable clamp.