Assembly instructions – Seville Classics UHD20246B User Manual
Page 5
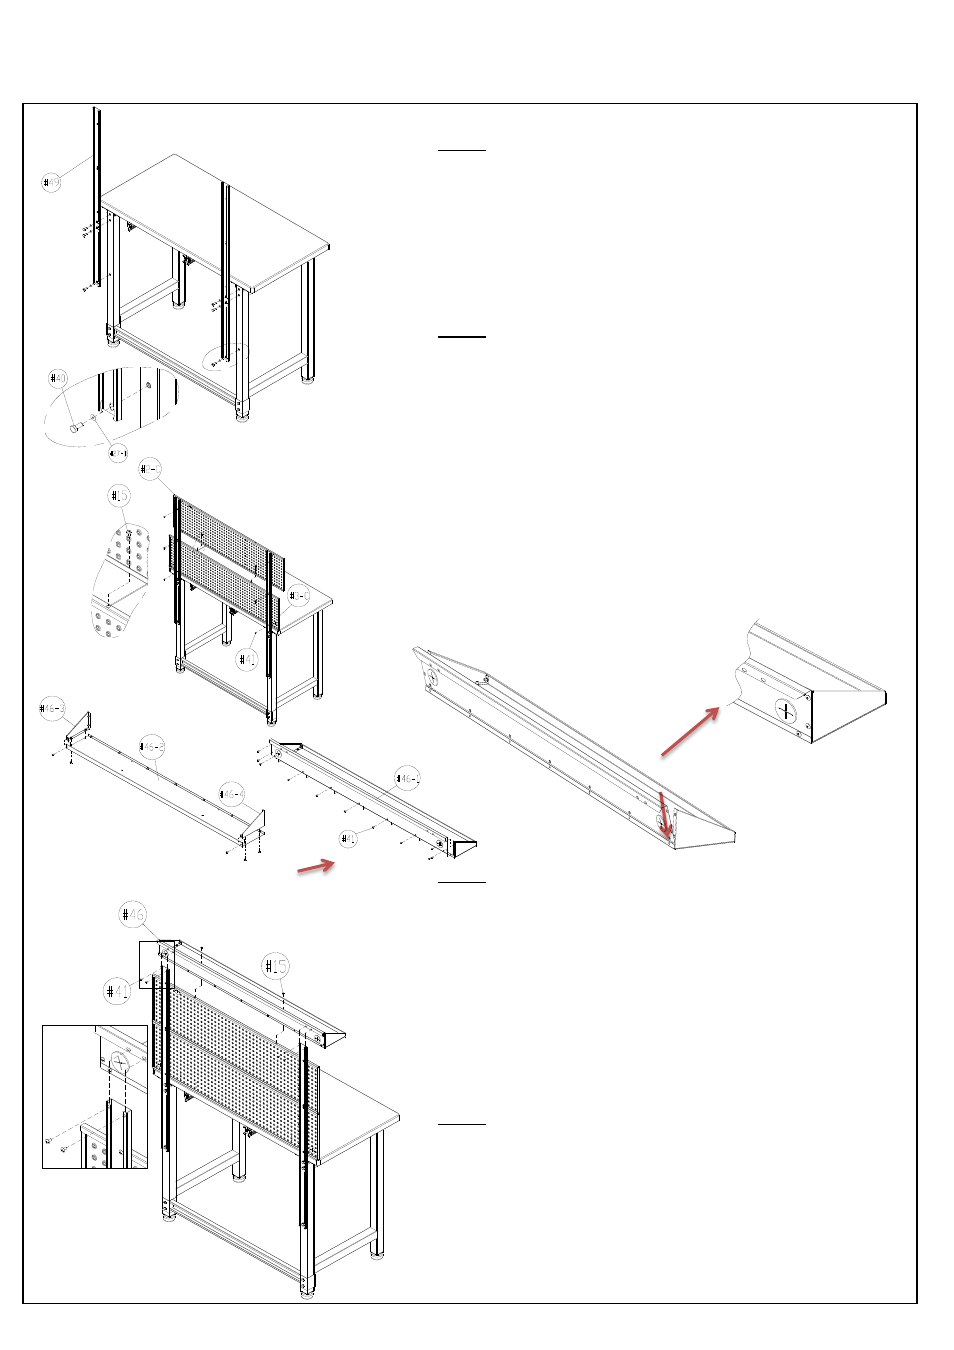
Step 4.
Step 5.
Step 6. Install (#46) Top Cantilever Shelf .
Step 7. Install Assembled (#46) Top Cantilever Shelf to
workbench.
Attach assembled (#46) Top Cantilever Shelf to (#2-C) Top
Pegboard Panel and (#49) Pegboard Long Support Bars, line up
the screw holes, use (#41) Screw F to tighten.
NOTE: Do not fully tighten the screws. This will help you make
any adjustments for alignment later.
ASSEMBLY INSTRUCTIONS
(pg 4 of 8)
*NOTE: We recommend TWO people to assemble the workbench.
A). Attach the (#46-3) Top Cantilever Shelf Left Panel and the
(#46-4) Top Cantilever Shelf Right Panel to (#46-2) Top Cantilever
Shelf Base Panel. Use (#41) F screws to tighten.
NOTE: Do not fully tighten the screws. This will help you make
any adjustments for alignment later.
B). Make sure to slide the back panel underneath the edge of
(#46-2) Top Cantilever Shelf Base Panel. Use (#41) F screws to
tighten.
Install (#49) Pegboard Long Support Bar.
Attach (#49) Pegboard Long Support Bar to the back of the
workbench, line up the screw holes, use (#40) Screw E with (#27-
B) Washer to tighten.
NOTE: Do not fully tighten the screws. This will help you make
any adjustments to alignment later.
Install (#3-C) Bottom Pegboard Panel and (#2-C) Top
Pegboard Panel.
Attach (#3-C) Bottom Pegboard Panel along the back top edge of
workbench and against (#49) Pegboard Long Support Bar, line
up the screw holes, use (#41) Screw F and (#21) Screwdriver to
tighten.
NOTE: Do not fully tighten the screws. This will help you make
any adjustments to alignment later.
Attach (#2-C) Top Pegboard Panel to the top of (#3-C) Bottom
Pegboard Panel and (#49) Pegboard Long Support Bar, line up
the screw holes, use (#41) Screw F and (#21) Screwdriver to
tighten.
A
B