Assembly instructions – Seville Classics UHD20246B User Manual
Page 4
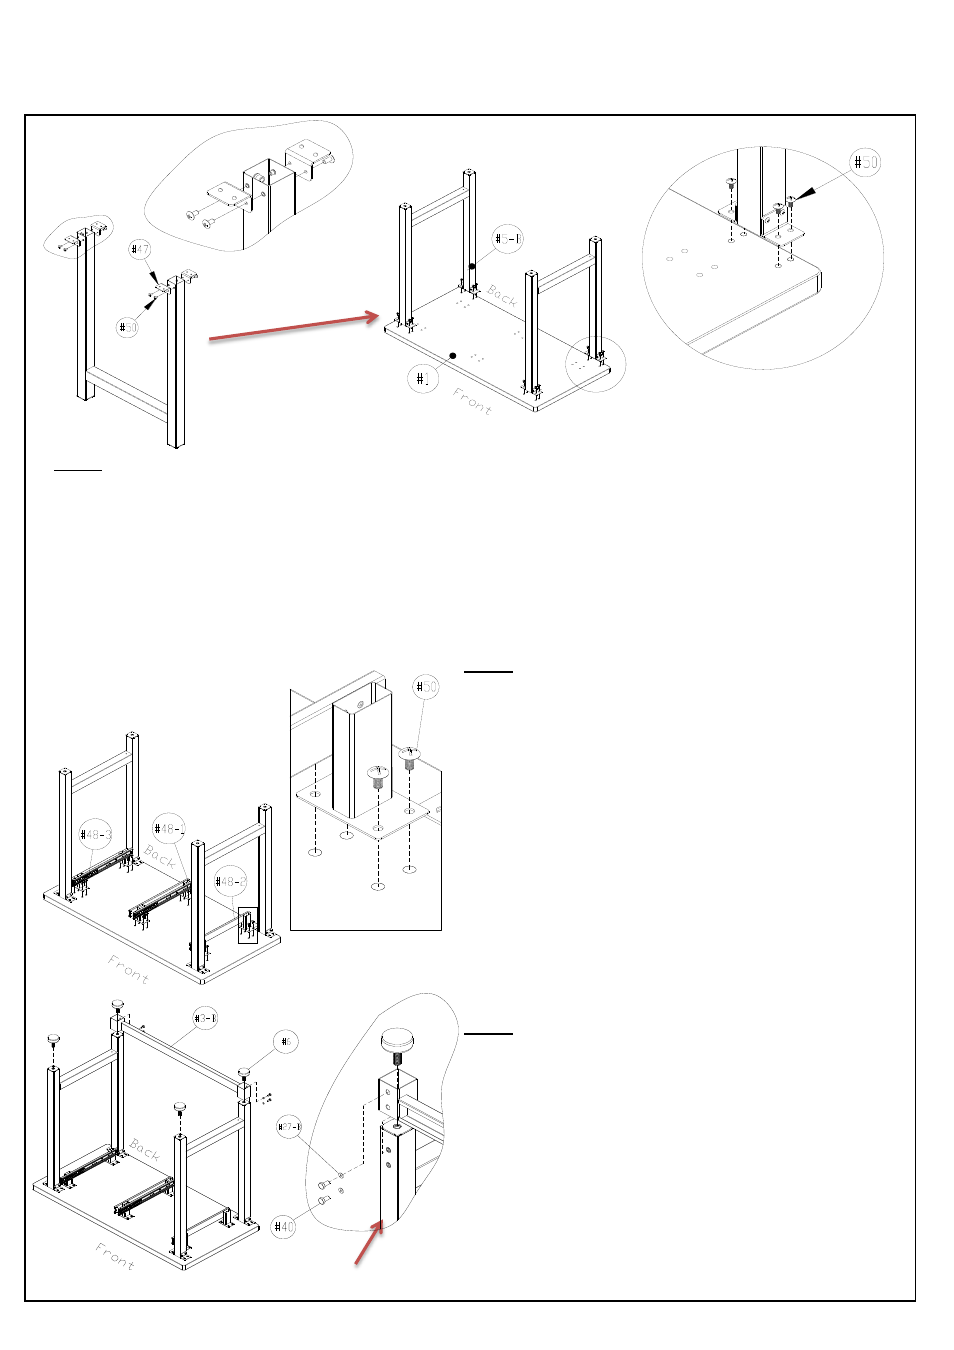
Step 1.
Step 2.
NOTE:
Step 3.
NOTE: Upturn the workbench once you finish this step.
Do not fully tighten the screws. This will help you make
any adjustments for alignment.
B:
Attach the (#5-B) Leg Pieces to the back of the (#1) Solid Hardwood Board Top, line up the screw holes, use (#50)
Screw I and (#21) Screwdriver to tighten.
Note: Assemble the workcenter on top of the cardboard packaging to help avoid scratching the solid hardwood top.
Install (#48-1) Small Drawer Middle Support, (#48-2)
Small Drawer Left Support, (#48-3) Small Drawer Right
Support.
Attach the (#48-1) Small Drawer Middle Support to the
back of (#1) Solid Hardwood Board Top Back, line up the
screw holes, use (#50) Screw I and (#21) Screwdriver to
tighten.
Repeat this step to install (#48-2) Small Drawer Left
Support and (#48-3) Small Drawer Right Support.
ASSEMBLY INSTRUCTIONS
(pg 3 of 8)
*NOTE: We recommend TWO people to assemble the workbench.
Install (#5-B) Leg Piece.
A:
Open the
package, and put the parts aside. Then, attach the (#47) "L" Bracket to the (#5-B) Leg Piece, use (#50)
Screw I to tighten. Repeat Step A to install (#47) "L" Brackets to another one (#5-B) Leg Piece.
Note: Tighten the all the screws after the (#47) Brackets are flush with the (#5-B) Leg Piece.
Install (#3-B) Bottom Cross Bar and (#6) Leveling Feet.
Attach the (#3-B) Bottom Cross Bar to the back of (#5) Leg
Piece, line up the screw holes, use (#40) Screw E with
(#27-B) Washer and (#25) Wrench to tighten.
After installing (#5-B) Leg Pieces, attach (#6) Leveling Feet
to (#5-B) Leg Pieces, use (#25) Wrench to tighten.
A
B
Back