Installation instructions (cont’d) – Reznor UDBS Sizes 30-125 Option - Installation - Stepdown Transformer - V3 Series User Manual
Page 4
Form I-UD-X, P/N 201244 R6, page 4
www.ReznorHVAC.com (800)695-1901
©2014 Reznor LLC, All rights reserved.
Trademark Note: Reznor
®
is registered in at least the United States.
All other trademarks are the property of their respective owners.
09/14 Form I-UD-X (Version B.1)
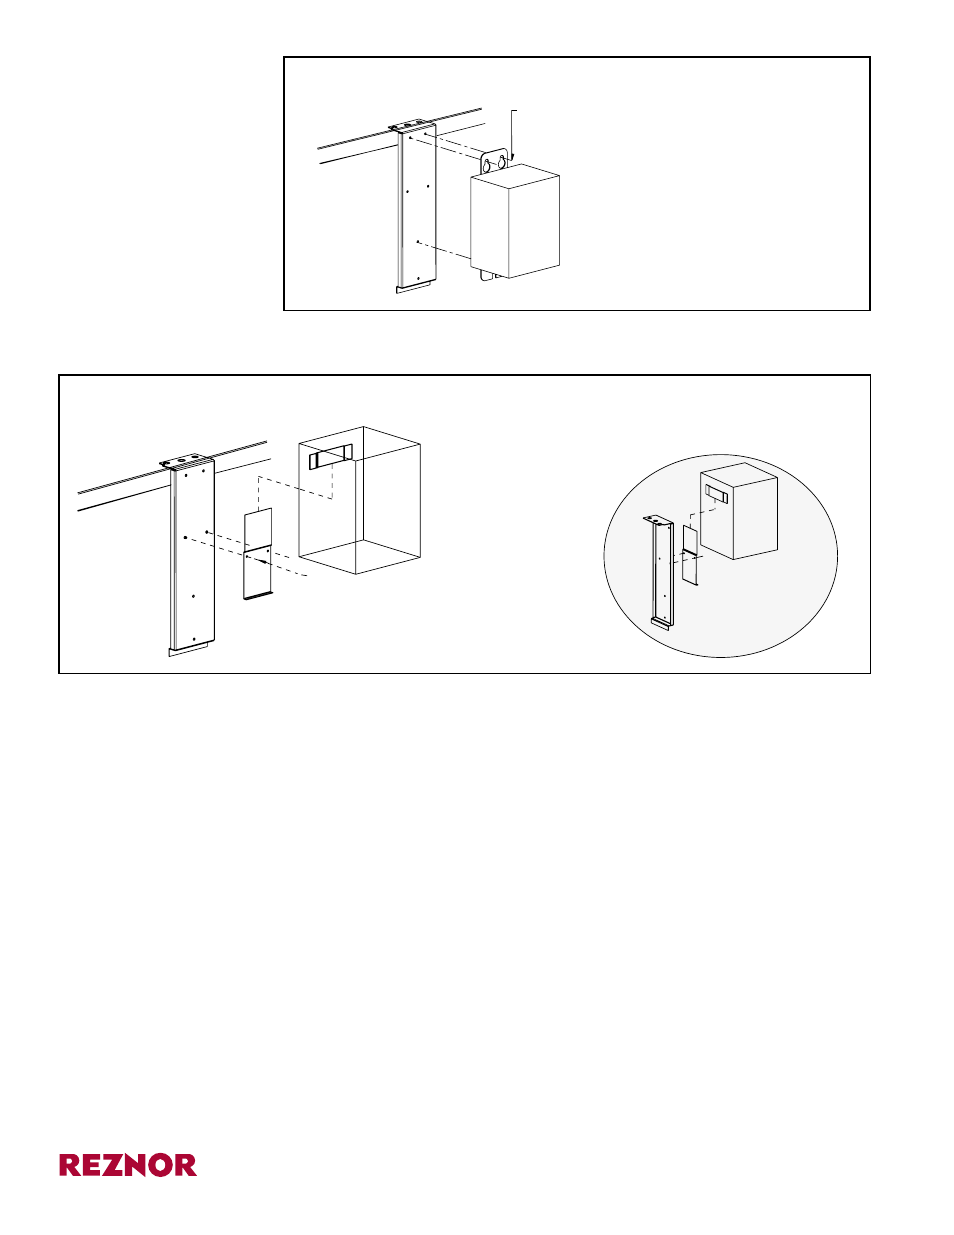
Transformer
with integral
mounting foot
Use sheetmetal screws provided
to attach the transformer to the
bracket installed in Step 3.
Transformer
Mounting
Bracket
(installed in
Step 3)
6. Connect the Wires (All Models)
At the line voltage inlet on the rear of the heater (See
FIGURE 1 or 2), attach the
90° connector so that the entrance is facing the fan or blower. Run the conduit
from the transformer to the bottom rear of the heater and across to the connector.
Feed the three wires through the connector and attach the connector to the
conduit.
In the path of the conduit locate a cabinet screw. Remove the screw and use it to
attach the cable clamp. Put the conduit into the cable clamp.
Remove the heater access panel. Follow the wiring diagram to connect the supply
wiring.
7. Installation of the stepdown transformer is finished. Follow the instructions in the
heater installation and venting manuals to complete the installation.
Transformer with
separate bracket -
the transformer
slides down over
the top of the
bracket provided
with the transformer.
Use the sheetmetal screws provided
to attach the bracket shipped in the
transformer carton to mounting bracket
installed on the heater in Step 3.
View from back
of Transformer
Transformer
Mounting
Bracket
(installed
in Step 3)
Installation
Instructions
(cont’d)
b) If the transformer has a slot across the back and a secondary bracket, install it
as illustrated in
FIGURE 6.
FIGURE 5 - Attaching a Transformer with an Integral Mounting
Foot
FIGURE 6 - Attaching a Transformer with a Separate Bracket
®