Led starbrite, Install the product, Power supply-mains – OmniSistem PR Star Brite User Manual
Page 4: Control connections
4/16
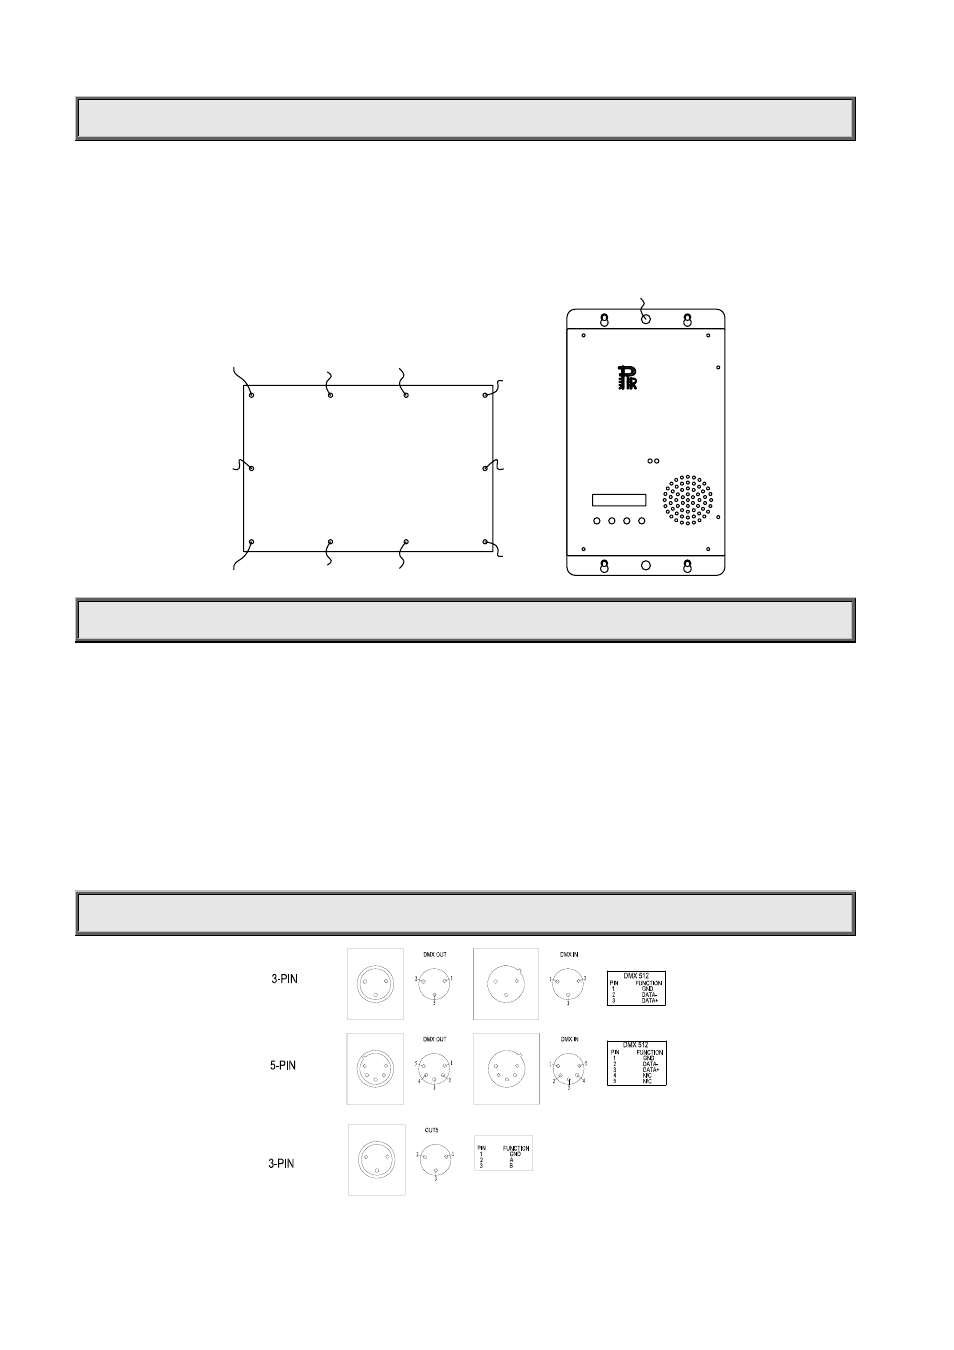
INSTALL THE PRODUCT
When a LED StarBrite is used, it should be installed as the figure below on the left. Thrill through the eyelets on four
fringes of the LED StarBrite by ropes and hang it at a higher place to achieve the effect of clusters of stars covering the
sky.
Generally, LED StarBrite Controller can be put on a
flat surface, such as a table, or a floor, but if you want to mount it
on a higher place, fix both the top and bottom fringes of the controller by four screws into the four screw eyelets, and
use a proved safety cord through the hole prearranged in the middle of the top fringe as a secondary safety fixing at
the same time. The figure below on the right shows all of this.
PR-8710C
StarBrite Controller
M E N U
U P
D O W N
S A V E
P O W E R
D M X
LED StarBrite
POWER SUPPLY-MAINS
Connect the power cord as follows:
L (live) =brown
E (earth) =yellow/green
N (neutral) =blue
Use the plug provided to connect the mains power to the LED StarBrite Controller paying attention to the voltage and
frequency marked on the panel of the LED StarBrite Controller. It is recommended that each LED StarBrite Controller be
supplied separately so that they may be individually switched on and off.
IMPORTANT
It is essential that each LED StarBrite Controller is correctly earthed and the electrical installation conforms to
all relevant standards.
CONTROL CONNECTIONS