Page 12, Aligning the prism plus printer – MF Digital Prism Plus Thermal User Manual
Page 12
121212
Page 12
Scribe EC Quick Installation Guide
with Prism PLUS Printer
Document Revision: 2004/12/07
ScribeEC with Prism PLUS printer
Installation Guide
Document Revision: 2004/12/28
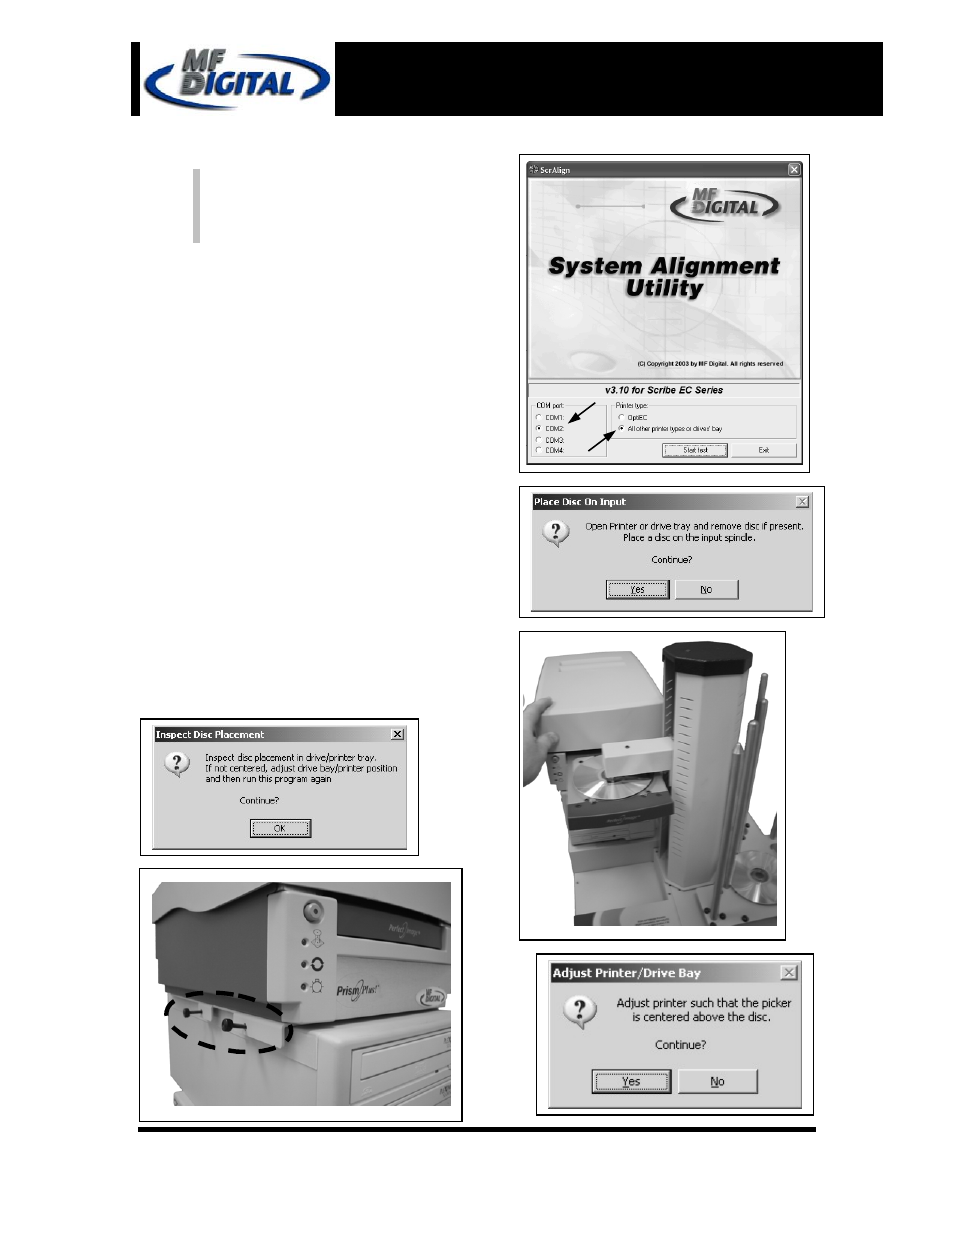
Aligning the Prism PLUS Printer
(fig. 3)
(fig. 4)
(fig. 5)
Alert:
Before starting the Alignment Utility,
position the back end of the inkjet printer
in line with the dotted line on the top of
the drive bay.
1. From the Start Menu Open the SCRIBE EC
Alignment Utility. It will be located in the folder
designated when you installed the alignment
utility. Choose the appropriate COM Port
Number, which the Scribe EC Loader is
connected to, then choose the All other printers
or drive bay then Click the Start Test button (fig.
1).
2. Follow the onscreen instructions then Click Yes
button (fig. 2). The picker arm will then hover a
disc over the open printer tray. Observe disc’s
position and make the appropriate adjustments to
the printer (fig. 3).
3. Click
the Yes button when you are satisfied with
your adjustment (fig. 4).
4. The picker arm will then place a disc onto the
printer tray. Follow the on screen instructions
then click the OK button (fig. 5).
5. Once you are satisfied with the printer’s
alignment, tighten the thumbscrews located on
both side of the printer (fig. 6).
(fig. 1)
(fig. 6)
(fig. 2)