Drilling locations – Great Planes Super Decathlon 40 Kit - GPMA0185 User Manual
Page 24
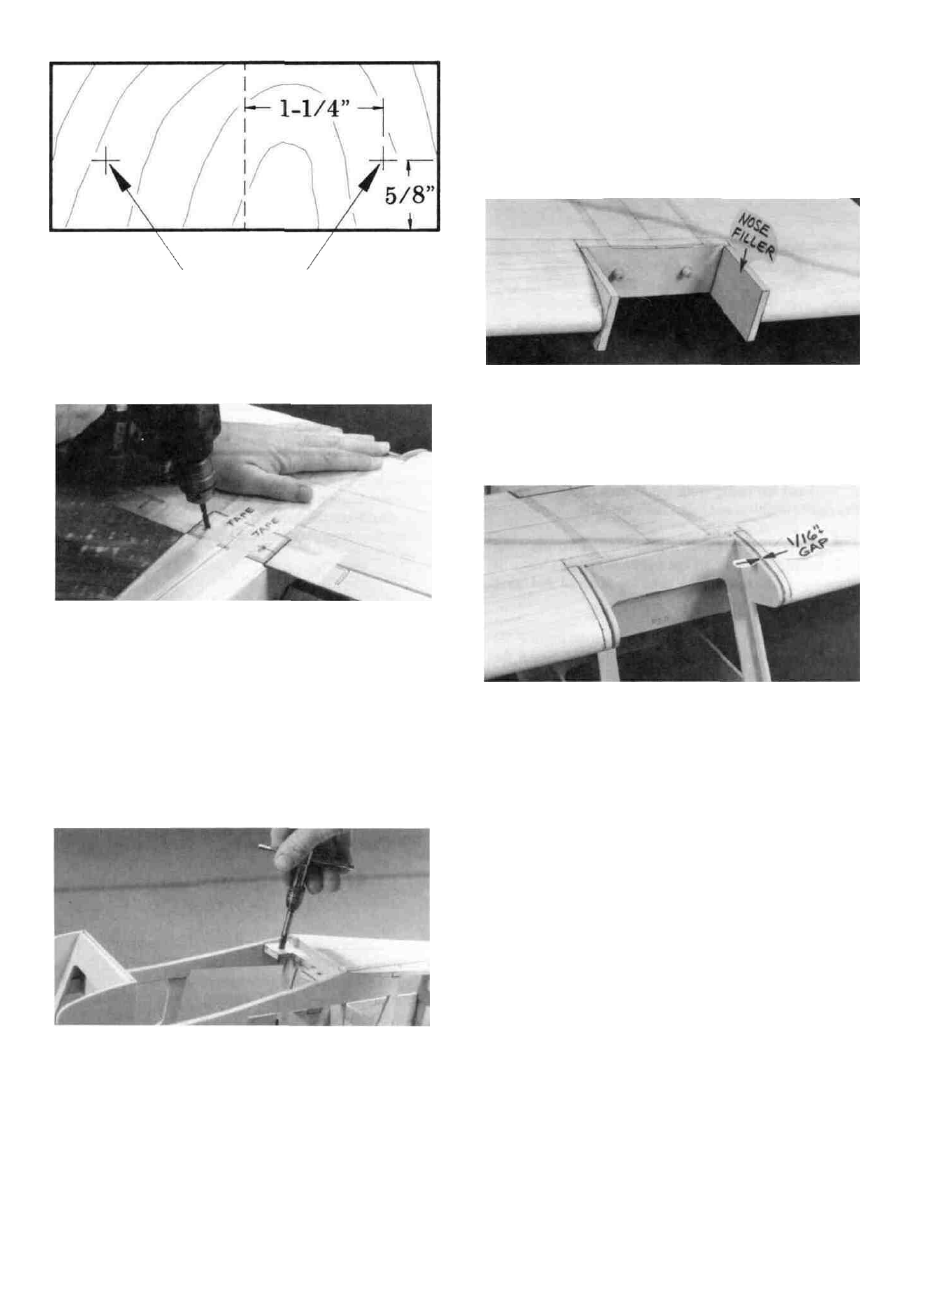
DRILLING LOCATIONS
D 17. Trial fit the wing to the fuse using the two 1/4-20
nylon bolts provided. You may cut the bolts off to their proper
length, so they protrude about 1/4" below the hold-down
blocks in the fuselage. Check the incidence of the wing using
the instructions provided at the bottom of page 41.
D 13. Holding the wing firmly in place, drill 13/64" holes
at the locations you marked in step 12, drilling down through
the 1/16" ply wing bolt plate and through the 1/4" ply hold-
down blocks in the fuselage. Try to drill straight in, perpen-
dicular to the 1/16" ply bolt plate. IMPORTANT!: Do not
allow the wing to move while drilling!
D 14. Remove the wing and re-drill the holes in the wing
only to 1/4".
D 18. Glue the two 1/4" x l -3/4" x 2-1/2" balsa center nose
fillers to the inside edges of the W-2 ribs. Then sand the edges
of these fillers to blend with the LE and LE sheeting.
D 19. Trial fit the wing on the fuselage, and sand the center
nose fillers to mate with the front of the 1/8" ply cabin sides.
Provide at least 1/16" clearance on both sides, between the
wing and fuse, to allow for the thickness of the covering
material and windshield.
U 15. Use a 1/4-20 tap and a tap wrench to cut threads in
the ply hold-down blocks in the fuselage.
D 16. Harden the threads in the hold-down block with thin
CA glue, then re-tap the threads after the glue is completely
dry.
24
MOUNT STABILIZER AND FIN
D 1. Lightly sand the stab saddle area smooth with a
T-bar or sanding block.
D 2. Accurately measure the trailing edge of the stabi-
lizer and mark the center point.
D 3. Temporarily mount the wing in the saddle (for refer-
ence).
D 4. Lay the stab in position on the stab saddle with the
center point lined up with the tail end of the fuselage.
Carefully check the stab alignment by standing directly