Great Planes Super Decathlon 40 Kit - GPMA0185 User Manual
Page 10
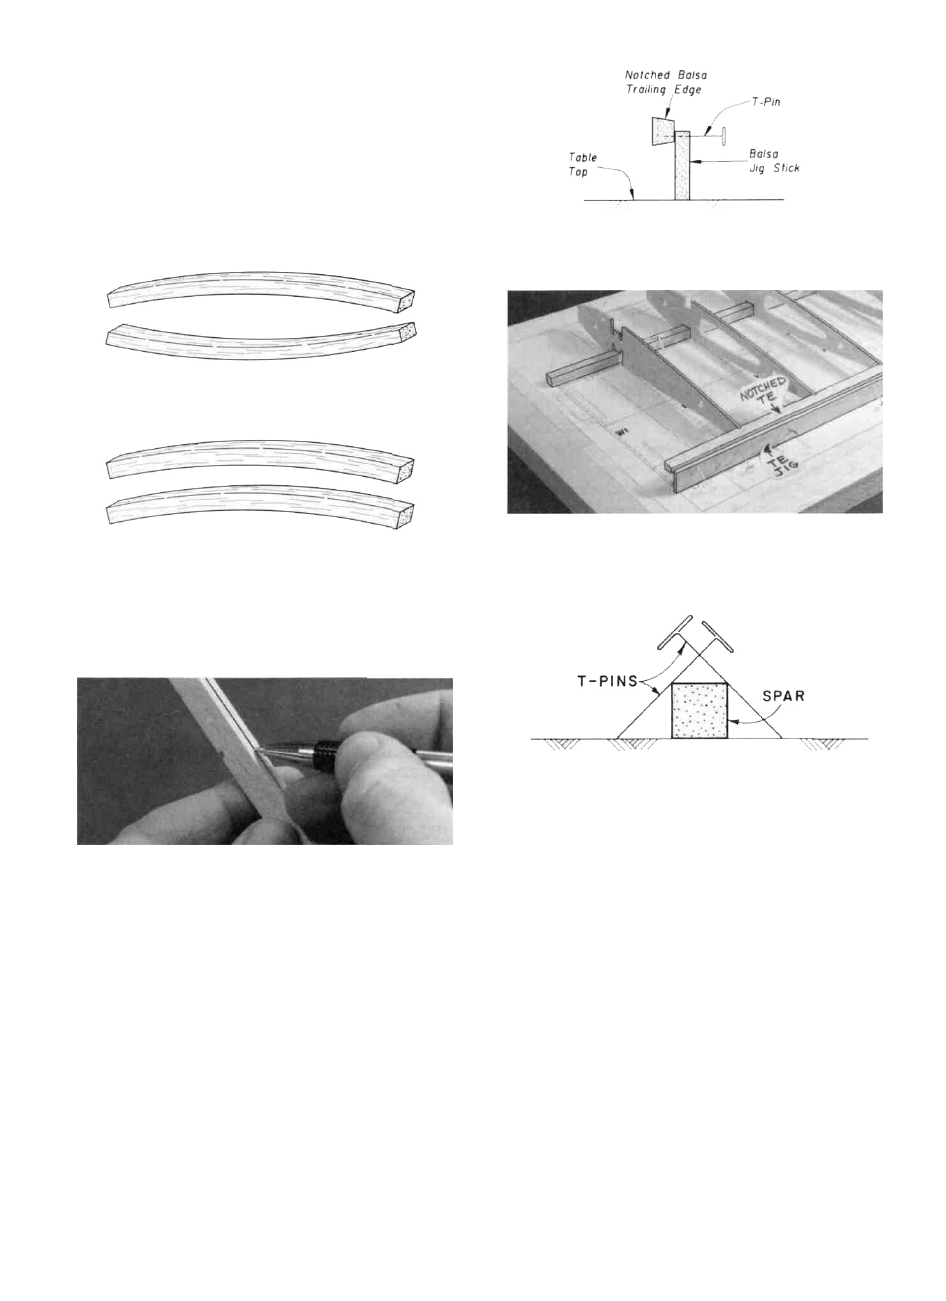
D 3. Before using the 3/8" x 3/8" x 32" hard balsa spars,
examine them carefully for possible imperfections. Look for
knots, soft spots, diagonal grain and any other imperfections.
If possible, position each spar so the imperfections are on the
outer half of the wing panel (toward the tip), where they will
be least affected by high stress. If the spars are warped
slightly, try to "balance them out" by installing the warped
spars in opposite directions (see sketch).
TWO WARPED SPARS INSTALLED
THIS WAY WILL RESULT IN A
STRAIGHT WING
TWO WARPED SPARS INSTALLED
THIS WAY WILL RESULT IN A
WARPED WING
D 4. Carefully punch out all the die-cut 3/32" balsa wing
ribs. Sand the edges slightly to remove any die-cutting ir-
regularities.
D D 7. Place one of the 3/8" x 3/8" balsa main spars on
the wing plan and pin the spar down with crossed T-pins as
shown in the following sketch. NOTE: The spars are cut
slightly too long, and the excess will be cut off later.
D 5. Draw an accurate centerline along the rear edge of
the notched balsa trailing edges.
D D 8. Place one of the W-2 ribs and nine of the W-3
ribs on the spar in their approximate positions, but do not
glue.
NOTE: Follow steps 6 through 21 to build the RIGHT
wing panel, then repeat these steps to build the LEFT
wing panel.
D D 6. Pin one of the notched balsa trailing edges to the
1/8" x 3/4" x 32" balsa TE Jig stick as shown in the following
sketch. Note that the top of the Jig stick must be on the
centerline which you have drawn on the trailing edge.
D D 9. Hold the notched balsa trailing edge in place
(with TE Jig attached) and carefully work the ribs into the
notches, centering each rib up and down. Pin or tack glue the
TE Jig stick to your building surface, making sure the ribs
line up with the plan.
D D 10. Glue the W-2 and W-3 ribs to the TE. (Apply
glue sparingly, to avoid gluing the TE to the TE Jig).
10