Assemble the engine mounts – Great Planes Profile 38 - GPMA0487 User Manual
Page 22
❏ ❏
13. Remove the upper boom from the plan. Using a bar
sander, sand the upper boom even.
❏ ❏
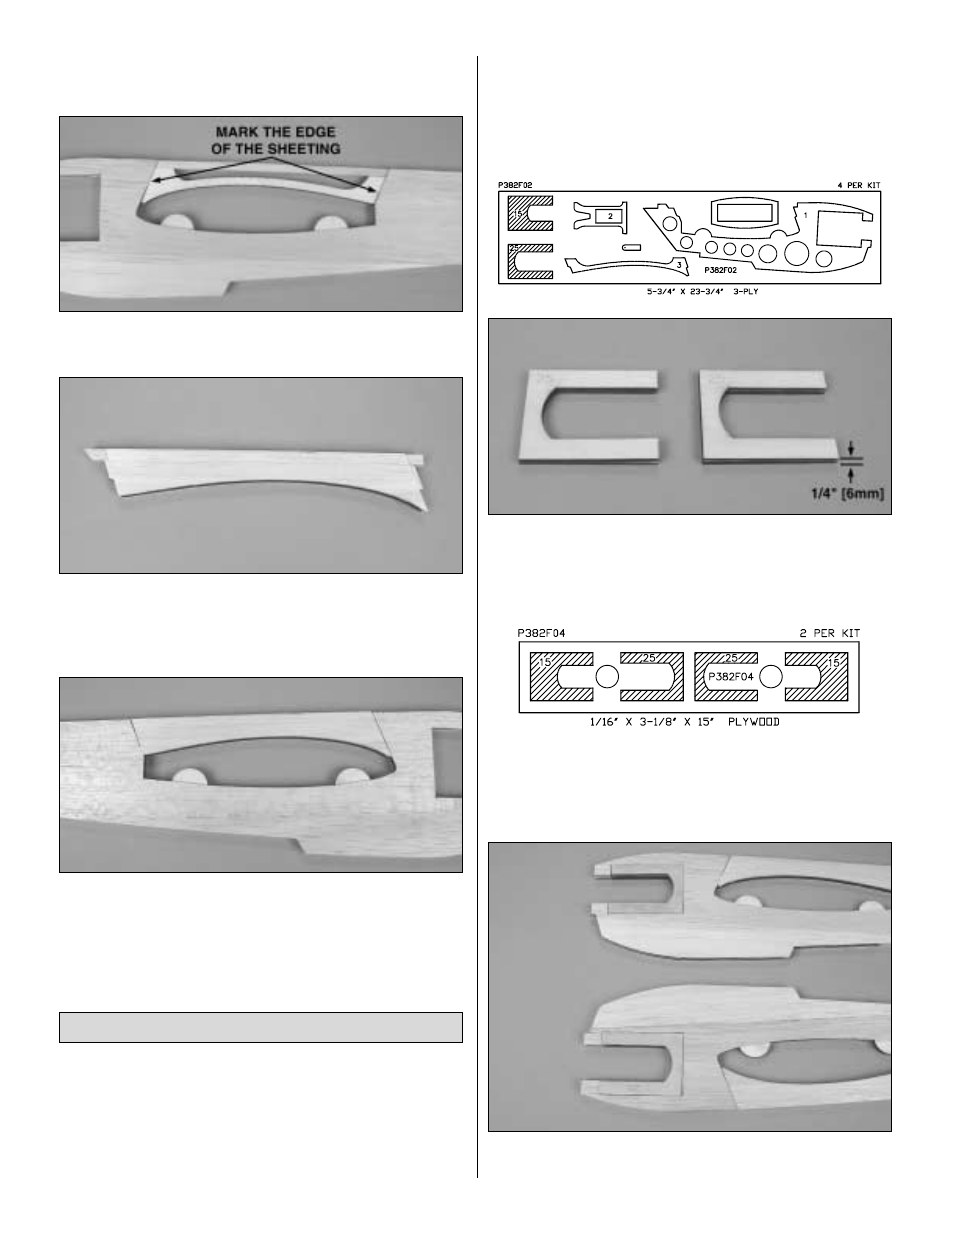
14. Test fit the upper boom to the main boom. Mark
the upper boom at the edge of the main boom sheeting.
❏ ❏
15. Sheet one side of the upper boom with leftover
1/16" [1.6mm] balsa sheeting. Trim the sheeting along the
top and bottom and along the lines drawn in the previous
step. Turn the upper boom over and sheet the other side.
❏ ❏
16. Test fit the upper boom to the main boom. The
sheeting does not have to mate perfectly. Later, after the
upper boom and main boom are glued to the wing, balsa
filler can be used to cover any imperfections.
❏
17. Return to step 11 and assemble the second upper boom.
❏
1. Mark one of the main booms left and the other right; it
doesn’t matter which.
❏
2. Decide what size engines you are going to use. We
have provided die-cut mounts for the O.S.
®
.15 LA and the
.25 LA. If you are using a different engine, you may need to
trim the mounts to fit your engine. The .15 size mounts have
a “15” embossed on them and the .25 size mounts have a
“25” embossed on them. Both mounts are assembled and
installed using the same method.
❏
3. Locate the four die-cut 3-ply engine mount cores. Use CA
to glue two of the cores together making a pair of engine mounts.
❏
4. Locate the four die-cut 1/16" [1.6mm] plywood engine
mount outers. Glue one of the outers to each side of the
engine mount cores.
❏
5. Test fit the engine mounts in the cutouts at the front of
the main booms and trim as necessary.
Assemble the Engine Mounts
22