Great Planes Profile 38 - GPMA0487 User Manual
Page 11
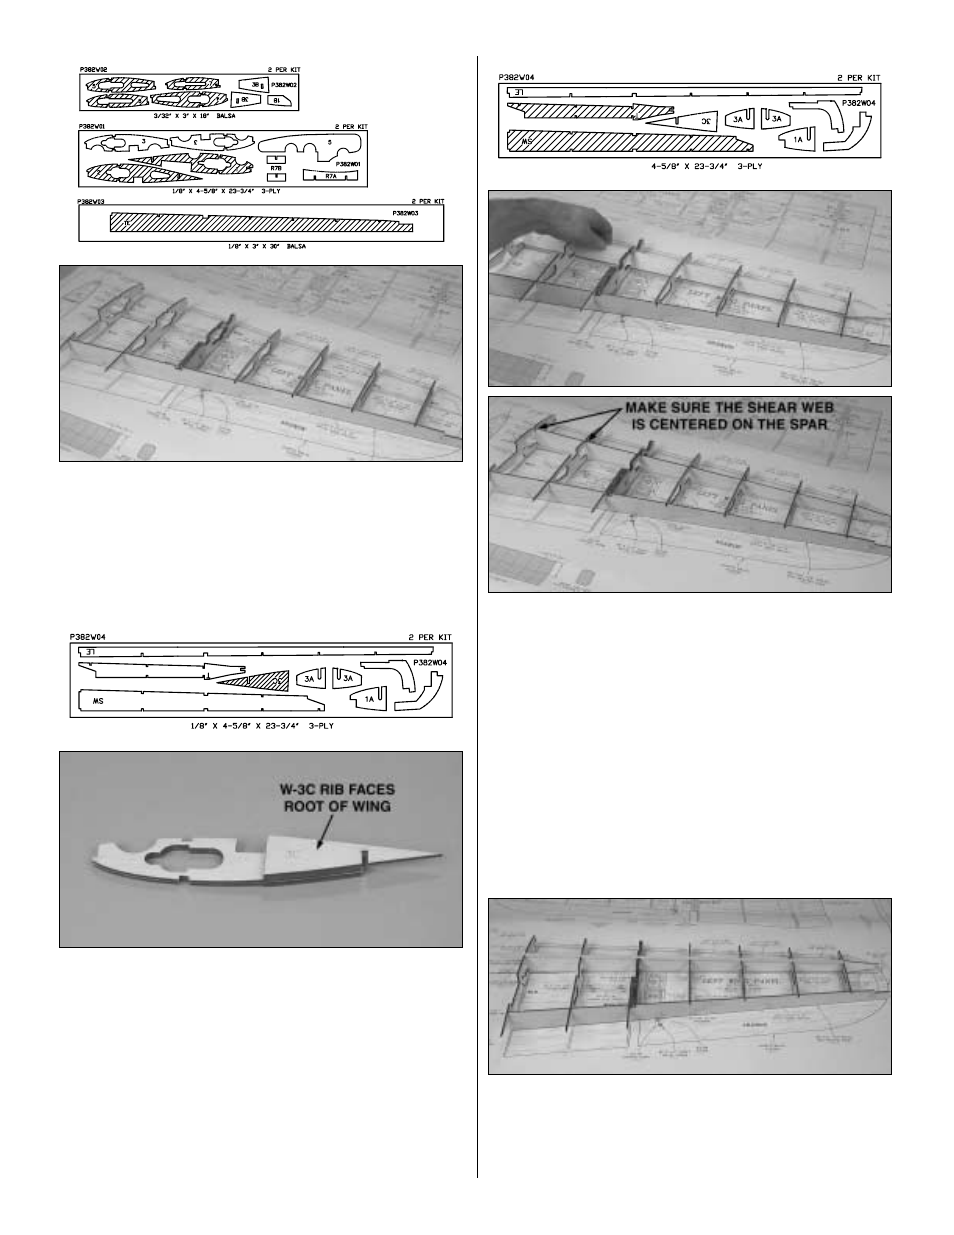
❏ ❏
6. Pin the die-cut 1/8" [3mm] balsa sub-trailing edge
over the plan, perpendicular to the building board. Position
the die-cut ribs on the main spar, inserting the aft end of the
ribs in the notches of the sub-trailing edge.
❏ ❏
7. Note which side of rib W-3 faces the root of the wing.
Remove W-3 and glue the die-cut 3-ply W-3C rib to this side.
❏ ❏
8. Reinstall W-3 on the main spar and sub-trailing
edge. Repin the main spar to your building board with the
pins outside of rib W-1. Pin rib W-7 perpendicular to your
building board. Remove the remaining pins holding the main
spar to the building board. This will allow the shear web to
be installed in the next step.
❏ ❏
9. Glue the two-piece die-cut 3-ply shear web together.
Use a straightedge to keep the two pieces aligned. From the
root rib, insert the shear web through the center of the ribs.
Carefully rotate it so that the “T” on the shear web is towards
your building board and the notches are aligned with the
ribs. Position the shear web so that it is as far back in the rib
as possible. The shear web will be centered on the main
spar. Pay special attention at ribs 1 and 2.
❏ ❏
10. Pin the ribs to your building board next to the main
spar. Once the shear web is in position, glue it to the ribs
and the main spar.
❏ ❏
11. With the ribs fully seated in the sub-trailing edge,
glue the ribs to the sub-trailing edge.
❏ ❏
12. Test fit the second main spar in the ribs. Make sure
it is flush with the top of the ribs. Once satisfied with the fit,
remove the spar and apply a bead of medium CA along the
top edge of the shear web and the main spar notch of the
ribs and reinstall the spar.
11