Install the tail – Great Planes Nieuport XI EP ARF - GPMA1146 User Manual
Page 7
7
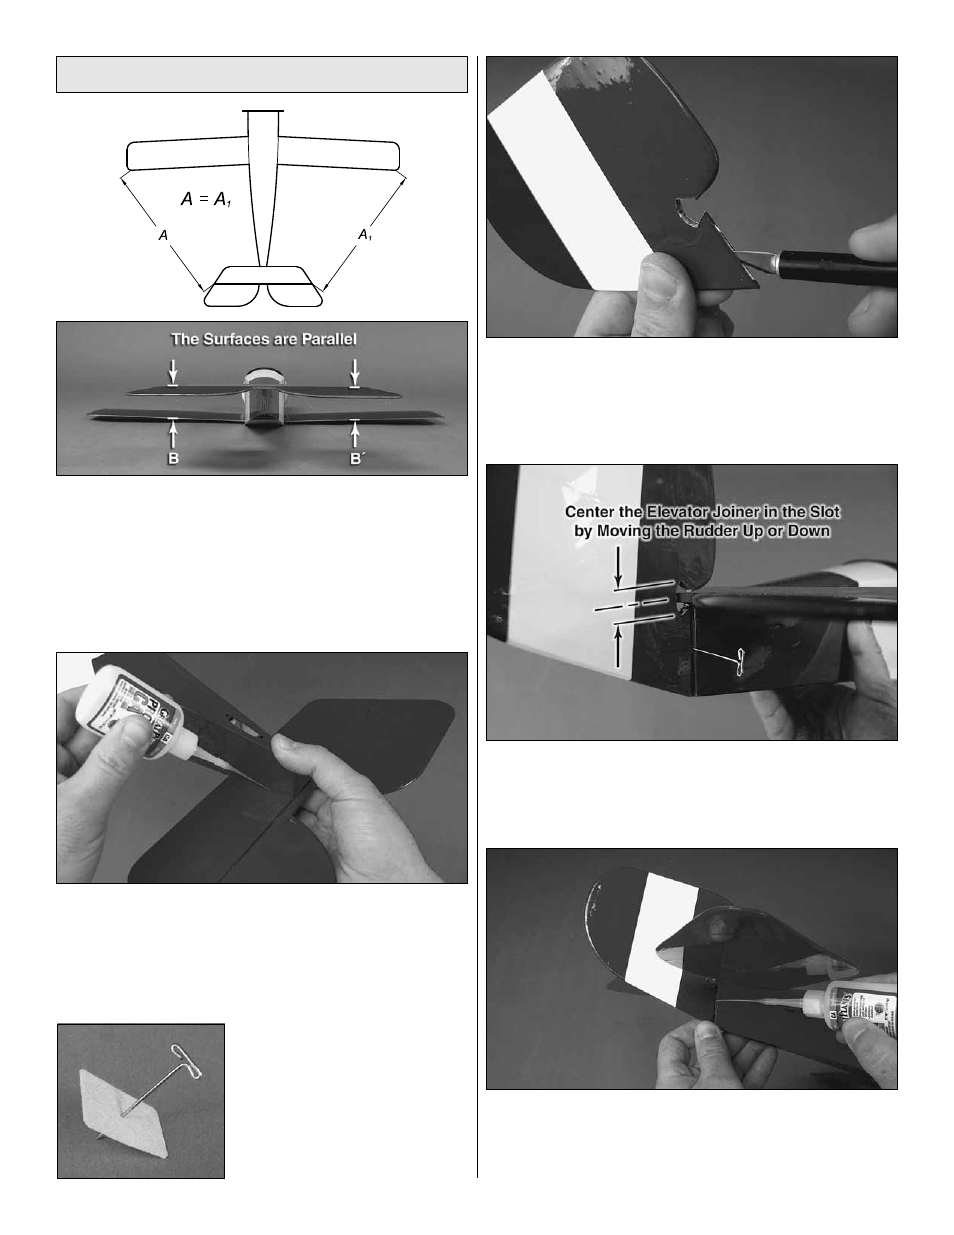
Install the Tail
❏
1.
Test fi t the tabbed portion of the horizontal stabilizer
into the slot in the fuselage. Use a fabric tape measure
to measure the distance from each stabilizer tip to each
corresponding wing tip. Adjust the stabilizer so distance A =
A
1
. Set the fuse on a level surface and take a few steps back.
Check to see that the stabilizer is correctly aligned in relation
to the wing. If one side is higher than the other, lightly sand
the fuselage side that is higher.
❏
2.
When you’re satisfi ed with the fi t of the horizontal tail,
glue it in place using thin CA. Hold the joint tightly together
as you wick a bead of CA into the length of the joint.
❏
3.
Remove the bottom wing from the fuselage and retain
the screws and washers.
❏
4.
Push a T-pin through
the center of the CA hinge as
shown.
❏
5.
Test fi t the hinge into the end of the fuselage and bottom
of the rudder. The hinge should slide in as far as the T-pin
allows. If the hinge doesn’t fi t well, use the back side of your
hobby knife to dig out the hinge or make it deeper. Trim the
covering back from the slot to allow the CA to wick better.
❏
6.
Fit the hinge to the fuselage, then fi t the rudder. Slide
the rudder up or down so that the elevator joiner is centered in
the semi-circular clearance slot. Push the rudder up against
the hinge line and defl ect it left and right several times.
❏
7.
When you’re satisfi ed with the fi t of the rudder, apply
4-5 drops of thin CA to each side of the hinge to glue it in
place. Have a paper towel handy with some CA debonder to
clean up any runoff or excess glue.