Install the dummy engine, cowl & propeller – Great Planes Nieuport XI EP ARF - GPMA1146 User Manual
Page 15
15
❏
5.
Glue the belly panel to the lower wing using R/C-56
glue or tape it in place. This will allow for easy removal if you
have to remove the lower wing later. Note: You may have to
trim more clearance to fi t the landing gear legs. For the best
results, use a Dremel® Tool (or similar rotary tool) with a
small sanding drum.
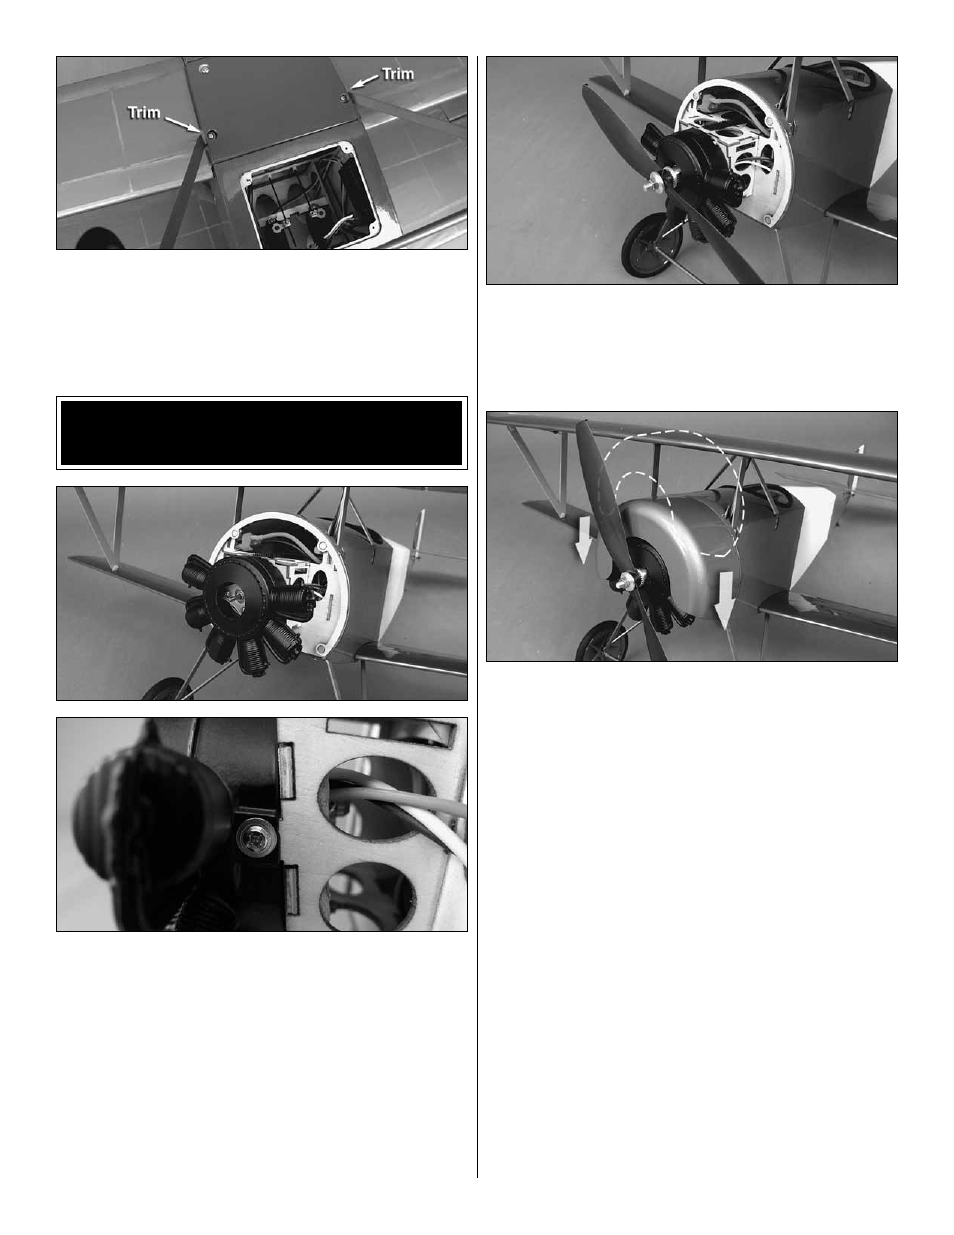
INSTALL THE DUMMY ENGINE,
COWL & PROPELLER
❏
1.
Make sure that the motor wires are routed properly
and that they do not contact the motor case. Glue the dummy
engine to the three tabs on the motor box. As an option, we
have provided two 2 x 5mm [3/16"] washer-head screws to
attach the dummy engine. Install the screws on the left and
right side tabs by positioning the dummy engine and drilling
a 1/16" [1.6mm] hole though the dummy engine and into
each underlying tab.
❏
2.
Balance your propeller using the method described in
the “Balance Propellers” section.
❏
3.
Fit a 3mm to 5mm collet prop adapter (GPMQ4959)
to the motor shaft.
Install the propeller, the prop
washer, and the prop nut onto the prop adapter. With
the prop adapter fully seated on the motor shaft,
tighten the prop nut and lock the prop adapter in place.
❏
4.
Turn the prop so that it is horizontal. Fit the cowl to the
fi rewall from the top. You will need to remove the cowl to access
your battery. Warning: Always turn on your transmitter before
you plug in the LiPo battery. When the battery is plugged in
the motor is live, so please use caution when re-fi tting the
cowl. Stay behind the propeller at all times and always keep
one hand on the model. An assistant is recommended.