Balance the model laterally – Great Planes Gee Bee R-1 EP Rx-R - GPMA6020 User Manual
Page 11
11
❏
2. Install the propeller on the prop adapter and secure it
with the prop washer and prop nut. Slowly rotate the propeller
by hand to check that it does not hit the cowl. If it does, loosen
the prop nut and slide the prop adapter forward slightly.
More than any other factor, the C.G. (center of gravity/
balance point) can have the greatest effect on how a model
fl ies and could determine whether or not your fi rst fl ight will
be successful. If you value your model and wish to enjoy it for
many fl ights, DO NOT OVERLOOK THIS IMPORTANT
PROCEDURE. A model that is not properly balanced may
be unstable and possibly unfl yable.
At this stage the model should be in ready-to-fl y condition with
all of the components in place, including the motor battery.
❏
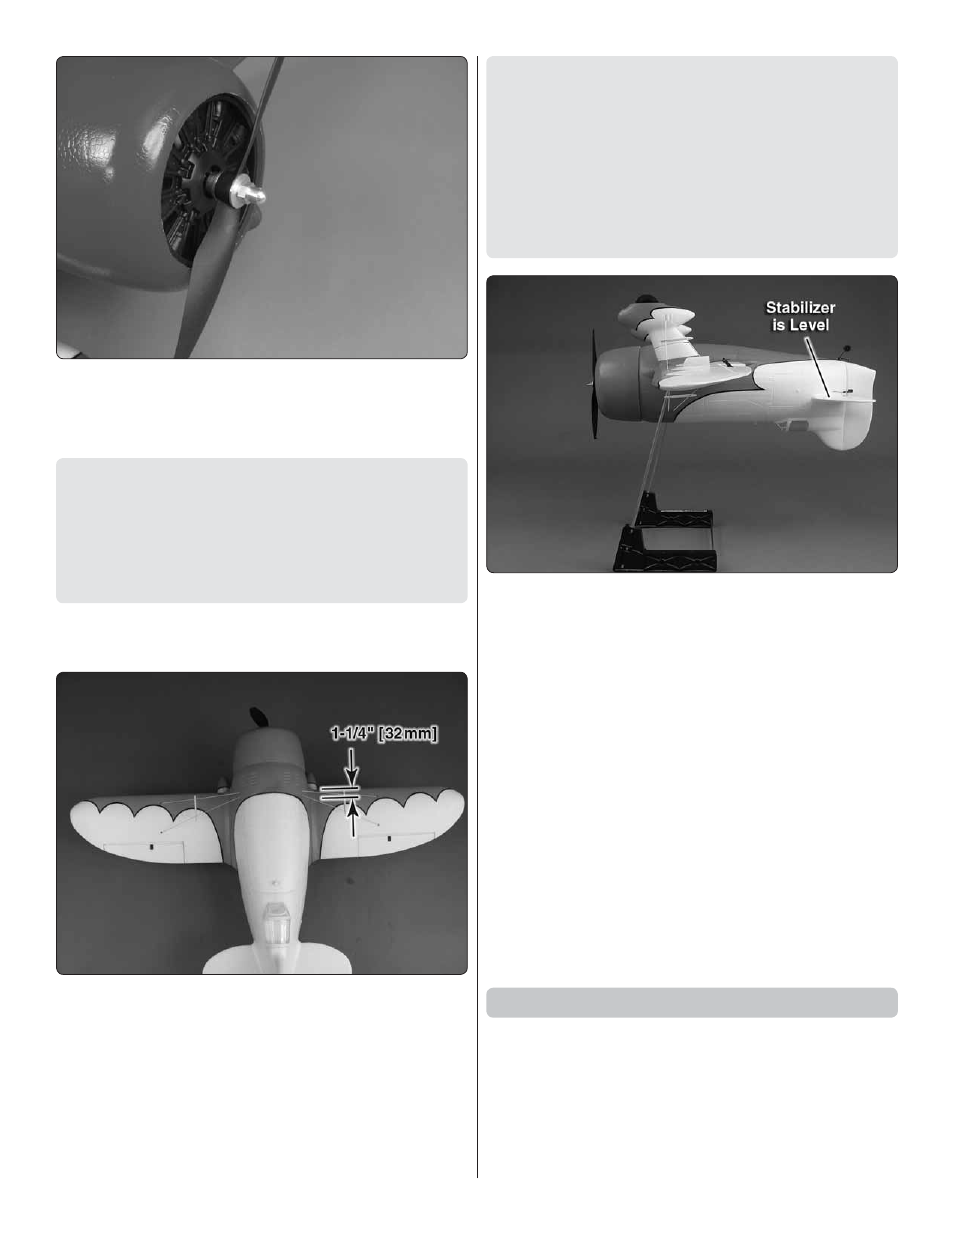
1. If using a Great Planes C.G. Machine
™
, set the rulers to
1-1/4" [32 mm]. If not using a C.G. Machine, use a fi ne-point
felt tip pen to place a small dot on the top of the wing on both
sides of the fuselage 1-1/4" [32 mm] back from the leading
edge. Due to the Gee Bee having a short nose (and depending
on the battery used), additional nose weight may be required.
This is where your model should balance for the fi rst
fl ights. Later, you may experiment by shifting the C.G. 5/32”
[4 mm] forward or 5/32” [4 mm] back to change the fl ying
characteristics. Moving the C.G. forward will improve the
smoothness and stability, but the model will then be less
aerobatic (which may be fi ne for less-experienced pilots).
Moving the C.G. aft makes the model more maneuverable
and aerobatic for experienced pilots. In any case, start at
the recommended balance point and do not at any time
balance the model outside the specifi ed range.
❏
2. With the wing attached to the fuselage, all parts of the
model installed (ready to fl y) and the motor battery installed,
place the model upside-down on a Great Planes CG Machine,
or lift it upside-down at the balance point you marked.
❏
3. If the tail drops, the model is “tail heavy.” If possible, move
the motor battery forward to get the model to balance. If the
nose drops, the model is “nose heavy.” If possible, move the
motor battery aft. If moving the motor battery is not enough,
use Great Planes “stick-on” lead (GPMQ4485). To fi nd out
how much weight is required, place incrementally increasing
amounts of weight on the bottom of the fuselage over the
location where it would be mounted inside until the model
balances. A good place to add stick-on nose weight is to the
motor box. Do not attach weight to the cowl—the magnets
securing the cowl cannot support the additional weight. Once
you have determined the amount of weight required, it can
be permanently attached.
❏
4. IMPORTANT: If you found it necessary to add any
weight, recheck the C.G. after the weight has been installed.
Balance the Model Laterally
❏
1. With the wing level, have an assistant help you lift the
model by the engine propeller shaft and the bottom of the
fuse under the TE of the fi n. Do this several times.
❏
2. If one wing always drops when you lift the model, it means
that side is heavy. Balance the airplane by adding weight to the
other wing tip. An airplane that has been laterally balanced
will track better in loops and other maneuvers.