Great Planes Extra 300S 1.20 ARF Patty Wagstaff - GPMA1305 User Manual
Page 25
❏
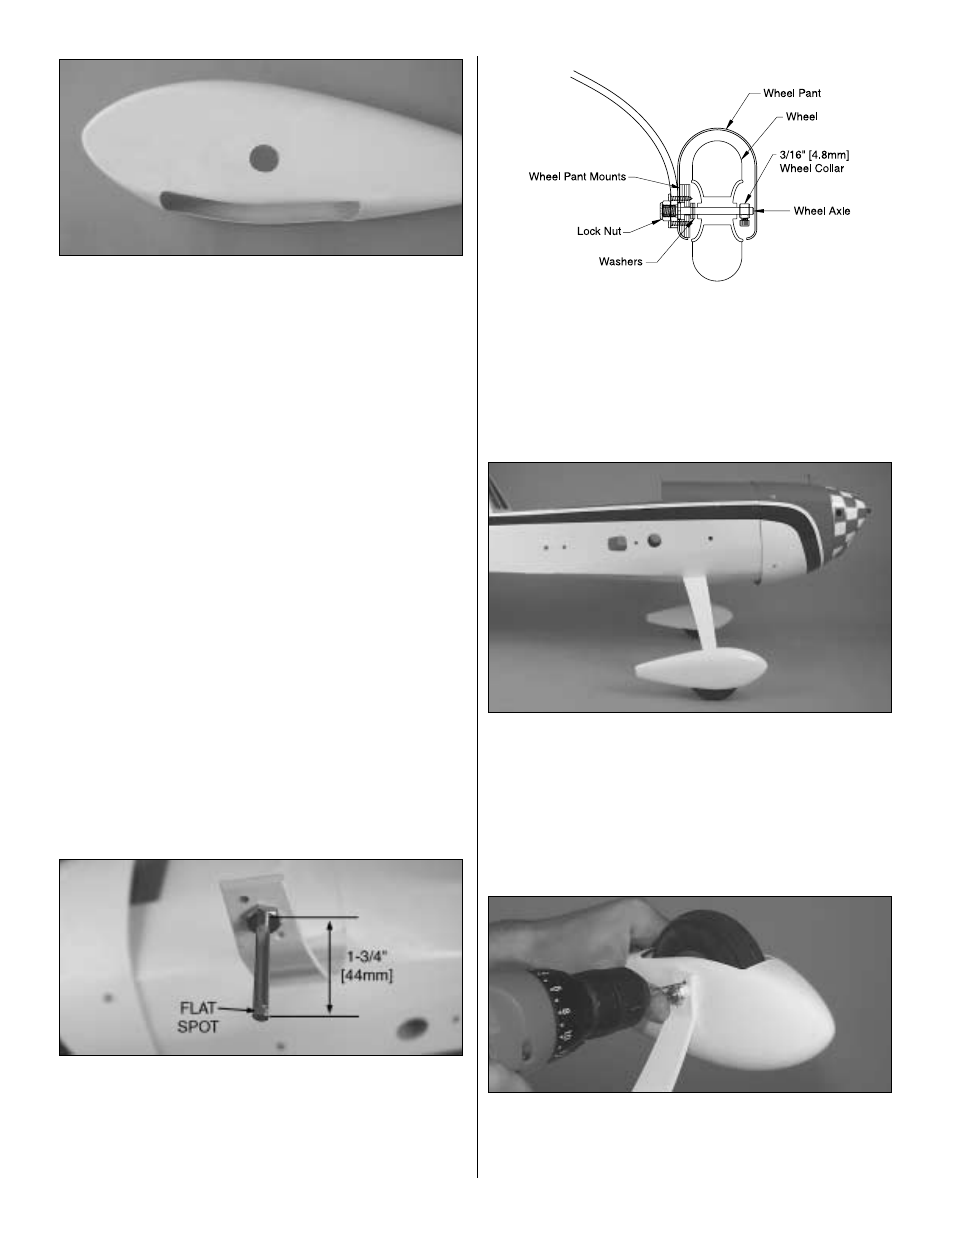
10. Look carefully at the wheel pants. Locate a dimple
that indicates the wheel axle location on the side of the
wheel pant. Use a high speed rotary tool to drill a 1/2"
[13mm] hole at the mark. Make sure you make a right wheel
pant and a left wheel pant.
❏
11. Round the bottom edge of the wheel pant mount so
it fits in the pant when the 1/2" [13mm] hole in the mount is
centered over the hole in the pant. Roughen the area inside
the wheel pant with sandpaper where the wheel pant mount
will be glued. Glue the mount to the pant with 30-minute
epoxy. Hint: For the most secure bond, add micro balloons
(TOPR1090) or milled glass fibers (GPMR6165) to the epoxy.
❏
12. Use a metal saw or a high-speed rotary tool with a
reinforced cut-off wheel to cut the wheel axle to 1-3/4"
[44mm] length. Mount the axle to the landing gear with a
self-locking nut.
❏
13. Temporarily slide the wheel pant, two #8 washers and
a 3/16" [4.8mm] wheel onto the axle. Determine where the
wheel collar that retains the wheel will be positioned on the
axle. Remove the wheel and wheel pant, then file a flat spot
on the axle for the set screw in the outer wheel collar. Do
this for both wheel pants.
❏
14. Mount the wheel and wheel pant to the axle with two
#8 washers, and a wheel collar. Temporarily tighten the set
screw in the wheel collar. Do this for both wheel pants.
❏
15. Place the model on its gear on the workbench. Prop
up the tail until the fuse is level. Adjust both wheel pants so
that they are level with the fuse.
❏
16. Without moving the wheel pants, drill 1/16" [1.6mm]
holes through the holes in the landing gear into the wheel
pants and mounts as shown above. Make sure you do not
drill into the wheels.
25