Great Planes Extra 300S 1.20 ARF Patty Wagstaff - GPMA1305 User Manual
Page 20
❏
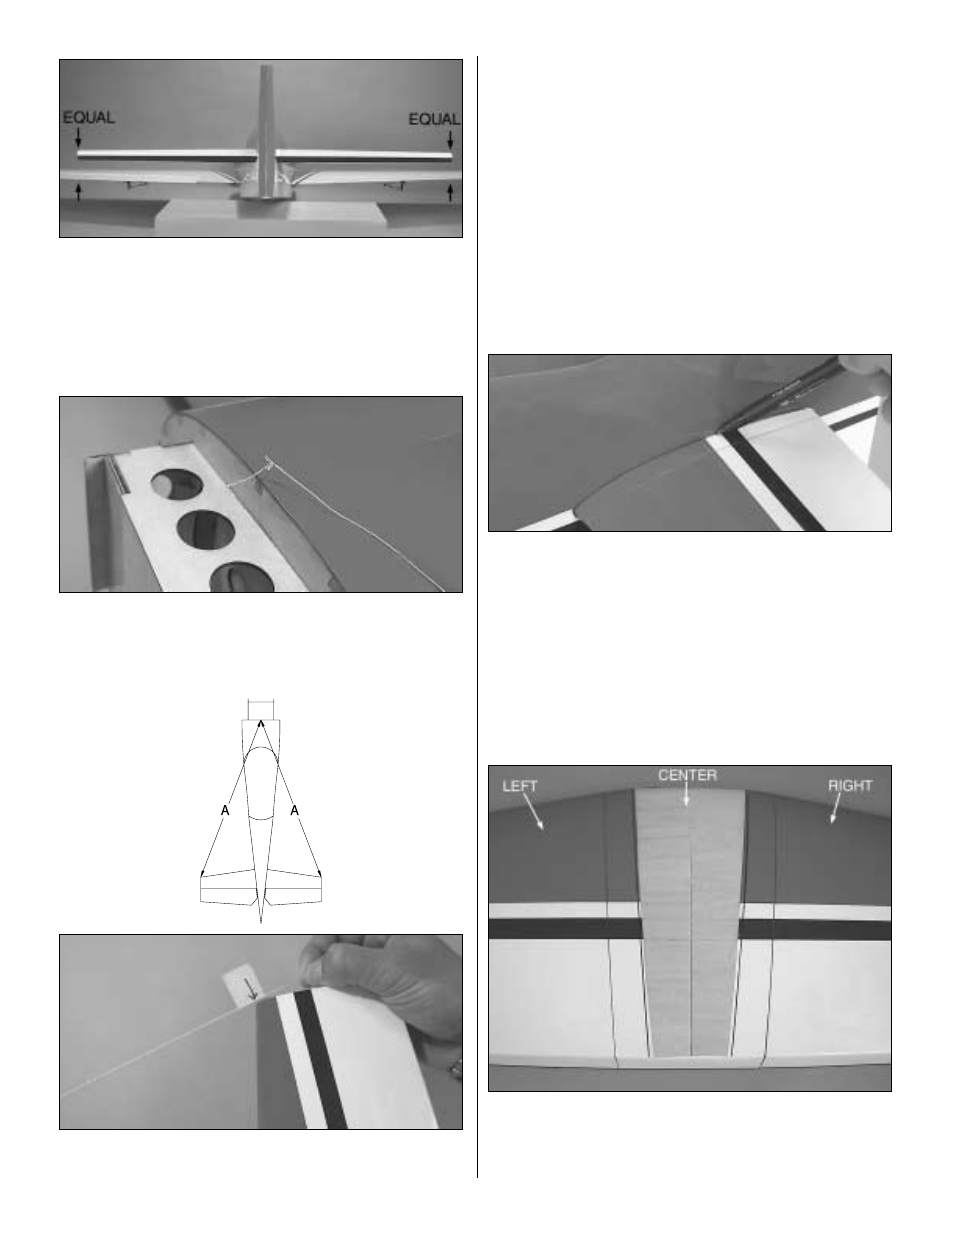
2. Mount the wing. Stand five to ten feet behind the
model and view the stab and the wing. The wing and stab
should line up. If they do not line up, place a small weight on
the “high” side of the stab to bring it into alignment. If much
weight is required, remove the stab and sand the “high” side
of the slot in the fuse where the stab fits until the stab aligns
with the wing.
❏
3. Stick a pin into the center of the fuselage on top of the
firewall. Tie a small loop on one end of a 60" [1520 mm]
piece of non-elastic string such as a K & S #801 Kevlar
thread (K+SR4575). Slip the loop in the string over the T-pin.
❏
4. Fold a piece of masking tape over the end of the string
and draw an arrow on it. Slide the tape along the string and
align the arrow with one corner of the stab as shown in the
photo. Swing the string over to the same position on the
other corner of the stab. Rotate the stab and slide the tape
along the string until the arrow aligns with both sides. Be
certain the stab remains centered from side-to-side during
this process.
❏
5. Use a Top Flite Panel Line Pen to mark the outline of
the fuse onto the top and bottom of the stab.
❏
6. Remove the stab from the fuse. Use a sharp #11
hobby knife or use the following Expert Tip to cut the
covering 1/16" [1.6 mm] inside of the lines you marked. Use
care to cut only into the covering and not into the wood.
20