Great Planes Extra 300S 1.20 ARF Patty Wagstaff - GPMA1305 User Manual
Page 24
❏
5. Cut two 1-1/2" [38mm] lengths of silicone tubing.
Remove the threaded clevis from the rudder pushrod that is
on the same side where the tail wheel pushrod is installed
(you may choose to install the tail wheel pushrod on either
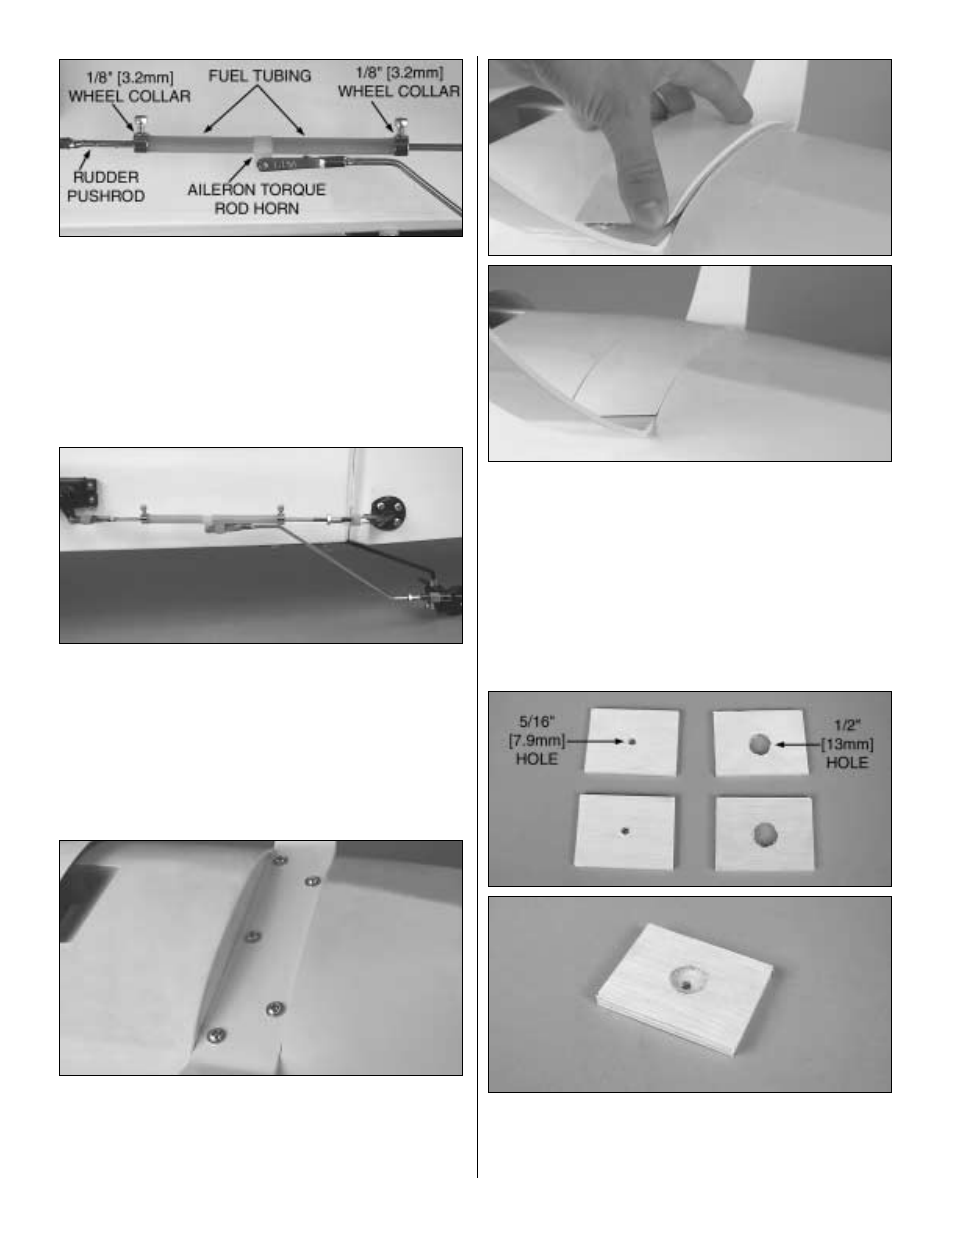
side of the rudder). Slip a 1/8" [3.2mm] wheel collar, a 1-1/2"
[38mm] piece of silicone fuel tubing, an aileron torque rod
horn, another silicone fuel tubing piece and another 1/8"
[3.2mm] wheel collar over the pushrod. Reinstall the
threaded clevis for the rudder and its retainer and install it
back onto the rudder control horn.
❏
6. Connect the tail wheel pushrod to the aileron torque
rod horn. Straighten the rudder and adjust the positioning of
the tail wheel pushrod by sliding the swivel along the length
of the rudder pushrod. When the rudder and the tail wheel
are straight, push the silicone tubing and the wheel collars
against the swivel and use a 4-40 x 1/4" [6.4mm] SHCS to
tighten the wheel collars. Use Great Planes Pro Threadlocker
on the SHCS. Slip a silicone retainer onto both tail wheel
pushrod clevises.
❏
7. Locate the main aluminum landing gear, five 8-32 x
1" [25mm] Phillips head machine screws and five #5 flat
washers. Install the landing gear using the Phillips head
machine screws into the pre-installed blind nuts on the
airplane as shown.
❏
8. Find the landing gear cover and fit it in place. Push the
balsa block down until the heads of the landing gear screws
leave a mark on the block. Remove the block and drill
clearance holes where the screws left a mark until the block
fits flush with the bottom of the fuselage. Glue the block in
place with CA.
❏
9. Locate the four ply wheel pant mounts. Glue one of
the mounts with the 5/16" [7.9mm] hole to one of the mounts
with the 1/2" [13mm] hole as shown. Repeat the procedure
for the other mount.
24