Mount the cowl & landing gear – Great Planes de Havilland Tiger Moth EP ARF - GPMA1134 User Manual
Page 8
8
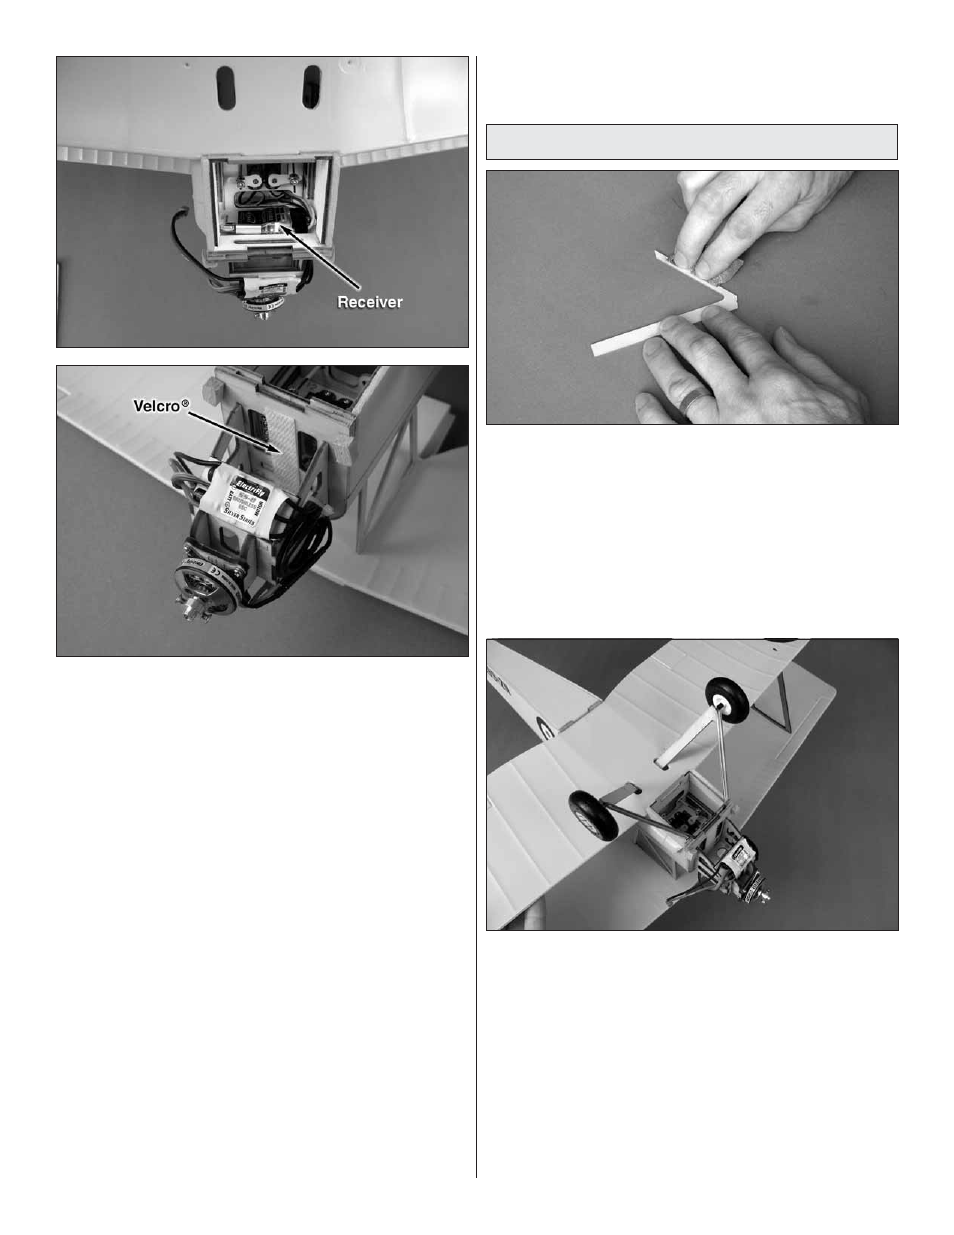
Refer to these photos for mounting
the receiver, ESC and motor.
❏
8. Reconnect the servos and the ESC to the receiver. Use
the included adhesive-back Velcro or double-sided adhesive
foam tape (not included) to mount the receiver wherever
convenient, such as to the sides or top of the “engine box”
or to the back of the former in the servo compartment
where shown. If you do mount the receiver back in the servo
compartment, make sure the pushrods and servo arms don’t
hit the receiver when the servo arms rotate forward.
❏
9. Mount the ESC where shown. Apply a strip of the
rougher, “hook side” of adhesive-backed Velcro where shown
for the battery.
❏
10. Mount the motor to the fi rewall with the three included
2mm x 8mm Phillips wood screws. Connect the motor wires
to the ESC and make sure the motor is turning the correct
direction by plugging in the battery and running the motor.
If the motor is turning the wrong direction, switch any two
motor/ESC wires with each other.
❏
11. With the radio on and the trims centered, center the
rudder and elevator and tighten down the screws in the
screw-lock connectors to lock the pushrods down. Use the
control sticks on your transmitter to move the elevator and
rudder, making sure they respond in the correct direction.
If necessary, use the servo reversing function in your
transmitter to reverse the servos so the elevator, rudder and
throttle respond correctly.
Mount the Cowl & Landing Gear
❏
1. Use medium-grit sandpaper to roughen the inner
surfaces of the forward legs on the plywood landing
gear struts where they will be glued to the main landing
gear wires.
❏
2. Use a small piece of paper towel or a small cloth
dampened with denatured alcohol or other solvent to wipe
any residual oils or contaminants from the landing gear
wires. Use medium-grit sandpaper to scuff the gear wire so
glue will adhere.
Refer to this photo for the next two steps.
❏
3. Insert the main landing gear wire into the fuselage—
the gear should fi t tightly enough to stay in on its own, but if
it doesn’t fi t tightly add a drop of thin, foam-safe CA to the
legs where they go into the mounts.
❏
4. One at a time, position the struts to the gear and in
the wing and glue them to the gear wires with thin CA. Hint:
before positioning the struts, “prime” them with a light mist of
CA accelerator sprayed from a distance of approximately 12"
[300mm]. This will cause the CA to harden faster, preventing
it from running down onto the rest of the model.