Assembly mount the wings – Great Planes de Havilland Tiger Moth EP ARF - GPMA1134 User Manual
Page 4
4
ASSEMBLY
Mount the Wings
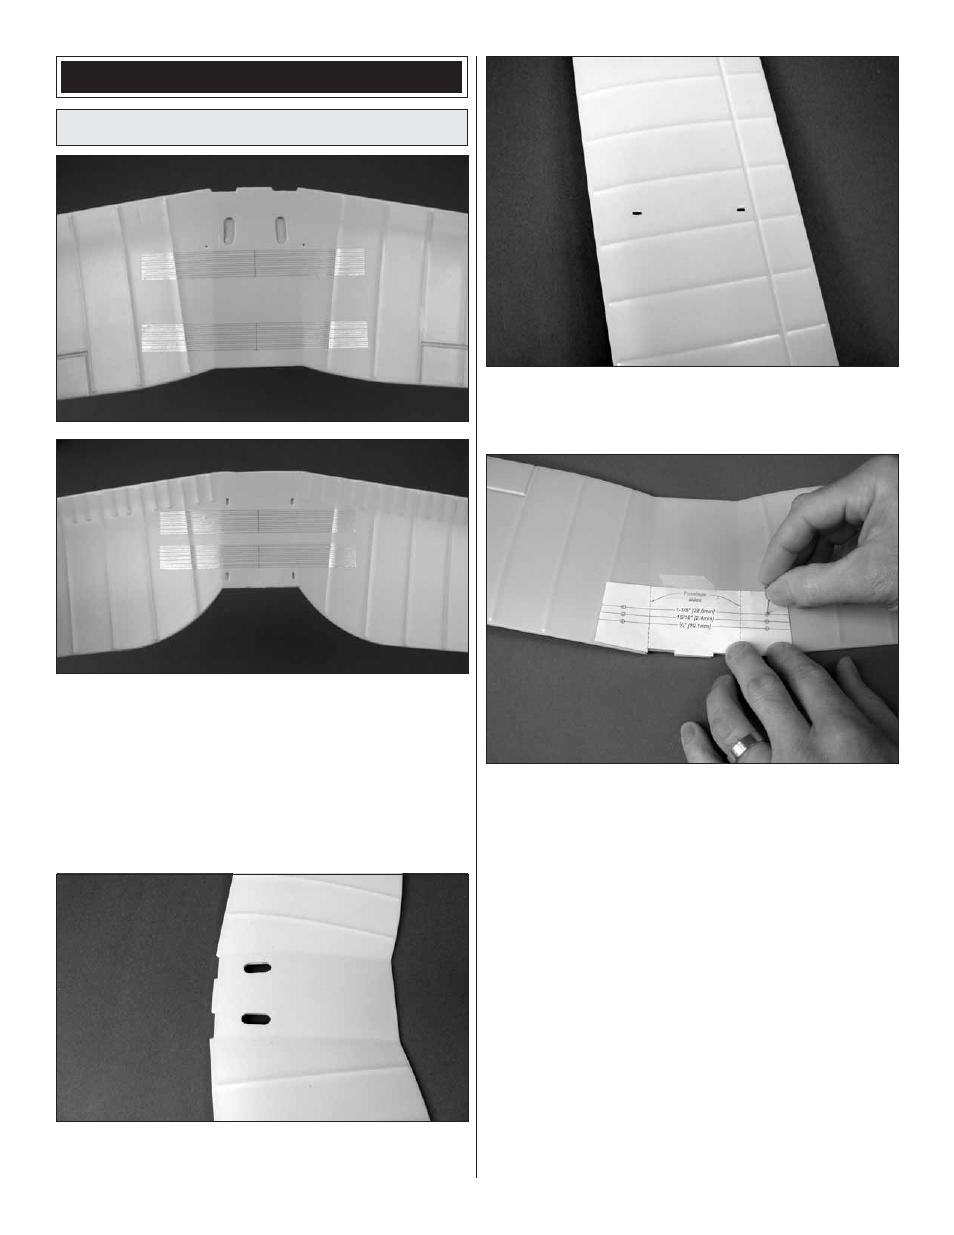
❏
1. If you will be fl ying your Tiger Moth aggressively by
fl ying it outdoors in windy conditions or performing aggressive
aerobatics, or if you will be using servos, batteries or a motor
larger than those recommended, apply two 6" [150mm] strips
of 3/4" [20mm] fi ber-reinforced tape to the bottom of both
wings as shown. (We marked light centerlines on the strips
of tape to make them easier to center.) If you will be fl ying
your Tiger Moth in calm conditions or indoors in a normal,
scale-like manner, no reinforcement is required.
❏
2. Use a sharp hobby knife to cut the skin from the top of
the bottom wing over the holes for the landing gear struts.
❏
3. Also cut the skin from both sides of the bottom wing
over the notches for the outer wing struts. (There is no need
to cut the skin from the slots in the top wing.)
❏
4. Cut the C.G. marking template from the back of the
manual. Tape the template to the top of the bottom wing with
the front edges of the template aligned with the leading edge.
Use a small pin or a sharpened pencil to lightly puncture
small dimples through the cross marks in the template
into the wing skin. When balancing the plane later, it will
be suspended with sharpened pencils or pens “keyed” into
the dimples. Note: Should you ever need to re check the
balance in the future but have misplaced your template, the
recommended balance point is 15/16" [23.8mm] from the
leading edge of the bottom wing at the fuselage sides. The
forward balance point is 3/4" [19.1mm] and the aft balance
point is 1-1/8" [28.6mm].