Great Planes de Havilland Tiger Moth EP ARF - GPMA1134 User Manual
Page 5
5
❏
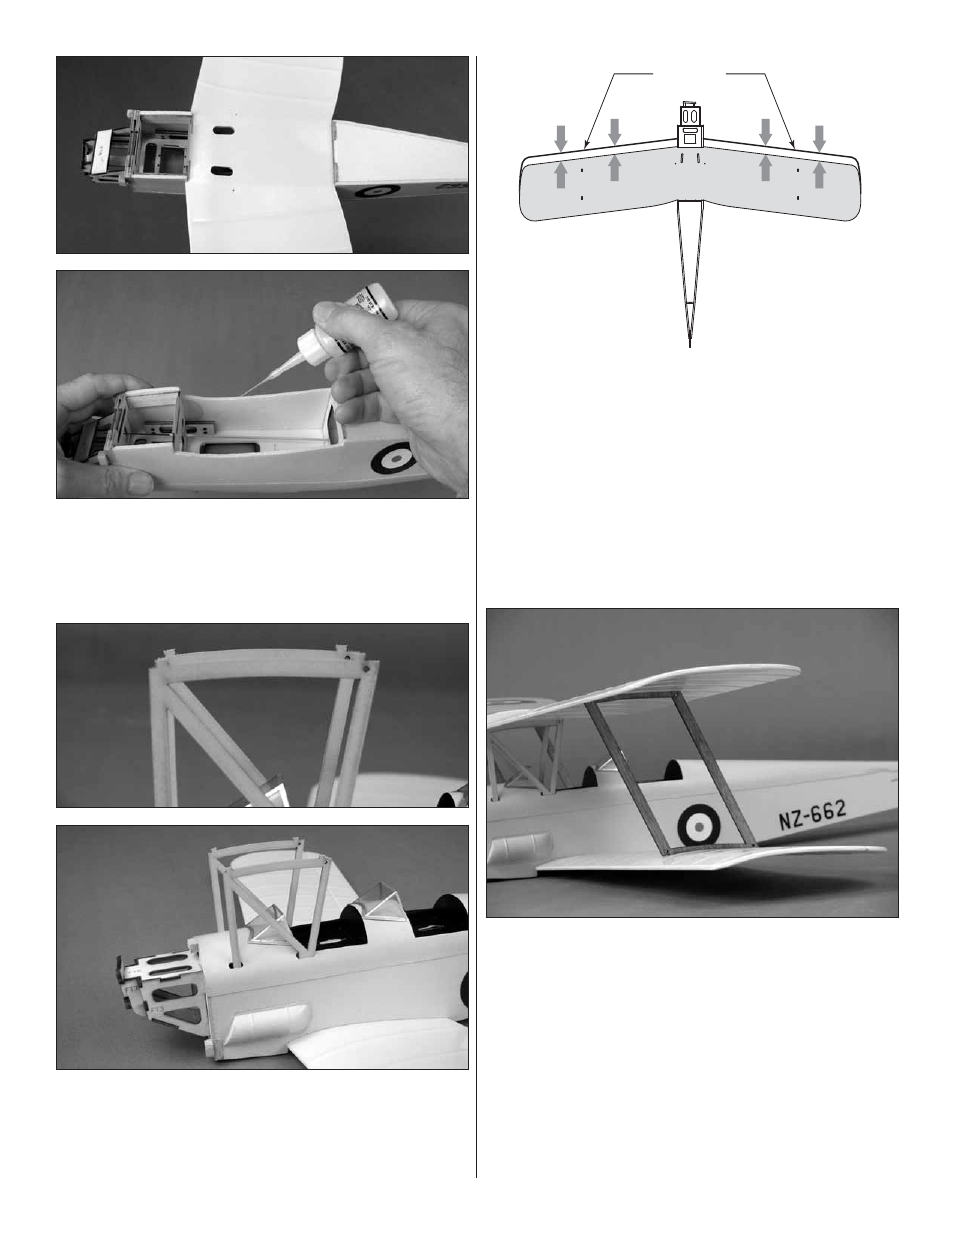
5. Test fi t the bottom wing to the fuselage just to see how
it fi ts. Remove the wing and apply a bead of thick or medium
foam-safe CA to the wing saddle and fi t the wing back into
position. Glue the front and back of the wing to the fuselage
as well.
❏
6. Test fi t the cabanes as shown, making certain they
are all the way down into the “pockets” in the fuselage. View
the top edges of the cabanes to make sure they align with
each other. Make any adjustments necessary. Then, glue the
cabanes into position with foam-safe CA.
Top Wing
❏
7. Test fi t the top wing to the cabanes. View the model
from the bottom, making sure the leading edge of the top
wing is parallel with the leading edge of the bottom wing. If
necessary, there should be enough free play in the notches
to rotate the top wing to get it aligned. If you need to move the
top wing but cannot, the notches may be slightly enlarged.
❏
8. Once you can get the top wing aligned with the bottom
wing, glue it to the cabanes with a small amount of thin,
foam-safe CA—using only a little thin CA will allow it to
harden faster and keep excess from running all over the rest
of the wing or dripping onto your clothes or workbench!
Refer to this photo for the following two steps.
❏
9. Test fi t the outer struts to the top and bottom wings.
Then, glue the struts to the bottom wings only with a small
amount of thin CA.
❏
10. As when gluing the top wing to the cabanes, view
the model from the bottom. Note the alignment between
the leading edge of the top and bottom wing to see if they
are parallel with each other. If necessary, adjust the top
wing on the struts until the leading edges are parallel. Then,
glue the top wing to the struts with a small amount of thin,
foam-safe CA.