Great Planes Cirrus SR22 Turbo ARF - GPMA1166 User Manual
Page 11
11
❏
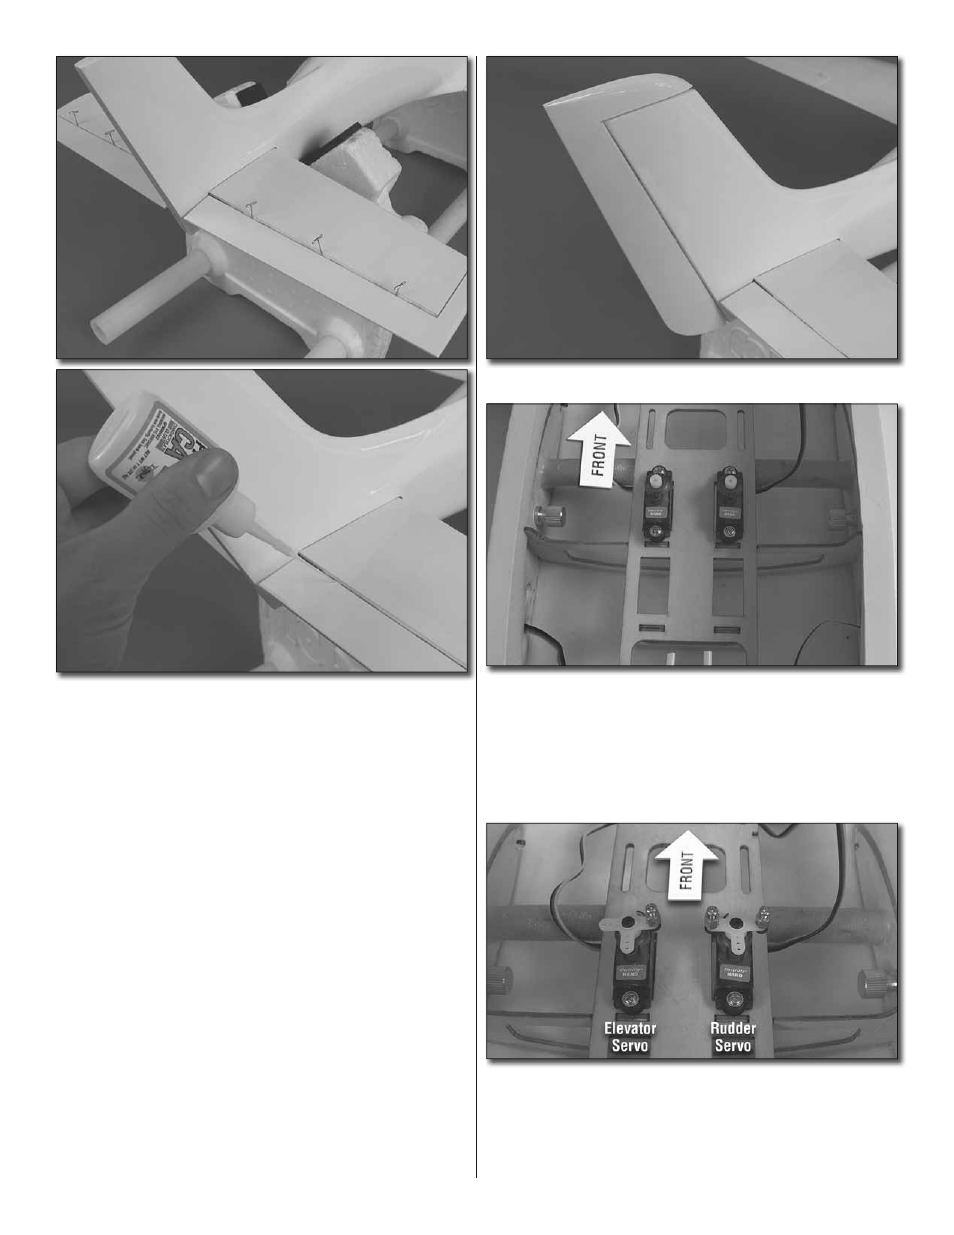
8. Test fi t the elevator halves onto the stab with CA hinges.
If necessary, enlarge the hinge slots with a hobby knife.
When satisfi ed with the fi t, insert a CA hinge halfway into
each hinge slot in the stab. Push a pin through the middle
of each hinge to keep them centered. The elevator joiner
wire ends fi t into the pre-drilled holes and slots at the LE
of the elevators. When satisfi ed, roughen the ends of the
elevator joiner wire with sandpaper and clean them with
denatured alcohol. Mix up a small amount of epoxy and coat
the ends of the joiner wire. Install the elevator halves onto
the stab with CA hinges, being sure that there are even gaps
between the stab tips and elevators on each side. Remove
the pins from the hinges. Apply six drops of thin CA to the
top and bottom of each hinge without using accelerator. After
the CA glue has hardened, confi rm that the elevators are
secure by pulling on them and defl ecting them up and down.
Wipe away any excess epoxy with denatured alcohol. The
CA hinges will hold the elevators in place while the epoxy on
the joiner wire cures.
❏
9. Install the rudder to the fuselage in the same manner.
❏
10. Use your radio system to center the elevator and rudder
servo. Install the servos into the fuselage as shown using the
hardware included with the servos. NOTE: Additional servo
bays are included aft of the ones shown in the photo. If you
plan to use a larger battery such as an 11.1V 3350mAh LiPo,
install your servos in the aft position to provide additional space
on the battery tray.
❏
11. Install two screw-lock connectors in the outer holes
of the rudder servo arm and one in the outer hole of the
elevator servo arm. Loosely thread a 2x4mm machine screw
into each connector. Install the servo arms onto the servos
using the servo arm screw, being sure that the arms are
perpendicular with the servo case.