Great Planes Ultra Sport 60 Kit - GPMA0420 Pages 28-48 User Manual
Page 2
clearance as necessary. Glue the lop front block to the fuse
and the spinner ring.
15. Cut off the aft end of the top front block at the
location and angle shown on the plan (measure forward from
F-3A).
18. Remove the prop nut and propeller. Pop the spinner
backplate loose with a screwdriver and remove the spacers.
You may remove the engine and mount in preparation for the
next step. Mark the outline of the engine mount on F-1 with
a pencil. HINT: After removing the engine, enlarge the hole
in the spinner ring as necessary until you can easily access the
engine mount screws with a long screwdriver.
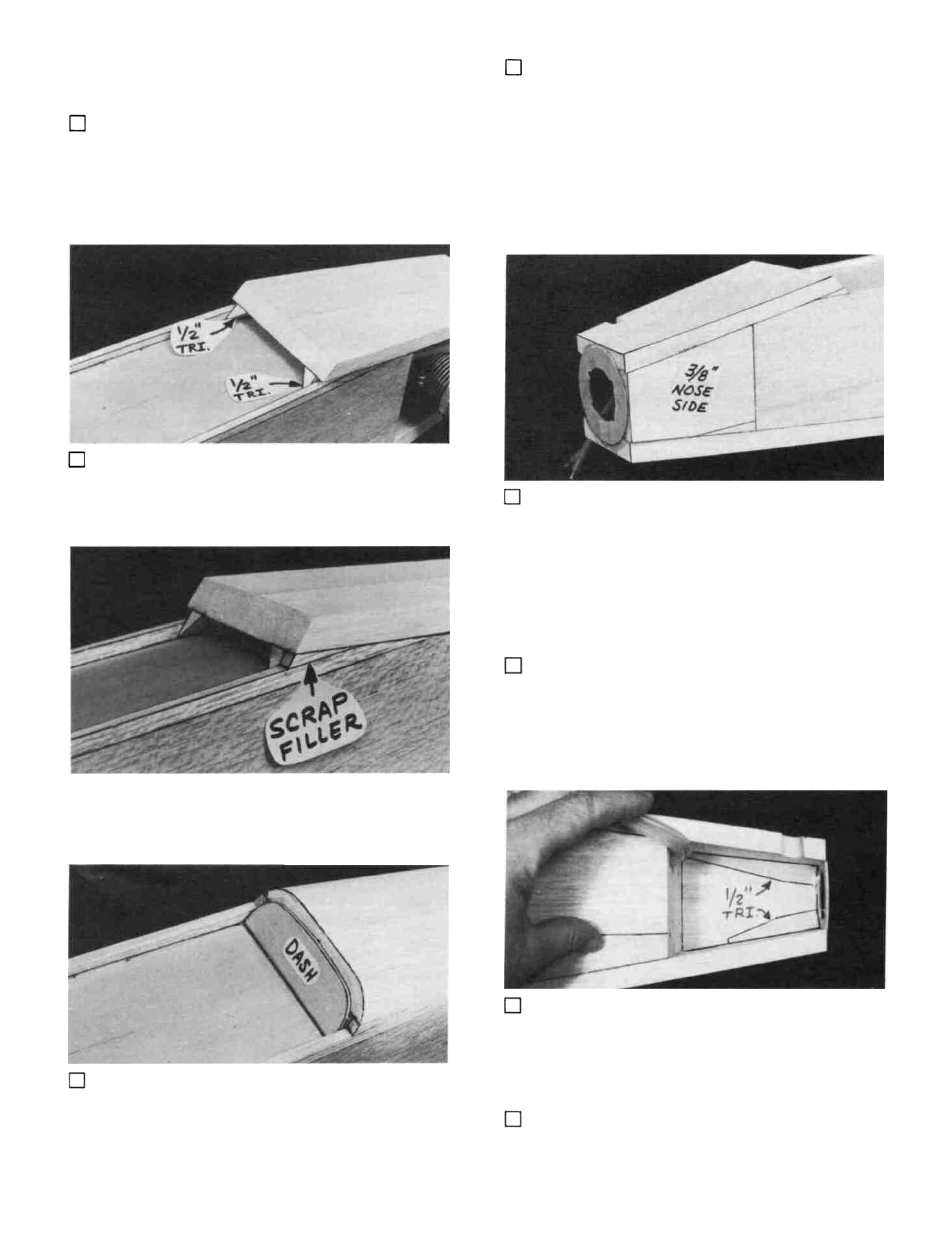
16. Cut two 1" lengths from the 1/2" x 11-1/2" balsa
triangle and shape them to fit under the top front block, just
in front of the dash. Also cut two scraps of 1/4" balsa to fill
the gap between the top front block and the cockpit sides (see
the DASH detail drawing on the fuse plan). Glue in place.
19. A 3/8" x 3" x 9-7/8" balsa sheet is provided for the
nose sides. From this sheet, cut pieces to fit on the left side
of the fuselage between the chin block, top front block, F-1
and the spinner ring. To do this more easily you may remove
the engine and mount, then lay the fuse on its left side on top
of the 3/8" balsa sheet and mark the outline of the opening on
the sheet. (When installing this block, make sure you stay
clear of the engine mount).
20. If necessary, carve out an area of the nose side
needed for nosegear steering arm and pushrod clearance, then
glue the left nose side in place.
17. Sand the sides of the die-cut 3/32" balsa dash to fit
21. From the 1/2" balsa triangle stock provided, cut
lengths to fit in the upper left and lower left comers of the
nose, between F-1 and the spinner ring. Sand these balsa
triangles to a taper, with the wide part at the front, and glue
in place.
between the cockpit sides, and sand the bottom edge to an
angle so it rests flat on the cockpit floor. Glue the dash in
place.
22. Temporarily re-install the engine and mount; then,
from the remaining 3/8" balsa sheet and 1/2" balsa triangle,
cut pieces to partially fill in the right side around the engine.
29