Great Planes Ultimate Biplane 40 Kit - GPMA0240 User Manual
Page 20
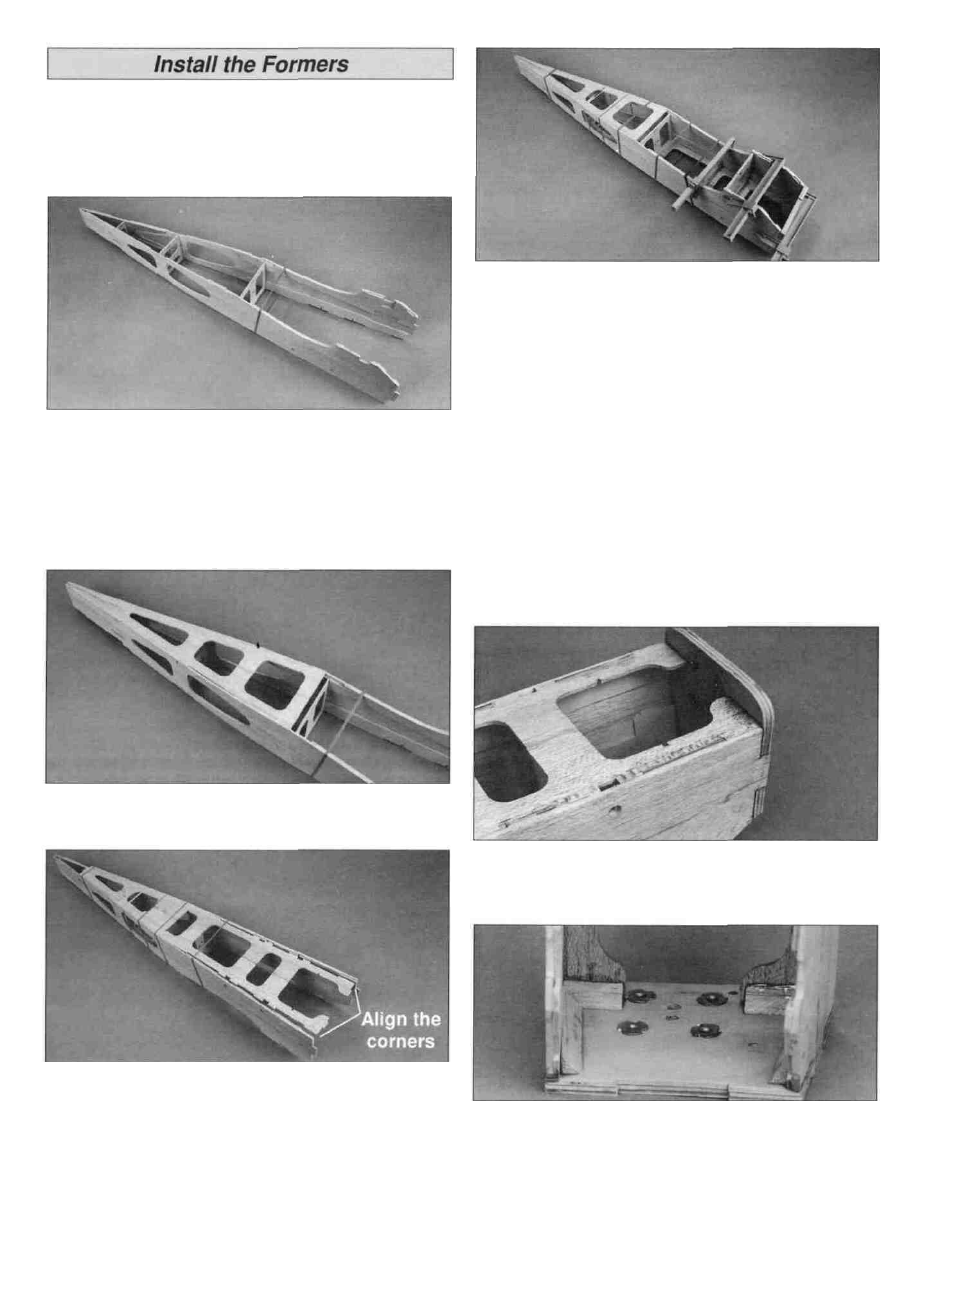
Important: Install all formers with the embossed lettering
facing the nose of the fuse. Do not glue the fuse together
until instructed to.
D 1. Insert die-cut 1/8" plywood formers F-10, F-11 and
F-12 into their appropriate slots in the fuse sides. Make
sure the modified right fuse side is on the right side. Use
rubber bands placed around the fuselage sides to hold the
formers in place.
D 2. Install the aft fuse bottom.
D 4. Install the die-cut 1/8" plywood formers F-9, F-8A/B
and the firewall as you pull the fuse sides together. You
may need to use clamps, placed along the bottom of the
fuse, along with rubber bands to hold the sides together.
D 5. Align the fuse over the bottom view of the fuse plan
with the firewall hanging over the edge of the building board.
With the formers perpendicular to your building board, use
thin CA to glue formers F-12 thru F-8A/B to the fuse sides,
top deck and aft fuse bottom. The fuse sides should be
perpendicular to the building board from the tail to former
F-10. At F-10 the bottom of the fuse starts to taper in. The
bottom of former F-8A/B is glued flush with the front of the
wing saddle. Do not glue the firewall at this time.
D 6. After gluing the joints with thin CA, go back and
reinforce all joints with medium CA. After the CA cures,
remove the rubber bands and clamps.
D 3. Install the fuse top deck.
Note: The front of the top deck is angled to build right
thrust in the firewall. Use rubber bands to temporarily hold
the tail section together.
D 7. With the fuse still positioned over the fuse plan bottom
view, use 30-minute epoxy to glue the firewall to the
fuse sides.
D 8. Use 6-minute epoxy to glue 3/8" balsa triangle sticks
to the joints between the fuse sides, the top deck and
the firewall.
20