Great Planes Ultimate Biplane 40 Kit - GPMA0240 User Manual
Page 16
D 3. Position the wing on your building board with the
bottom side up. Place weights on the wing to keep the main
spars in contact with the building board. Glue the bottom
LE sheeting in position following the same procedure used
for the top LE sheeting. Remember, you previously cut the
LE sheeting when you sheeted the top of the wing.
D 4. Glue the 1/16" TE sheet, cut in step 1 of "sheet the
top of the wing", to the TE and the bottom of the ribs. Use a
leftover piece of balsa sheeting to fill the gap at the center
of the LE.
D 5. Use the 1/16" x 3" x 30" and 1/16" x 3" x 24" balsa
sheeting, leftover from the top center sheeting, to make
the bottom center sheeting between the LE sheet and the
TE sheet.
D 6. Test fit the struts in the slots in the top of the wing,
making sure they seat against the top wing sheeting. From
1/16" x 3/16" x 30" balsa stick, cut and glue cap strips to
the top of ribs R-1. The edge of the cap strip on the R-1 tip
rib should be flush with the side of the rib. Use two cap
strips, edge-glued at the center of rib R-2A on the double
rib, for the strut.
D 7. Trim and sand the LE and TE sheeting flush with the
side of tip rib R-1.
D 8. Make the wing tips from a 1/8" x 3" x 18" balsa sheet.
Hold the sheet against tip rib R-1 and draw an outline of the
rib. Cut and glue the wing tips to tip ribs R-1.
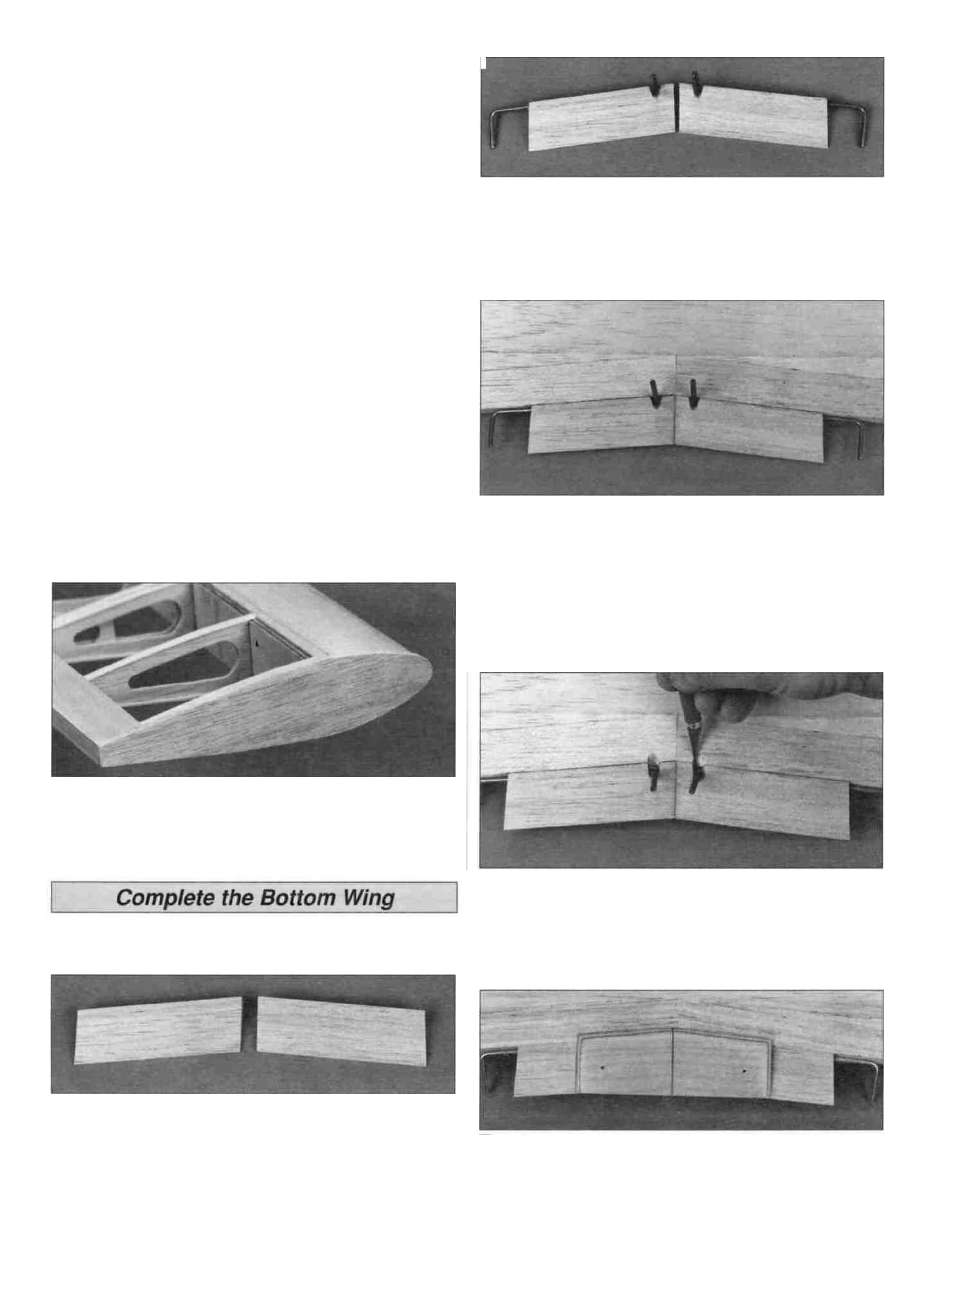
D 3. Mark the location of the aileron torque rod exits. Cut a
notch in the top LE of both pieces as shown.
Note; Be sure you make a right and left piece.
D 4. Roughen both torque rod tubes with coarse
sandpaper and apply a dab of petroleum jelly to the
exposed wire. Use 30-minute epoxy to glue the torque rod
tubes in the slot at the front of the center TE pieces. Before
the epoxy cures, glue the center TE pieces to the TE of the
wing. Wipe off any excess epoxy with a paper towel
dampened with isopropyi rubbing alcohol. Hold the center
TE pieces in place with masking tape until the epoxy cures.
D 1. Sand the TE sheet flush with the aft edge of the TE.
D 5. Extend the torque rod exit slots into the TE of
the wing.
D 6. Sand the center TE flush with the top and bottom
TE sheeting.
D 2. Position the tapered and grooved 1-1/4" x 4-1/2"
balsa wing center TE pieces over the plan. Trim the root
ends to match the angle shown on the plan. Test fit the
center TE on the TE of the wing.
D 7. Draw a centerline on the die-cut 1/16" birch plywood
wing bolt plate. Sand a bevel on the front and sides of
16